
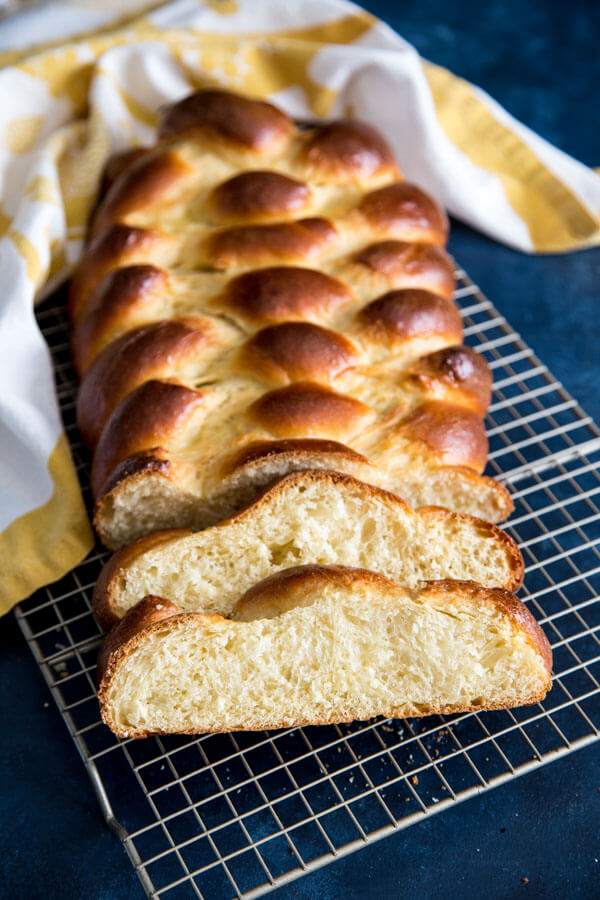
This six-strand braided Challah is soft, slightly sweet (thanks to a touch of honey), and completely dairy-free. It’s the kind of bread that fits right into your week—perfect for dunking into a hot bowl of soup, upgrading your sandwich game, or turning into the best Sunday morning French toast with whatever’s left. Basically, it’s the bread that keeps on giving!
✨ Trang’s Recipe Highlights
- TASTE: rich and just a tad sweet from the honey.
- TEXTURE: soft and tender.
- EASE: the most complicated bit about this challah recipe is probably the braiding, but other than that it is a fairly simple and straight forward yeast bread recipe.
- TOP IT YOUR WAY: I brushed this challah with an egg wash for that classic golden shine, but you can make it your own with different toppings. Sesame and poppy seeds are traditional, everything seasoning adds a fun savory twist, and za’atar gives it a bold Middle Eastern flair.
What is challah bread?
Challah is a beautifully braided traditional Jewish bread, typically eaten on Shabbat and holidays. Similar to brioche, it is an egg-rich, slightly sweet bread with soft, fluffy texture. The main differences between challah and brioche are that challah is typically dairy-free, and the techniques used to make challah is less labor-intensive in my opinion.
Key ingredients
As always, you’ll find the complete list of ingredients and quantities in the recipe card at the end of this post. Below are some notes and substitution tips:
- Yeast: both active dry yeast and instant yeast will work for this recipe. You can use the same amount of either.
- Flour: I typically use regular unbleached all-purpose flour for all my yeasted bread recipe to keep things simple. But you can use bread flour.
- Oil: You can use any flavorless oil like vegetable oil or canola oil in this recipe. But if you want to add a distinct flavor to your challah, you can use olive oil or whatever oil you prefer.
- Egg: I used whole eggs in this recipe. I’ve seen recipes that use just egg yolks, which will make the bread richer.
How to make challah
This challah bread is actually quite simple to make. I provided step-by-step photos within the recipe card at the end of this post to help you visualize the whole process. I think the trickiest part is probably braiding the bread, but let me break it down for you.
Start by gathering all 6 strands at one end.

You will work with just the first strand and the fourth strand at all time. Take the first strand and swing it across the other strand but loop it under the fourth strand. Keep doing that until you get to the ends.

When you get to the very end and you can’t braid it anymore, just tuck the end in under the loaf to make it look pretty.

Now, you need to let it rise and then it’s on to baking and enjoying your hard work!
Serving suggestions
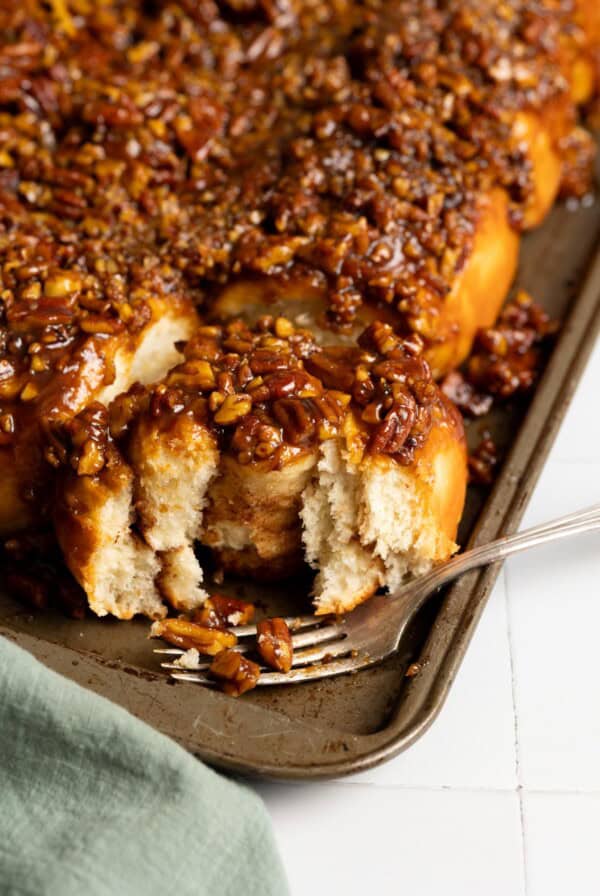
Serve challah warm slathered in honey apple butter with your meal, make turkey salad sandwich for lunch, or use leftover to make this yummy coconut French toast casserole.
Hungry for more?
Challah Bread Recipe

Equipment
Ingredients
Bread Dough
- ¼ cup warm water, 90°F to 110°F max
- 1 teaspoon granulated sugar
- 2 teaspoon active dry yeast, or instant yeast
- ⅓ cup vegetable oil, 74 g
- ⅓ cup honey, 112 g
- 3 large egg
- 1 teaspoon kosher salt
- 3 cup all-purpose flour, 405 g
- Extra flour as needed
Egg wash
- 1 large egg
- 1 tablespoon water
Instructions
- Mix warm water with the granulated sugar in a small bowl, sprinkle the yeast over the water and let it bloom for 10 – 15 minutes. If you have a thermometer, ensure the water temperature does not exceed 110°F or the yeast will die. Otherwise, lukewarm water from the tap should work just fine.¼ cup warm water, 2 teaspoon active dry yeast, 1 teaspoon granulated sugar

- In the stand mixer bowl, whisk together the vegetable oil, honey and egg until well combined. Add the bloomed yeast, flour and salt, and knead with the dough hook on medium-low speed for a few minutes until a soft dough forms. You can need to knead up to 10-15 minutes. The dough tends to become easier to handle the longer you knead.⅓ cup vegetable oil, ⅓ cup honey, 3 large egg, 1 teaspoon kosher salt, 3 cup all-purpose flour

- Scrape the dough out onto a lightly floured counter top and shape into a ball. Oil a large bowl and place the dough into the bowl. Cover with plastic wrap or a kitchen towel and allow to rise in a warm spot until double in size. This may take 1 – 2 hours or longer depending on the ambient temperature. To speed up the process, you can place the dough into your oven with the oven light on. This will keep it nice and warm, but make sure you don't accidentally turn the oven on.
- Turn the dough out onto a lightly floured counter top and divide into 6 equal portions. Roll each portion into a thin strand about 20” in length.

- Place your dough strands on top of a large piece of parchment paper. Gather one end together. Swing the first strand on the right over to the left, across the other strands, and loop it under the fourth strand only. Keep doing this until you get to the ends. When you can't braid the dough anymore, tuck the ends in under the loaf.
- Slide the loaf onto a baking sheet and trim the parchment paper if necessary. Allow it to rise in a warm spot until double in size and very puffy, this may take 1 – 2 hours or longer depending on the ambient temperature. Again, you can place this inside your oven with the light turned on to keep it warm.
- Remove the dough from the oven if you were letting it rise in there, and preheat the oven to 350°F.
- Prepare egg wash by beating one egg with 1 tablespoon of water. Brush the top of the risen dough with egg wash very lightly, getting it in all the nooks and crannies. Bake for 30 minutes until the top is golden brown and the internal temperature registers 190°F.1 large egg, 1 tablespoon water
- Remove from the oven and let cool on a wire rack.


Notes
- Make a proofing box: I especially like using the oven with the light turned on as a proofing box to let the dough rise in the winter when the ambient temperature is cold. You can also place a 9″x13″ baking dish on the bottom oven rack and fill it with boiling water to let the steam warm the oven and keep it humid for the second rise. This will be helpful to keep the dough from drying out since you can’t cover it during the second rise.
- Storage: you can keep your challah at room temperature for a few days, wrapped in a kitchen towel or in a large ziploc bag. Or you can also freeze it for up to 3 months. Thaw at room temp, and toast it up before serving.
Nutrition
Nutrition information is automatically calculated, so should only be used as an approximation.
 Like this recipe? Rate & comment below!
This post may contain affiliate links. For more details on how we utilize affiliates, ads, and sponsored content, see our full disclosure policy. Thank you for your continued support, which enables us to keep bringing you delicious recipes, at no extra cost to you.


Thank you, I did make your challah bread. It came out awesome.
While the recipe was overall easy to follow, please, please, please, give your flour measurements in weight as well. I thought the loaf looked suspiciously big for “3 cups” of flour, closer to 6 maybe. Sure enough, by weight, at 120g per cup, it took about 5 1/2 to 6 cups of flour in total to get this recipe to the correct hydration. 3 cups by weight made a paste.
Typically 1 cup for me is about 130g – 140g, not 120g. So 390g – 420g, plus extra for rolling, I would say another 30g for that. I am doing my best to go through old recipes and update with gram measurement but I am only one person and there are hundreds of recipes to be updated, so it will take me some times to go through them. Please also understand this is not my fulltime job, I do this at nights and weekends to provide completely free recipes to the public.
But no I did not use 5 – 6 cups like you did and yes my bread dough is stickier and wetter, and this is indicated by all the process photos I have shown in the post. I try to make everything as transparent as possible by showing you what my dough looks like. I don’t just write the recipe one way and make it a different way. But bread baking can be very personal and highly based on feel of the dough, and this is how I always make my bread to keep the crumbs softer. After you let it rise, the dough is always easy to handle and not so sticky. If you are an avid bread baker you will most likely have a different way of making it and please feel free to adapt.
Looks lovely and your braiding is perfect. I’ve always been too scared to try braided breads like this, thanks for the gif.
Delicious