
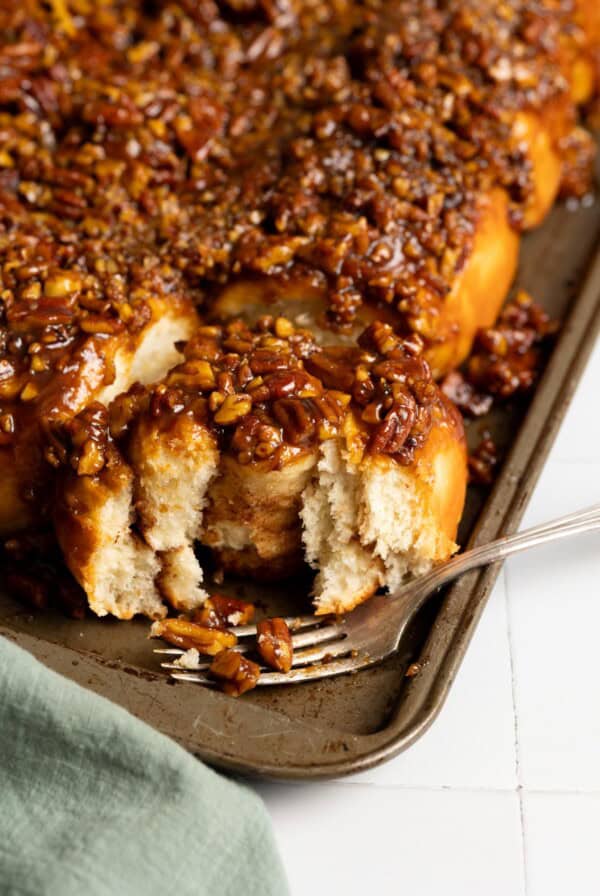
This Asian Milk Bread is super soft, slightly sweet, perfectly milky and extremely easy to make. It is perfect for breakfast toasts or lunch sandwiches. The dough is also incredibly versatile, you can use it to make both sweet and savory recipes, like these cinnamon rolls or pigs in a blanket.

Table of Contents
What is milk bread?
Milk bread is the quintessential Asian white bread which was developed in Japan and thus, it is also known as Japanese milk bread or shokupan, or Hokkaido milk bread. However, it is very popular throughout Asia, apparent by its availability in Japanese bakeries, as well as Korean and Chinese bakeries.
Many Japanese milk bread recipes use tangzhong, a cooked flour paste, traditionally used in Chinese bread making to achieve extremely soft and springy buns.
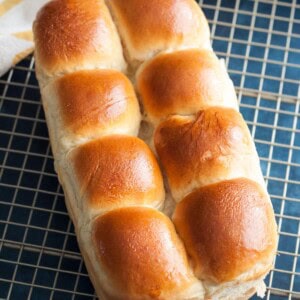
Milk bread can come in round top loaves, baked in open loaf pans, or square loaves baked in covered Pullman loaf pans. They’re usually much wider than your typical American loaf of sandwich bread. The slices tend to be thicker as well.
What does milk bread taste like?
Milk bread is incredibly soft, slightly sweet, buttery and milky. This is the result of using milk as the main liquid ingredient in the bread dough. They are perfect as breakfast toast or for sandwiches, both savory and sweet.
Why you’ll love it
- This easy milk bread recipe makes just one loaf, so if you’re baking for one, you won’t be wasting perfectly good bread.
- This recipe is not enriched with egg. So it is easier if you want to decrease or increase the quantity of the ingredients by an uneven amount to make a smaller batch or a larger batch to your specific needs.
- Many swear by the tangzhong method to make super soft bread but in this recipe I’ve skipped the tangzhong all together to make it the easiest milk bread recipe you will ever need without sacrificing the quality of this loaf.
- It tastes incredible.
- It stays soft and moist for days.
This bread is seriously so good that once you have a taste, it would be difficult to go back to regular plain white bread again. I know homemade bread can be somewhat intimidating and time consuming to make, that’s why I’ve made this recipe as simple as possible!
Ingredients and substitutions
This fluffy Japanese milk bread recipe is made without eggs in the bread dough and I even skipped the tangzhong to make it even easier. Below are some notes and substitution tips. See recipe card for full details and quantities.

- Heavy whipping cream – Since I’ve developed this recipe without egg and butter, I’ve used heavy whipping cream in the bread batter to bump up the fat content of the bread. This will also add to the milky taste. Instead of using cream and milk separately, you can substitute with half and half.
- Milk – Use whole milk or 2% milk here. Again, Instead of using cream and milk separately, you can substitute with half and half. I just tend to have milk for my other baking needs and cream for whipped cream.
- Granulated sugar – This will give the yeast food and make the bread a little sweeter. You can reduce the amount of sugar if you prefer your milk bread to be less sweet. Any type of sugar can be substituted here, except for liquid sweetener like honey or maple syrup because it will change the ratio of wet and dry ingredients in this recipe.
- Yeast – You can use either active dry yeast or rapid rise instant yeast. I’ve used both with success. Even with instant yeast, I still like to bloom it in warm liquid first to ensure the yeast is working.
- Flour – Typically, you want to make bread using bread flour for the higher protein content, which will make your bread chewier. However, for this milk bread recipe, to keep things simpler, I’ve used all-purpose flour here.
- Salt – I use kosher salt, if you’re using table salt, only use about ⅔ teaspoon.
- Egg – I didn’t use any egg in the bread but I did use one egg to make egg wash to brush on top of the bread before baking to get a golden brown top crust. If you omit the egg wash to save an egg, your bread won’t have the gorgeous golden brown crust. You could use heavy cream or milk wash instead, though it may not result in a deep golden color.
Tools you’ll need
- A stand mixer with the dough hook to make the dough. It is possible to make the dough by hand but you do need to knead the dough for 10-20 minutes, so a stand mixer will make this process much easier.
- A loaf pan for baking.
- A kitchen scale is always useful for exact measurement.
- A thermometer is also useful to check the liquid temperature to ensure you don’t kill the yeast.
How to make milk bread
The following instructions, step-by-step photos, and tips are here to help you visualize how to make the recipe. You can always skip straight to the printable recipe card at the end of this post.
First, bloom the yeast
Heat cream, milk and sugar in a small saucepan over medium heat, stirring to ensure the sugar dissolves and the mixture is heated evenly. Once it comes to a simmer, turn off the heat and let the mixture cool down to below 110°F. Note: if the liquid is too hot, it could kill the yeast!

Sprinkle active dry yeast over the liquid surface and let it bloom for 10-15 minutes, the mixture should puff up. If using instant yeast, the mixture will puff up much quicker.
Prepare the dough
Add the flour and salt to a stand mixer bowl and stir to distribute. Add the bloomed yeast mixture to the flour mixture and knead with the dough hook attachment on speed 2 for about 10 minutes until the dough comes together.

Tip: if the dough is still too sticky here, you could keep kneading. At about 20 minutes, the dough should actually pull away from the bowl. I tend to under-knead this bread because I actually want less gluten formation to result in a softer bread.
First rise
Scrape the dough out of the mixing bowl and shape into a ball. Place the dough ball into an oiled bowl, cover, and let rise in a warm place for 1-2 hours until at least double in size.

Tip: using oil on your hands and the counter instead of flour while shaping the dough will help with sticking and also prevent you from adding too much flour which can dry out the bread.
Second rise
Dump the risen dough ball out onto a lightly floured countertop, divide into 8 equal portions and shape into smaller balls. Note: the advantage of this loaf is that you can slice them into slices for sandwiches or pull them apart as dinner rolls. I’ve also seen milk bread divided into 3 larger portions.
Prepare a loaf pan lined with a piece of parchment paper, allowing the excess to hang over the sides. Arrange the dough balls in the loaf pan and let it rise in a warm place for another 1-2 hours until at least double in size and very puffy.
Bake the bread
Before you bake, lightly brush a little egg wash or milk wash all over the top of the risen dough loaf, be careful not to deflate it. Bake at 350°F until the top is golden brown, this will take about 24-25 minutes.

As soon as the bread comes out of the oven, immediately brush the top of the bread with a simple syrup, made by dissolving some sugar in boiling water, for extra shine and sweetness. This step is optional but I love the look and taste that the simple syrup gives this milk bread.
Troubleshooting tips
My bread doesn’t rise!
- Always check that your yeast is working properly before continuing with the recipe to ensure success. If the yeast mixture doesn’t puff up when bloomed, it is best to start over. Otherwise, your dough will not rise.
- Make sure you’re blooming the yeast in temperature 110°F or cooler. If the liquid is hotter than this, you will kill the yeast.
- Rising time can vary, depending on the environment: temperature, humidity, barometric pressure. The dough will rise faster in warmer weather compared to colder weather, in higher altitude compared to lower altitude, etc.
My bread doesn’t rise evenly!
- For this milk bread loaf, I divided the dough into 8 equal portions before putting them together in the loaf pan. If you have trouble getting the same size portion, you can simply shape the dough into 1 large loaf and allow it to rise as directed.
- Use a scale to divide the dough to ensure each portion is the exact same weight, this will help the bread rise and bake evenly.

Making the dough in advance
To prepare this milk bread in advance, you can make the dough the night before and here are some tips:
- Allow the dough to complete the first rise at room temperature. Shape the dough and prepare it for the second rise in the loaf pan.
- At this point, allow it to rise for 20-30 minutes, only half way through. Then refrigerate overnight.
- In the morning, take the dough out to let it come to room temperature and finish the second rise before baking.
- To speed up the last step, you can make a proofing oven by placing the bread in your oven middle rack and adding boiling water to a tray placed underneath. The steam will create a warm environment for your bread to rise.
When making this bread ahead, you have to be mindful not to let the dough over-rise, especially during the second rise, because over-risen dough will actually deflate and you’ll end up with very dense hard bread.
Most of the time, I don’t bother making this bread ahead because you can pretty much finish baking it within 3-4 hours. And a lot of this time is inactive time waiting for the bread to rise.
Storage
- Room temperature: you can store milk bread at room temperature for 1-2 days. Only slice off whatever you’re planning to eat to keep the moisture within the loaf. Store the bread in a ziploc bag.
- Refrigerator: you can keep your milk bread in the fridge for up to a week. Again, only slice what you need and keep it in a ziploc bag.
- Freezer: for the freezer, you’ll actually want to freeze the whole loaf pre-slices. This way you can defrost only what you need. Your bread should last up to 3 months.

FAQs
This easy milk bread does not use tangzhong, and is not enriched with eggs and butter in order to simplify the recipe. However, I use heavy whipping cream, along with milk, for its higher fat content that would be missing from the butter and egg yolk.
Tangzhong is a Chinese bread making technique that involves cooking some of the flour in liquid to create a flour paste prior to making the bread dough. This technique is supposed to help the flour retain more liquid resulting in super soft buns with longer shelf life.
I’ve tested the recipe with tangzhong but actually didn’t like the process and the final result didn’t seem to be superior to milk bread made without tangzhong. This is why I don’t use tangzhong in this recipe and don’t think it is necessary.
The main liquid ingredient in milk bread is milk, or in this case, milk and cream, or half and half. Whereas the main liquid ingredients in brioche are eggs and butter. Brioche is much richer than milk bread and requires a longer kneading time to incorporate all the butter into the dough.
This recipe makes just 1 loaf of bread or 8 dinner rolls. The way I shape the loaf makes it easier for you to serve it as a whole loaf or pull each portion off to serve as dinner rolls. Simply double the recipe if you wish to make 2 loaves or 1.5x the recipe to make 12 dinner rolls. Some readers have reported increasing the recipe successfully.
I do not own a bread machine so I don’t have personal experience with making this milk bread recipe in a bread machine. However, a couple readers have reported back that they were able to make it successfully in a bread machine. Follow step 1 and 2 in the recipe instructions and then add everything to the machine, select sandwich bread program.
Yes, you can, the bread just won’t turn out sweet. At a minimum, you just need a teaspoon of sugar to activate the yeast in step 1 and 2. Once you add flour, the yeast will continue to feed off the sugar in the flour.
Based on Splenda’s website, you can use Splenda baking blend for yeast bread.
Yes, you can, the recipe will still work but the dough texture will be a little bit different since cream has higher fat content and the end results will be richer. I haven’t tried it myself but a reader has tried it successfully and reported back that the bread was too rich.
Evaporated milk has lower fat content than heavy cream so the bread will not be as rich with a strong milky flavor if you decide to go with this substitution. You may also need to use a tad more flour as well.
You can use a plant based milk here but I think some other modifications may need to happen as well since plant based milk is very low in fat and is mostly water. You may want to add oil or vegan butter to make up for the fat content that will be missing from cream. Cream is 30% fat, so I would recommend adding about ¼ cup of oil or melted vegan butter along with ¾ cup of plant based milk of your choice to replace the cream and cow milk in this recipe.

Recipes made with milk bread dough
- Soft Pretzels and Pretzel Bites
- Macadamia Coconut Rolls
- Pani Popo (Samoan Coconut Buns)
- AnPan (Japanese Red Bean Buns)
- Oreo Cinnamon Rolls
Hungry for more?
Milk Bread
Equipment
Ingredients
Bread dough
- ½ cup heavy whipping cream, 118 g
- ½ cup milk, whole milk or 2%, 118 g
- ¼ cup granulated sugar, 50 g
- 1 teaspoon active dry yeast
- ¾ tsp kosher salt
- 2 cup all-purpose flour, 265 g
- Extra flour for rolling
Egg wash
- 1 whole egg
- 1 tablespoon milk
Simple syrup (optional)
- 1 teaspoon granulated sugar
- 1 teaspoon hot water
Instructions
- Add cream, milk and sugar to a small saucepan and bring the mixture to a simmer over medium heat, stirring occasionally. Turn off the heat and let the mixture cool down to below 110°F.
- Sprinkle active dry yeast over the liquid surface and let it bloom for 10-15 minutes, the mixture should puff up. If using instant yeast, the mixture will puff up much quicker.
- Add the flour and salt to a stand mixer bowl and stir to distribute. Add the yeast mixture to the flour mixture and knead with the dough hook on speed 2 for about 10 minutes until the dough comes together.
- Scrape the dough out of the mixing bowl onto a floured or oiled countertop. Use floured or oiled hands to shape the dough into a ball.
- Place the dough ball into an oiled bowl, cover, and let rise in a warm place for 1-2 hours until at least double in size.
- Dump the risen dough out onto a lightly flour countertop, divide into 8 equal portions and shape into balls. Use a scale in this step to ensure each portion is the exact same weight, this will help the bread rise and bake evenly.
- Grease a loaf pan and line the bottom with a piece of parchment paper, allowing the excess to hang over the sides. Then grease the parchment paper as well.
- Arrange the dough balls in the loaf pan and let it rise in a warm place for another 1-2 hours until at least double in size and very puffy.
- Preheat the oven to 350°F.
- Beat one egg with a tablespoon of milk to make egg wash. If you don’t want to use egg wash, you could use a little bit of milk or cream as the wash instead.
- Lightly brush egg or milk wash all over the top of the dough. Be careful not to deflate the dough.
- Bake at 350°F for 24-25 minutes until the top is golden brown.
- Optional simple syrup: Dissolve 1 teaspoon of sugar in 1 teaspoon of boiling water to make a quick simple syrup. Immediately brush the top of the bread with simple syrup as soon as it comes out of the oven for extra shine and sweetness.
Notes
- Instead of using cream and milk separately, you can substitute both with 1 cup of half and half (coffee cream).
- Always check that your yeast is working properly before continuing with the recipe to ensure success. If the yeast doesn’t puff up when bloomed in warm liquid, it is best to start over. Otherwise, your dough will not rise.
- Rising time can vary, depending on the environment: temperature, humidity, barometric pressure. The dough will rise faster in warmer weather compared to colder weather, in higher altitude compared to lower altitude, etc.
- Using oil to shape the dough will help with sticking and prevent you from adding too much extra flour to the dough.
Nutrition
Nutrition information is automatically calculated, so should only be used as an approximation.
 Like this recipe? Rate & comment below!
This post may contain affiliate links. For more details on how we utilize affiliates, ads, and sponsored content, see our full disclosure policy. Thank you for your continued support, which enables us to keep bringing you delicious recipes, at no extra cost to you.


Can I put the dough in a loaf pan without forming them into rolls? If so, would it change the bake time at all since it would be one big loaf instead of smaller rolls? I am looking for a milk bread recipe to use for sandwich bread without egg. Thank you!
Hi Kristi, yes you don’t need for form into smaller rolls. You can shape it into 1 large roll that fit your loaf pan. It should not change the bake time. If you have a thermometer, I would check the internal temperature to make sure it’s around 190F when done baking.
Great, thank you!!!
Of course! Anytime!
This looks like a fun project to work on with my grandson. Is it possible to use only whole milk (no cream)? Thank you!
Hi Vlad, I have not made this recipe with just whole milk so I can’t speak to the results but my expectation is that the bread will likely be drier and less rich since whole milk has significantly less fat than cream. That said, you can use only whole milk but the taste won’t be the same, and you may need to use additional flour to get the same dough texture.
Got it, that makes sense. I’ll stick with the heavy cream! Thanks for your quick reply! Excited to try it!
My pleasure! Let me know how it turns out. I do hope you enjoy making it with your grandson. Happy holidays!
Made this today and it’s delicious. Just wondering if I want to cut back the sugar, what’s the minimum for this recipe to work?
Hi Vanessa, you can use just a teaspoon in the milk mixture when activating the yeast, once the flour is mixed in, the yeast will feast off the sugar in the flour.
Thank you so much! This will be our go to bread now!
That’s great to hear Vanessa! Let me know if you ever have any baking issues and I’ll try to help as best as I can 🙂