
These Fish Dog Treats are made with canned sardines, pumpkin puree, old fashioned rolled oats and a little bit of peanut butter. They are packed with nutrients and are also delicious for your furry friends.

If you have a picky eater like our little chihuahua, homemade treats are always your best bet. Plus making homemade dog biscuits allow you to control the ingredients going into these treats for allergy or any dietary needs.
Just a warning, these sardine dog treats are quite fishy! But the dogs just love them and I think you will love making them too.
Table of Contents
Why you’ll love this recipe
- This simple fish dog treat recipe is made with just 5 ingredients..
- With a food processor, it is pretty much a one bowl recipe.
- You can make a big batch and save them in the refrigerator or freezer for later.
Tools you’ll need
You’ll need a food processor to grind rolled oats into flour as well as to make the dough. You’ll also need a rolling pin to roll out the dough and a cookie cutter to cut the treats into shapes.
Ingredients and substitutions
As always, you’ll find the complete list of ingredients and quantities in the recipe card at the end of this post. Below are some notes and substitution tips:

- Pumpkin puree – I’ve used both homemade kabocha pumpkin puree and canned pumpkin puree in this recipe. You could also use mashed sweet potato.
- Peanut butter – any kind of creamy peanut butter or even homemade peanut butter will work.
- Sardines – I used canned sardines in olive oil. You can substitute canned tuna, canned salmon, any type of canned fish you have on hand.
- Oats – I used old fashioned rolled oats, ground into a flour using my food processor. You could also use pre-processed oat flour, or another type of gluten free flour.
- Egg – I used one egg to bind everything together.
How to make fish dog treats
The following instructions, step-by-step photos, and tips are here to help you visualize how to make the recipe. You can always skip straight to the printable recipe card at the end of this post.
First, you’ll need to ground the old fashioned rolled oats into flour. Place rolled oats in a food processor fitted with the metal blade and process into flour. Transfer oat flour into a large bowl.

Tip: If you don’t have a food processor, you could use a high speed blender.
Using the same food processor without washing, drain the sardines and add them to the empty food processor bowl, along with pumpkin puree, peanut butter, and egg, process until well-mixed.

Now, add 3 cups of oat flour to the wet ingredients mixture, one cup at a time and process each time until the flour is incorporated. Scrape the dough out onto an oat-floured countertop, shape into a ball.
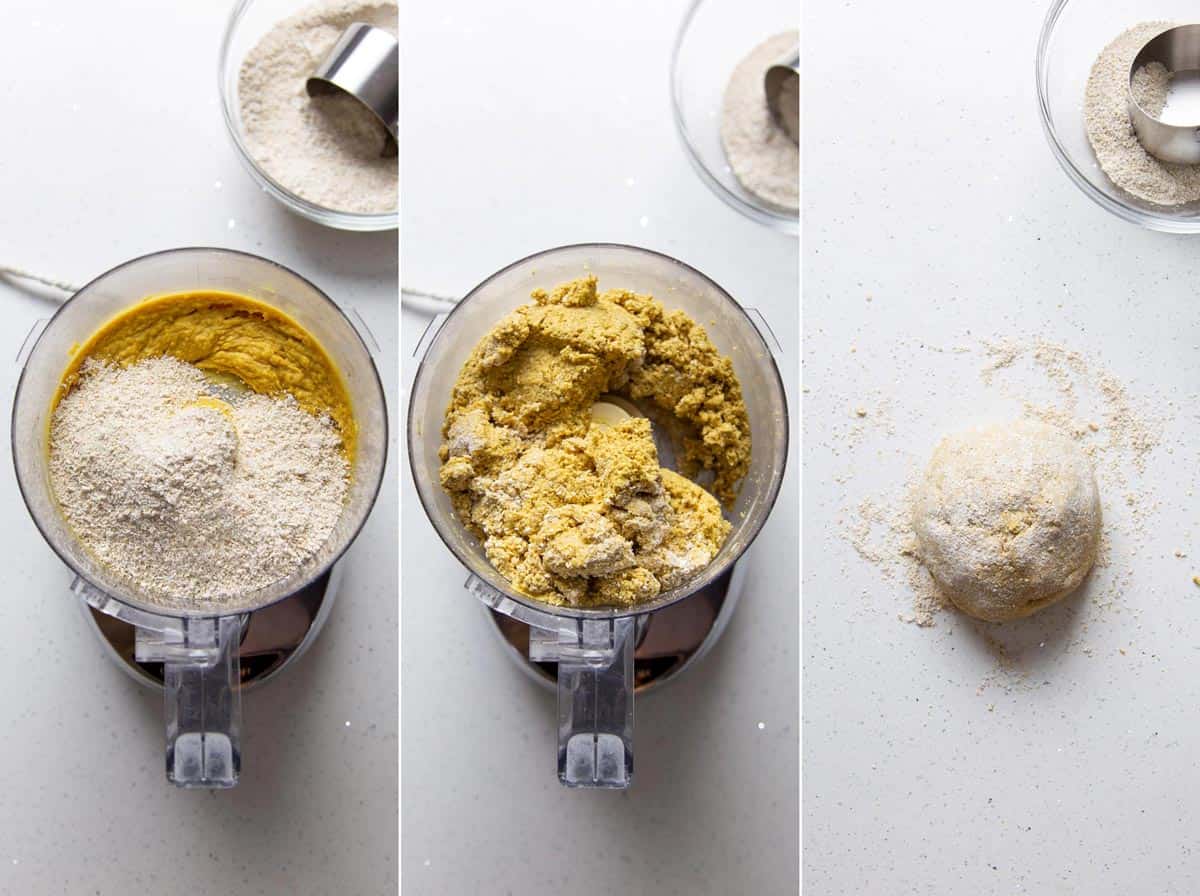
Tip: If the dough is still wet after adding 3 cups of oat flour, sprinkle a little bit more of the reserved oat flour and process until the dough resembles pie dough.
Divide the dough into 2 dough balls just to make it easier to roll out. Roll the dough out to about ¼” thick. Cut with a cookie cutter if desired, or simply cut into squares with a knife.
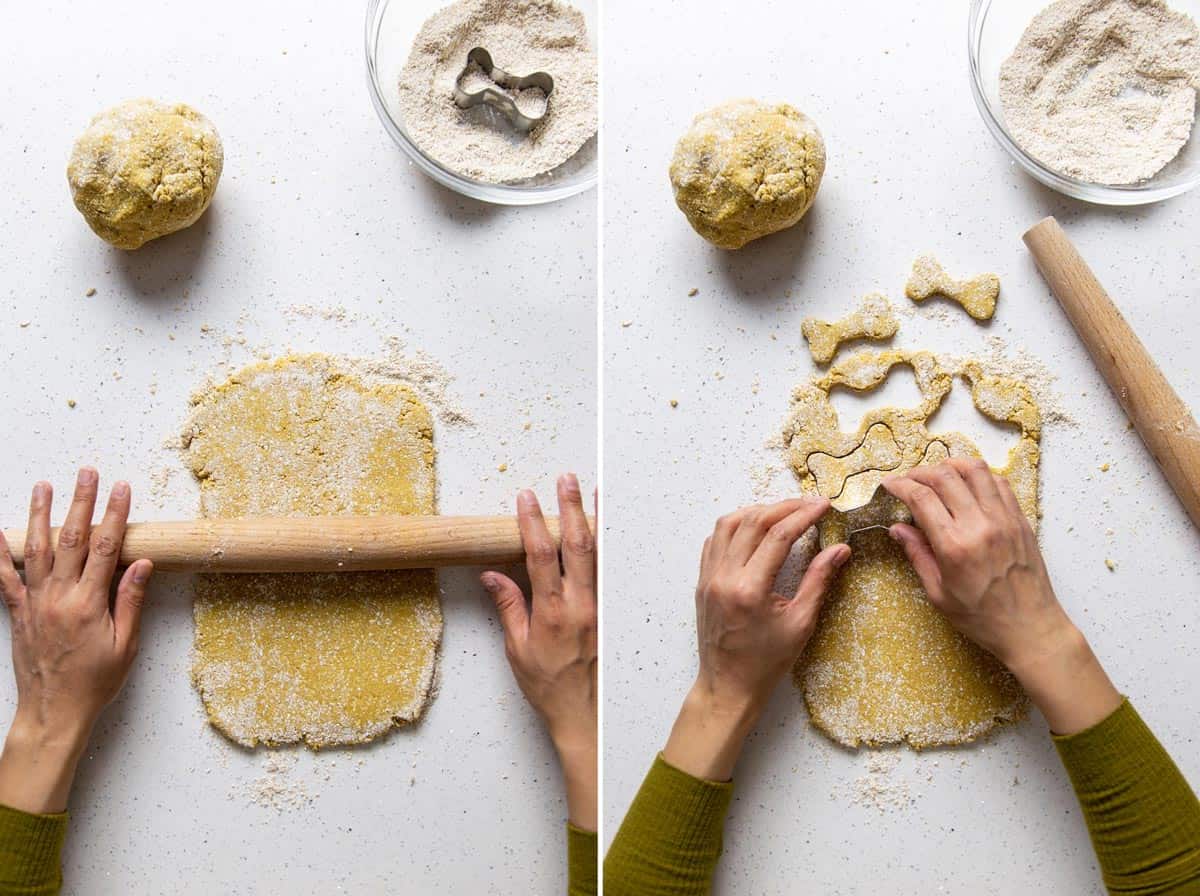
Tip: Use the remaining oat flour for rolling as needed to keep the dough from sticking to the counter and your rolling pin.
Place the treats on a baking sheet about ½” apart, and bake for 35 minutes. Flipping the treats over and rotating the baking pan about halfway through so they brown evenly.
More baker’s tips
- The amount of treats you’ll get from this recipe depends on the size of your cookie cutter. I use a 2” bone shape cutter and a 1.5” heart shape cutter, this yields about 70 treats.
- For larger treats, bake them longer at lower oven temperature so they can properly dry out without burning.
- You can bake 2 pans at the same time. Place one of your oven racks on the lower third and the other one on the upper third of the oven, just switch the pan halfway through baking while you flip the treats and rotate the pans.

Storage
Store these fish dog treats in a clean jar or an airtight container. Only store about 5 days to a week worth of treats at room temperature at a time. Keep the rest in the refrigerator for up to 2 months and in the freezer for up to 8 months.
More oatmeal dog treats
- Apple Peanut Butter Oatmeal Dog Treats
- Pineapple Dog Treats
- Peanut Butter Banana Oatmeal Dog Treats
- Strawberry Dog Treats
Hungry for more?

Fish Dog Treats
Equipment
Ingredients
- 1 cup pumpkin puree (244 g)
- 2 tablespoon creamy peanut butter (30 g)
- 1 large egg
- 1 can of sardines (drained, 98 g)
- 3 ½ cup rolled oats (divided, 350 g)
Instructions
- Preheat the oven to 350°F.
- Place rolled oats in a food processor fitted with the metal blade and grind into a flour. Transfer oat flour into a large bowl.
- Drain the sardines and add them to the empty food processor, add pumpkin, peanut butter, and egg, process until well-mixed.
- Add 3 cups of oat flour to the wet ingredients mixture, one cup at a time and process each time until the flour is incorporated.
- If the dough is still wet, sprinkle a little bit more of the reserved oat flour and process until the dough resembles pie dough.
- Scrape the dough out onto an oat-floured countertop, shape into a ball and roll it out to about ¼” thick. Use the rest of the oat flour for rolling as needed to keep the dough from sticking to the counter and your rolling pin.
- Cut with a cookie cutter if desired, or simply cut into squares with a knife. Place the treats on a baking sheet about ½” apart, and bake for 35 minutes. Flipping the treats over and rotating the baking pan about halfway through so they brown evenly.
Notes
- Use homemade pumpkin puree, canned pumpkin puree, or even mashed sweet potato.
- You can substitute canned sardines with canned salmon, canned tuna, etc.
- The amount of treats you’ll get from this recipe depends on the size of your cookie cutter. I use a 2” bone shaped cutter and a 1.5” heart cutter, this yields about 70 treats.
- For larger treats, bake them longer at lower oven temperature so they can properly dry out without burning.
- You can bake 2 pans at the same time. Place one of your oven racks on the lower third and the other one on the upper third of the oven, just switch the pan halfway through baking while you flip the treats and rotate the pans.
Nutrition
This post may contain affiliate links. For more details on how we utilize affiliates, ads, and sponsored content, see our full disclosure policy. Thank you for your continued support, which enables us to keep bringing you delicious recipes, at no extra cost to you.


The good news is that regular peanut butter is safe to give your dog as a treat. Just make sure to avoid peanut butter with Xylitol, a sugar substitute found in lower or sugar-free products. Xylitol is the only ingredient in peanut butter that’s bad for dogs.
perhaps something you should mention when using peanut butter for dogs in your pet recipes.
Thank you for your input, Gail. That’s such a good point.
Some peanut butters contain xylitol which is toxic for dogs. Best to stick to 100% peanut natural peanut butter and avoid added sugars, salt, or other potentially harmful additives, Xylitol, a common sugar substitute, is highly toxic to dogs and can cause severe health problems, including hypoglycemia and liver damage, even in small amount. The biscuits were a hit.
Thank you, Bonnie, for the information. That is really good to know!
Thank you. I’m going to bake these for my dogs.
I hope they love it 🙂 Thank you!
Do these require refrigeration? My dogs all absolutely love them! Thank you!
I usually keep mine at room temperature for up to a week but if you make a lot and think they might last longer than a week, I would refrigerate. Usually, when I make a large batch, I just refrigerate half and keep half in the cupboard.