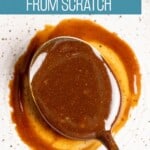
Dulce de leche is pure magic to me. It is sweet, creamy, and full of rich, caramelized flavor. I’ve been making this recipe from scratch since 2014, and it is by far my favorite and preferred method to make dulce de leche. Even though it takes hours on the stove, I think the final product is completely worth the wait and the effort.

This post is one of the OG posts on Wild Wild Whisk since its inception in 2014. I’ve since made this recipe over and over again. If it is your first time making it, it might seem a bit intimidating, you might be afraid to burn it on the stove. But it’s actually the easiest thing to make, it just takes a darn long time. You need a little bit of patience, grab a bar stool and plant yourself next to the stove, listen to an audio book or podcast, and stir stir stir.
Now, you can also make dulce de leche from a can of sweetened condensed milk. There are many different ways to do it: boiling the can for several hours on the stove top, in the pressure cooker, or in a slow cooker, or you can bake the sweetened condensed milk in a baking pan in a water bath in the oven. All these methods are more easy going, and you don’t have to watch it constantly.
I have tried baking the sweetened condensed milk in the oven in a water bath. But now you can get canned dulce de leche, so I felt that these methods are really no longer relevant. I will still include it in the recipe card below if you are interested in it.
But if you’re up for it, making dulce de leche from scratch will yield a sauce with smooth texture, less sweet than the shortcut method using sweetened condensed milk, and the flavor is much more complex with the addition of vanilla bean. Try it on a piece of artisan sourdough toast with salted butter or use it in place of miso caramel in these salted caramel brownies!
Key ingredients
You’ll only need 5 ingredients to make dulce de leche from scratch. As always, for the full list of ingredients with quantities and detailed instructions, skip straight to the recipe card.
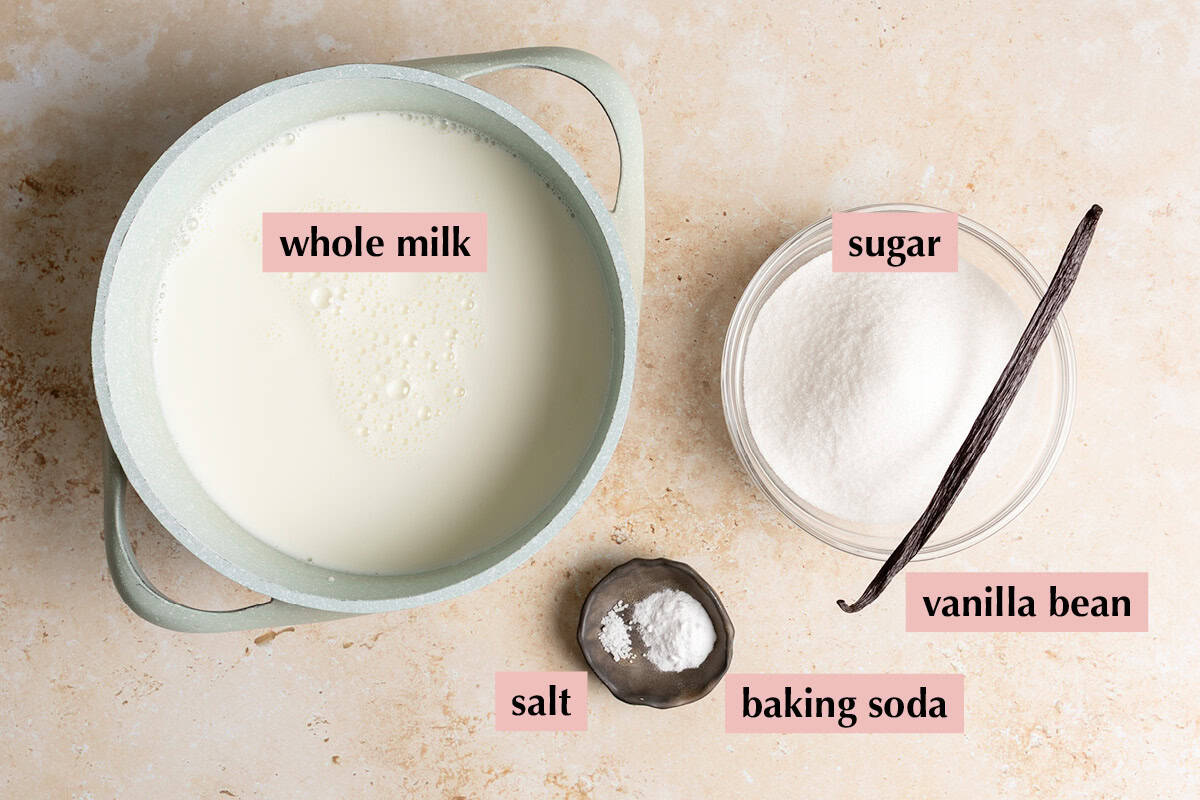
- Vanilla bean can be very expensive so you don’t have to use it. You can use a tablespoon of vanilla bean paste if you have it or just use a tablespoon of vanilla extract. If using extract, stir it in at the end after you’ve taken it off the stove so it doesn’t evaporate away as you’re cooking the dulce de leche.
- Baking soda might sound like a weird ingredient here, but it is not optional. It is used to prevent the milk protein from coagulating or sticking together so you don’t get a lumpy mixture.
- A little bit of salt goes a long way to add complexity and depth to your dulce de leche as well.
Let’s make it
- First, heat milk, sugar and the vanilla beans along with the pod over medium heat until simmering, stirring occasionally. I start cooking at around 9am.
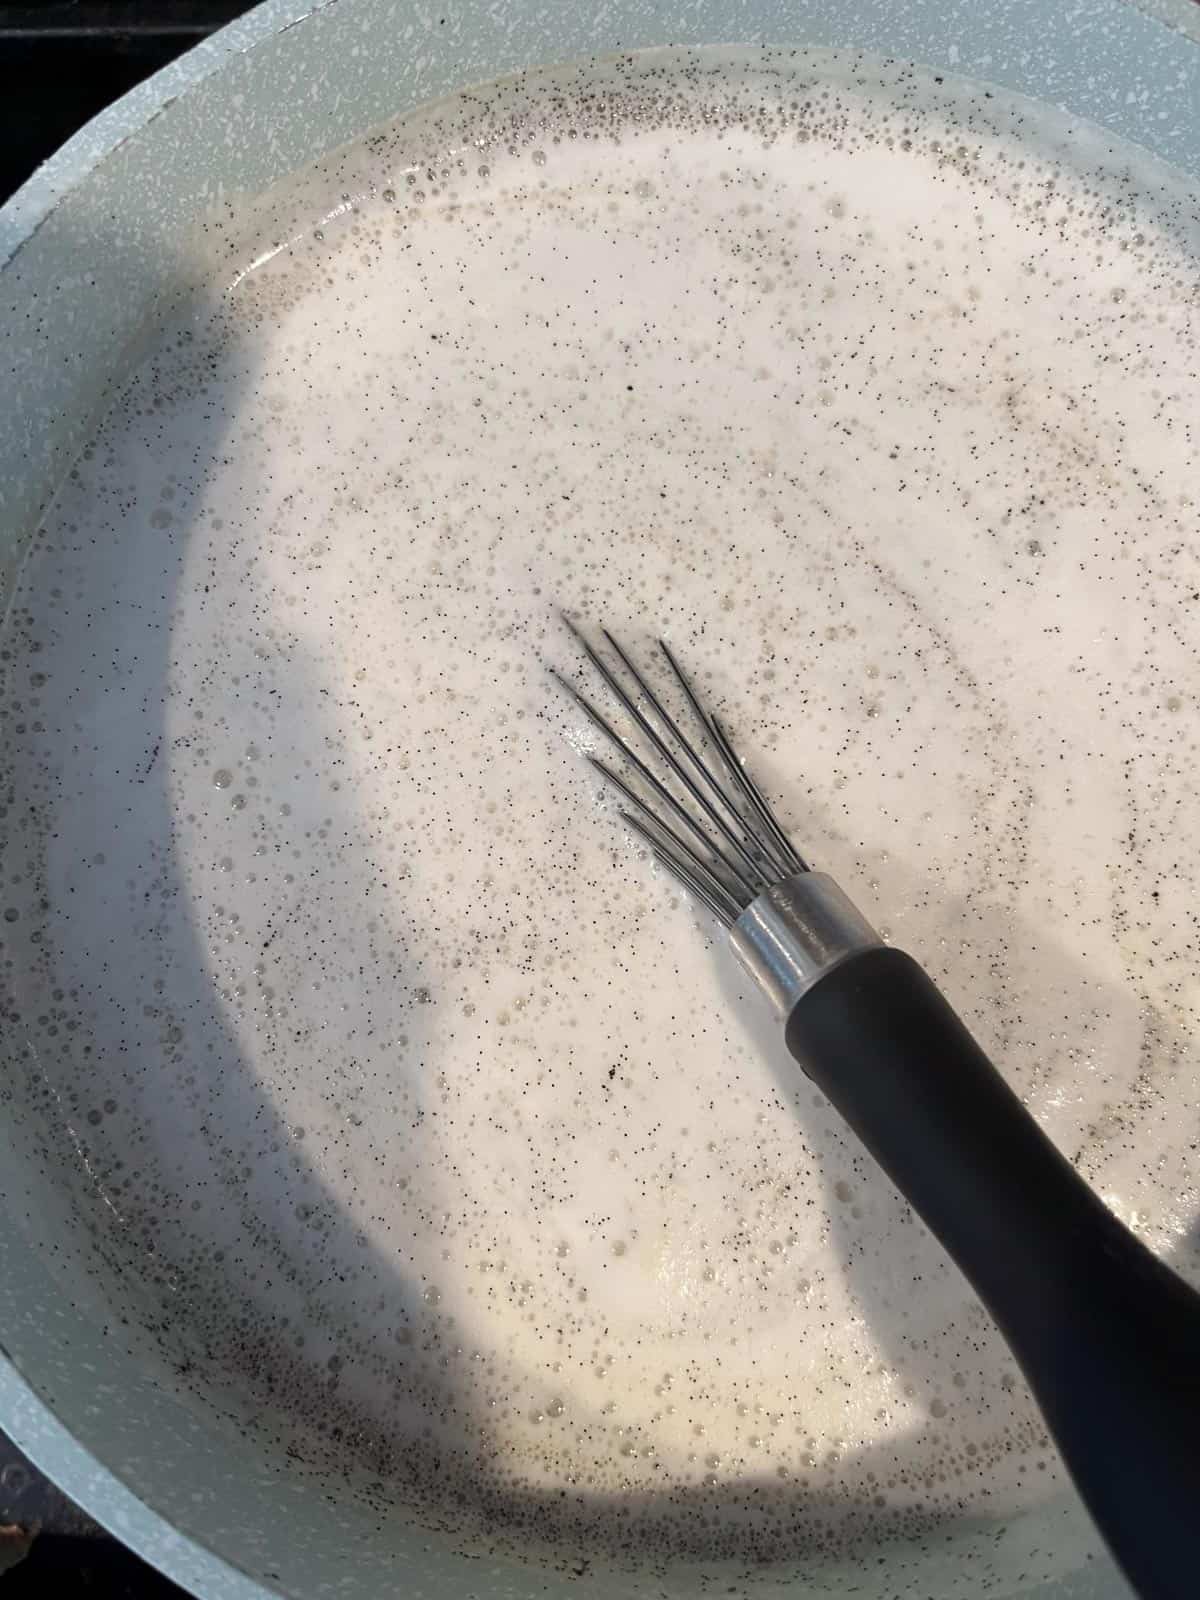
- When the sugar dissolves completely, add baking soda and salt. Continue cooking, stirring frequently.
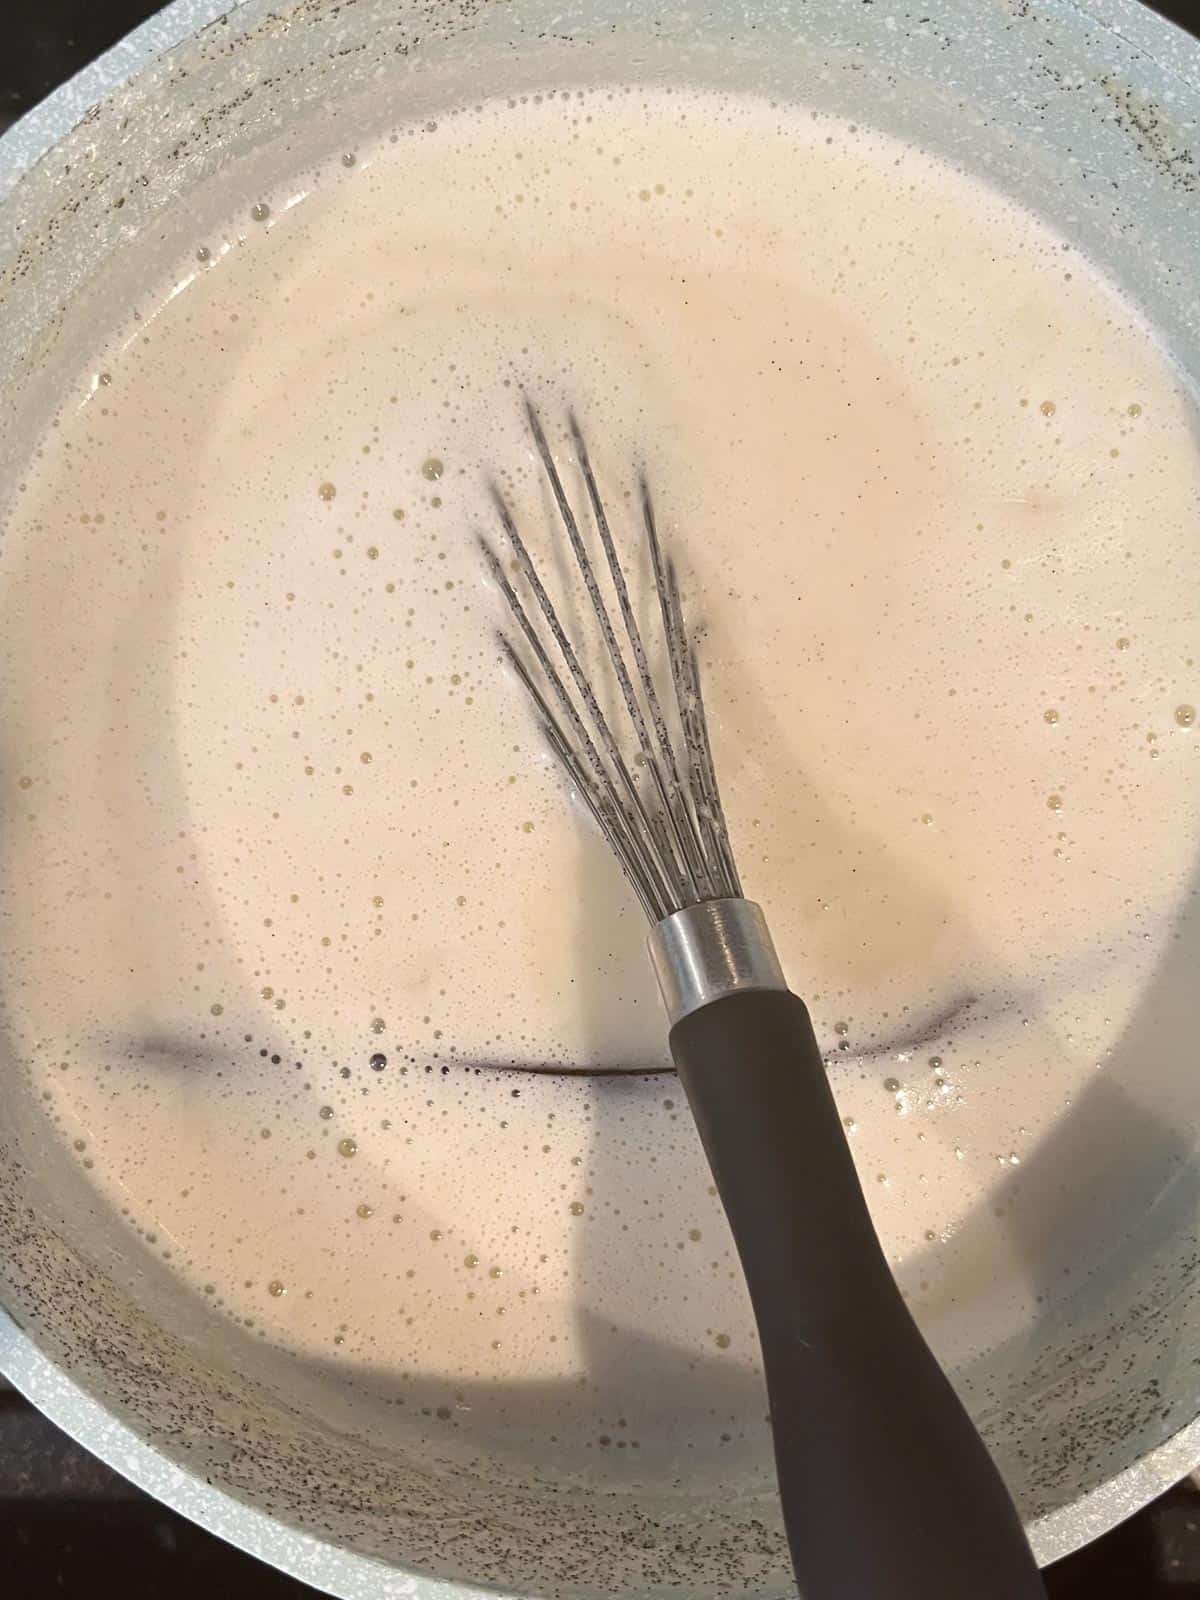
- The milk mixture starts to take on color already around 9:32 am in this photo.
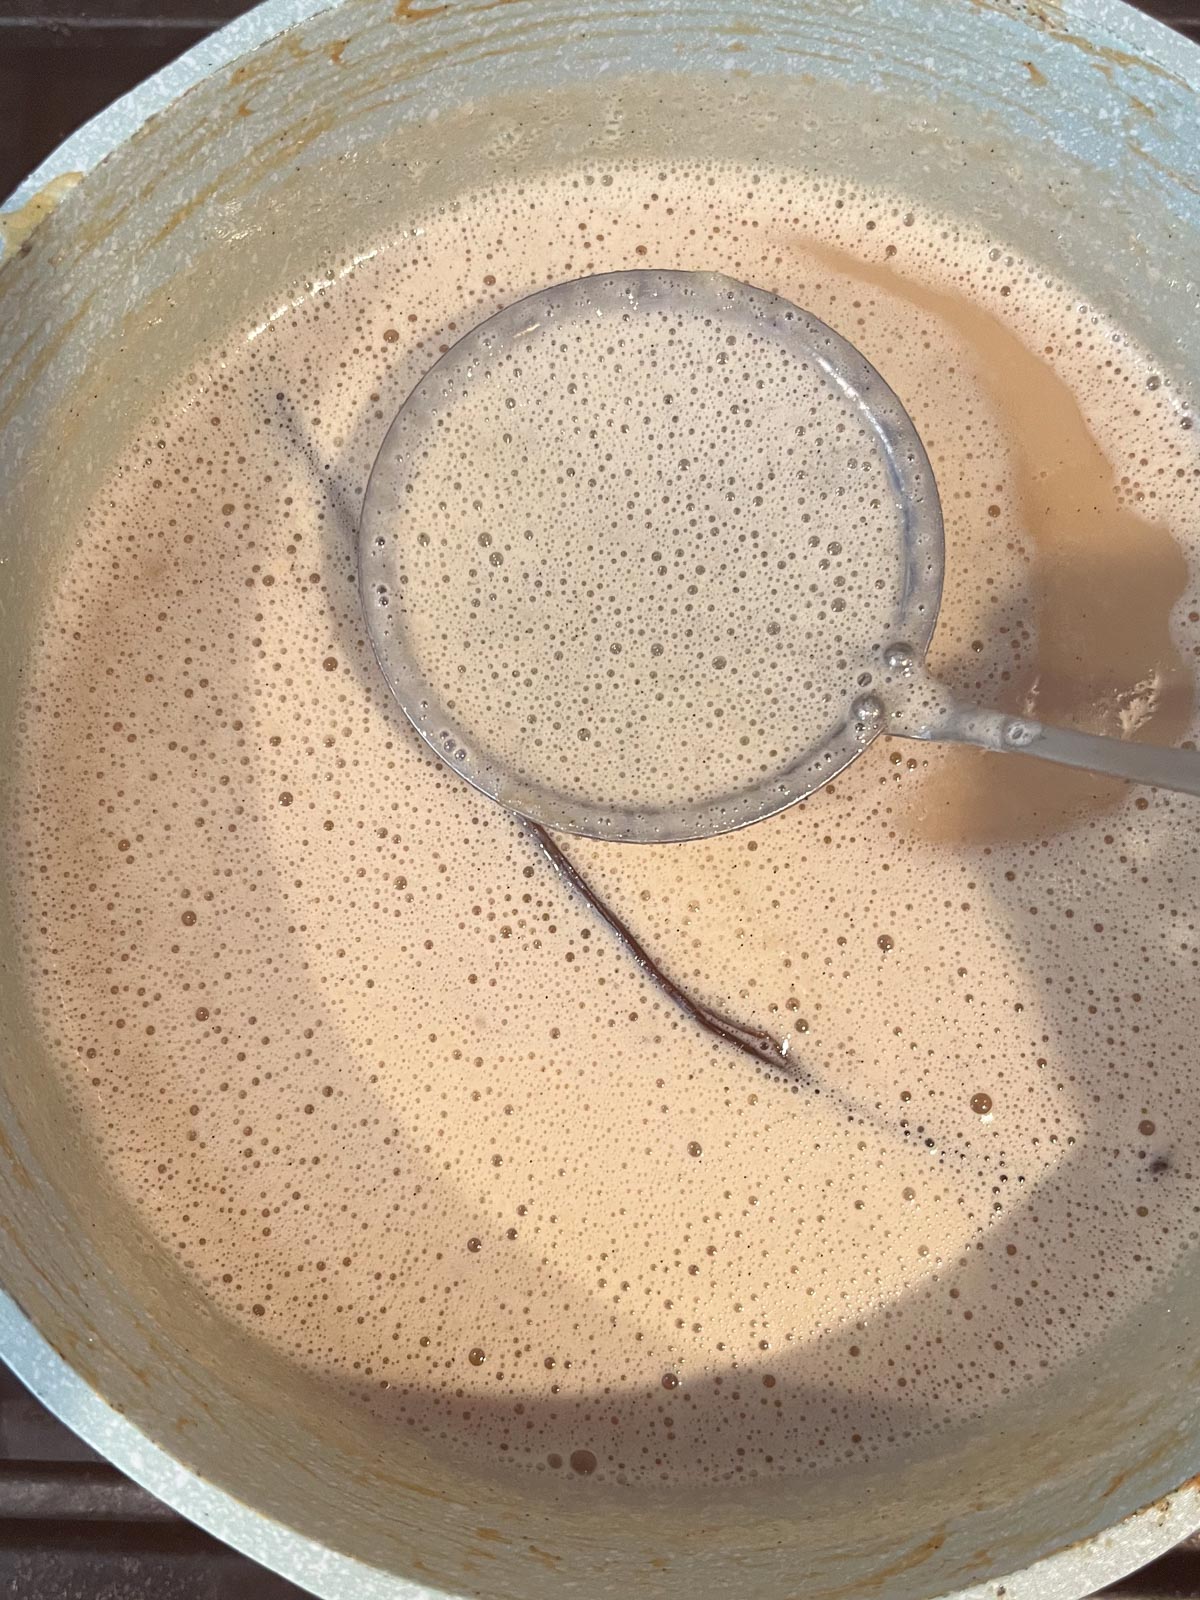
- If there is a lot of foaming, remove the foam as necessary. And remove the vanilla bean pod around the 1 hour mark. You can see the mixture has a little bit more color here, at 9:57 am.
- The milk mixture color deepens further, pretty quickly, at 10:15 am.
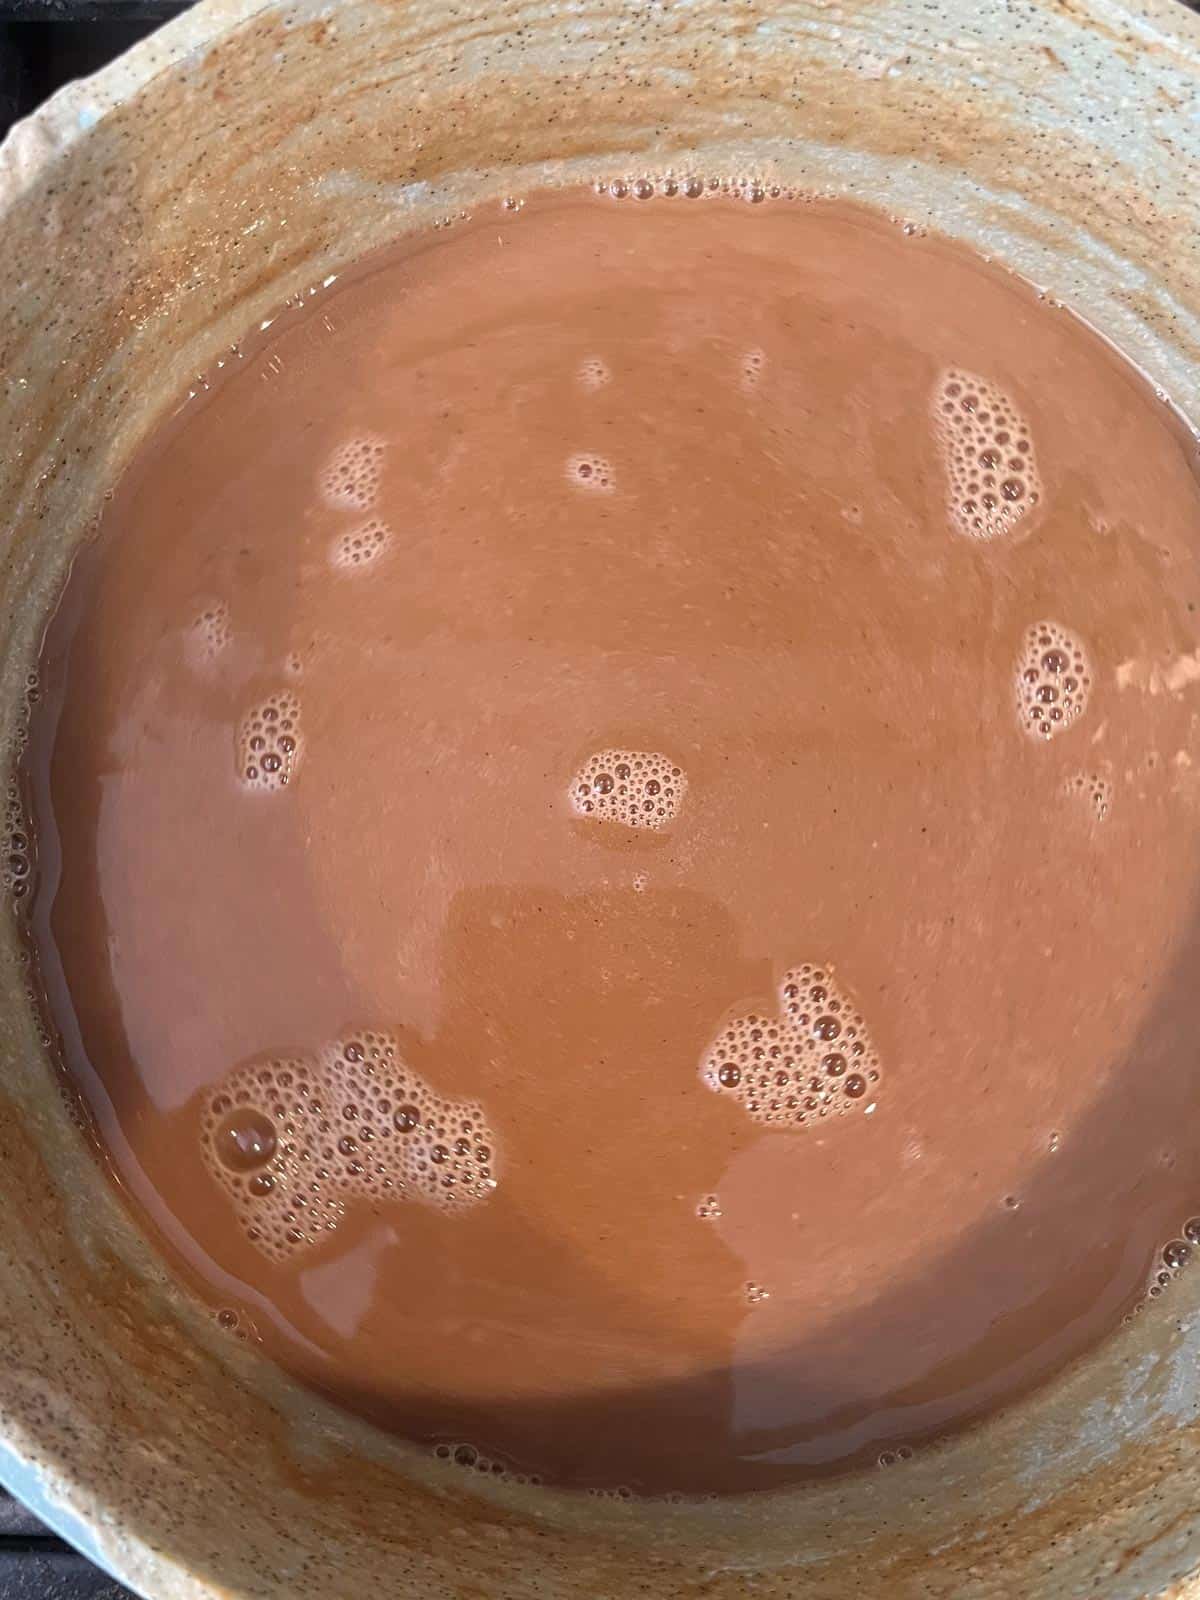
- And further at 10:44 am. Almost there, this color is what you’re looking for, but with a thicker consistency.
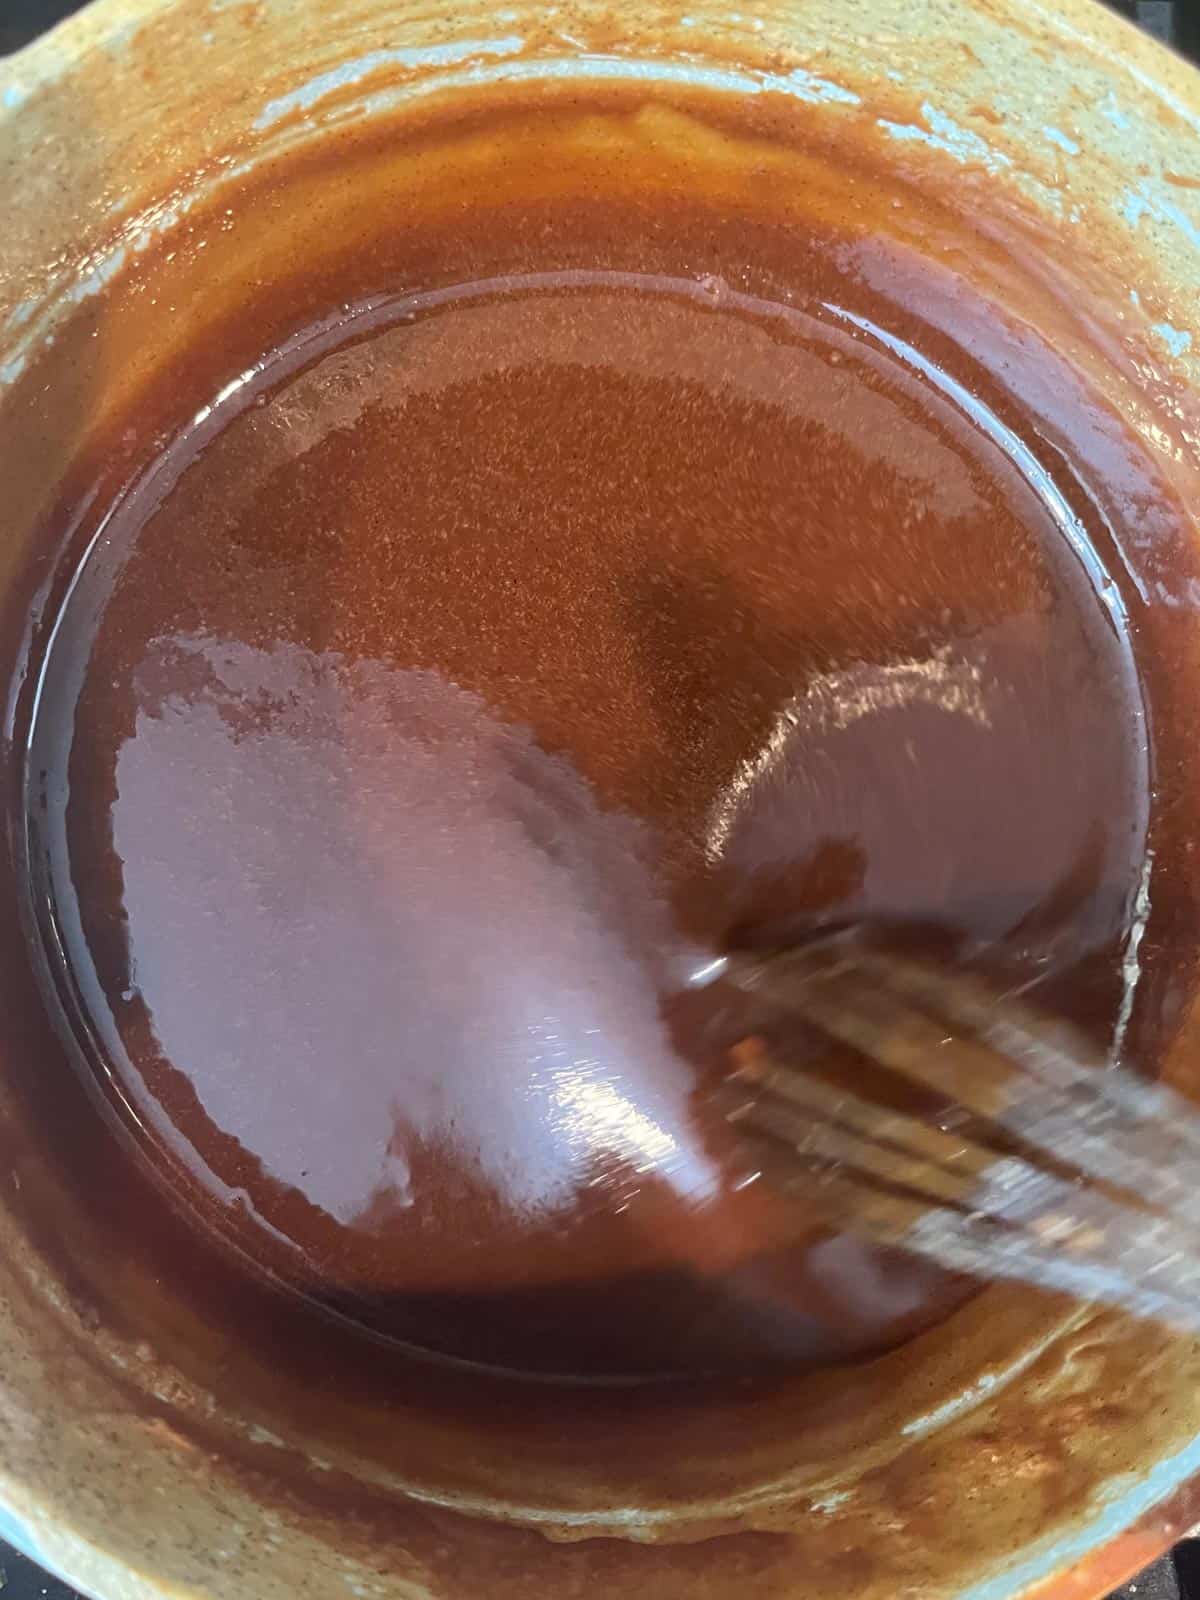
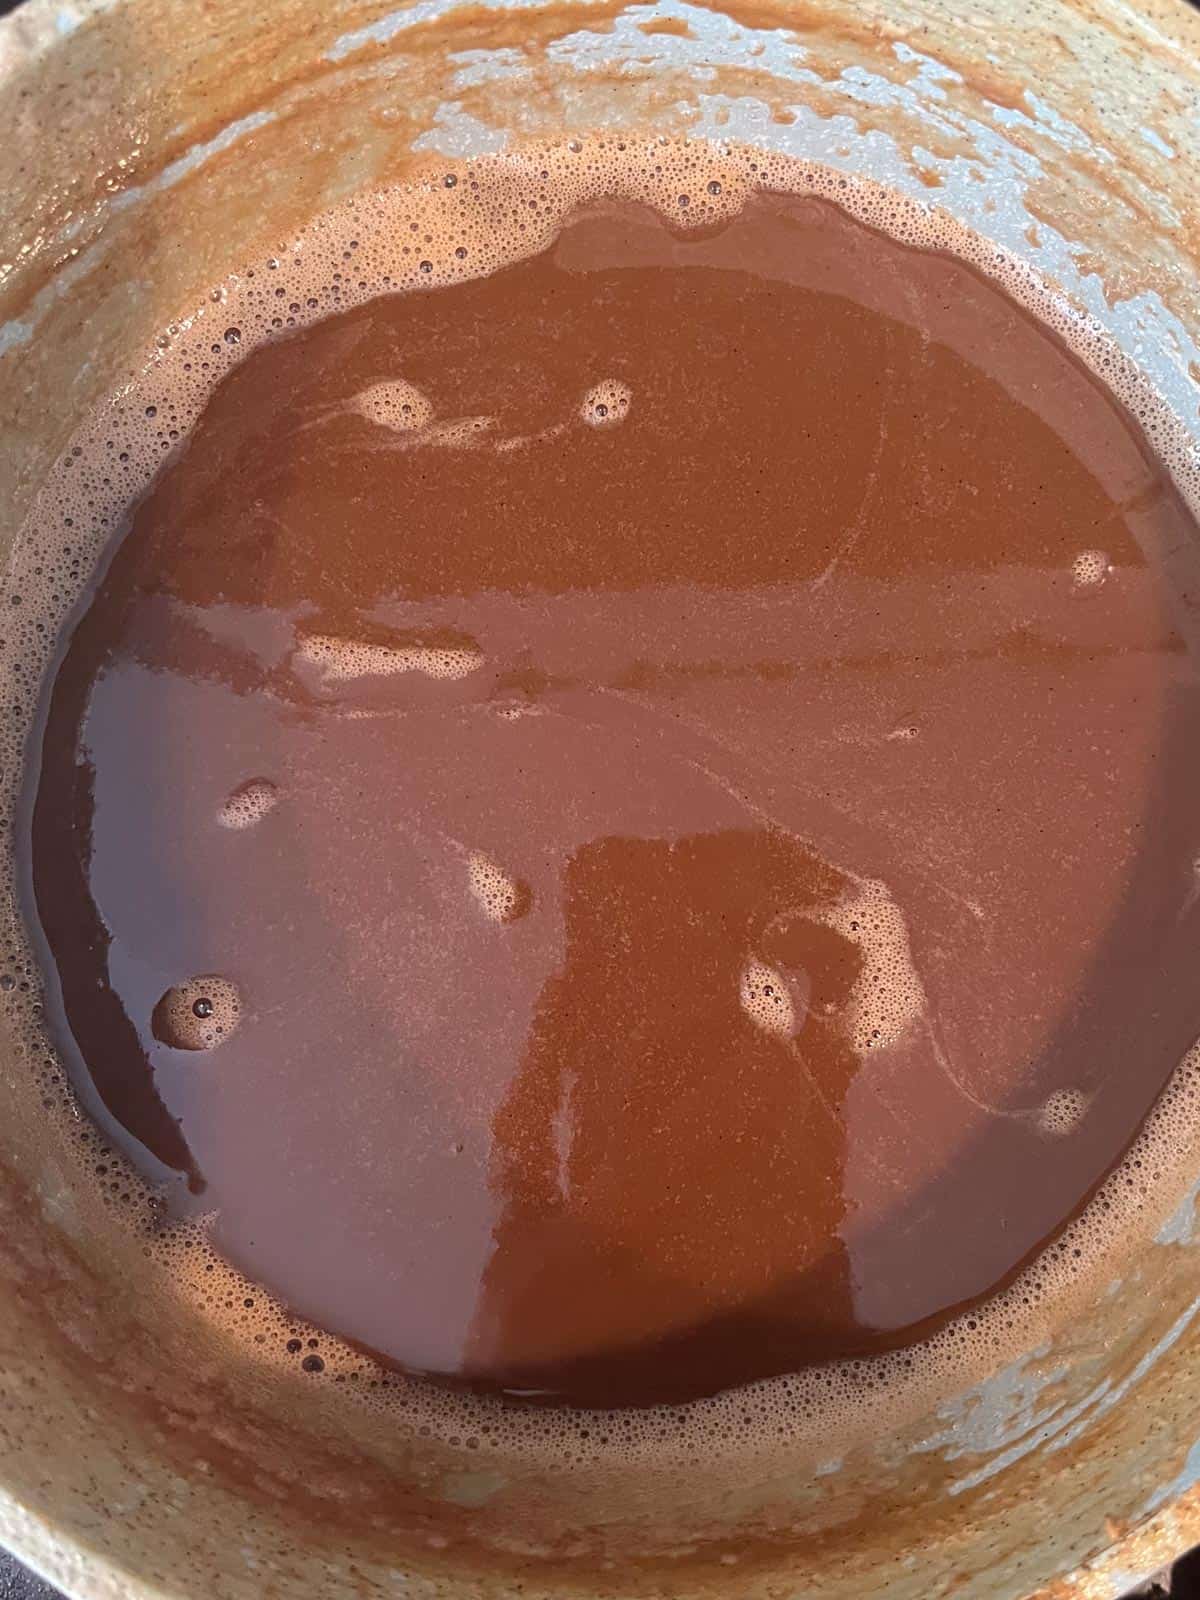
- By 11:20 am, the dulce de leche is complete! You should feel resistance when whisking it in the pot.
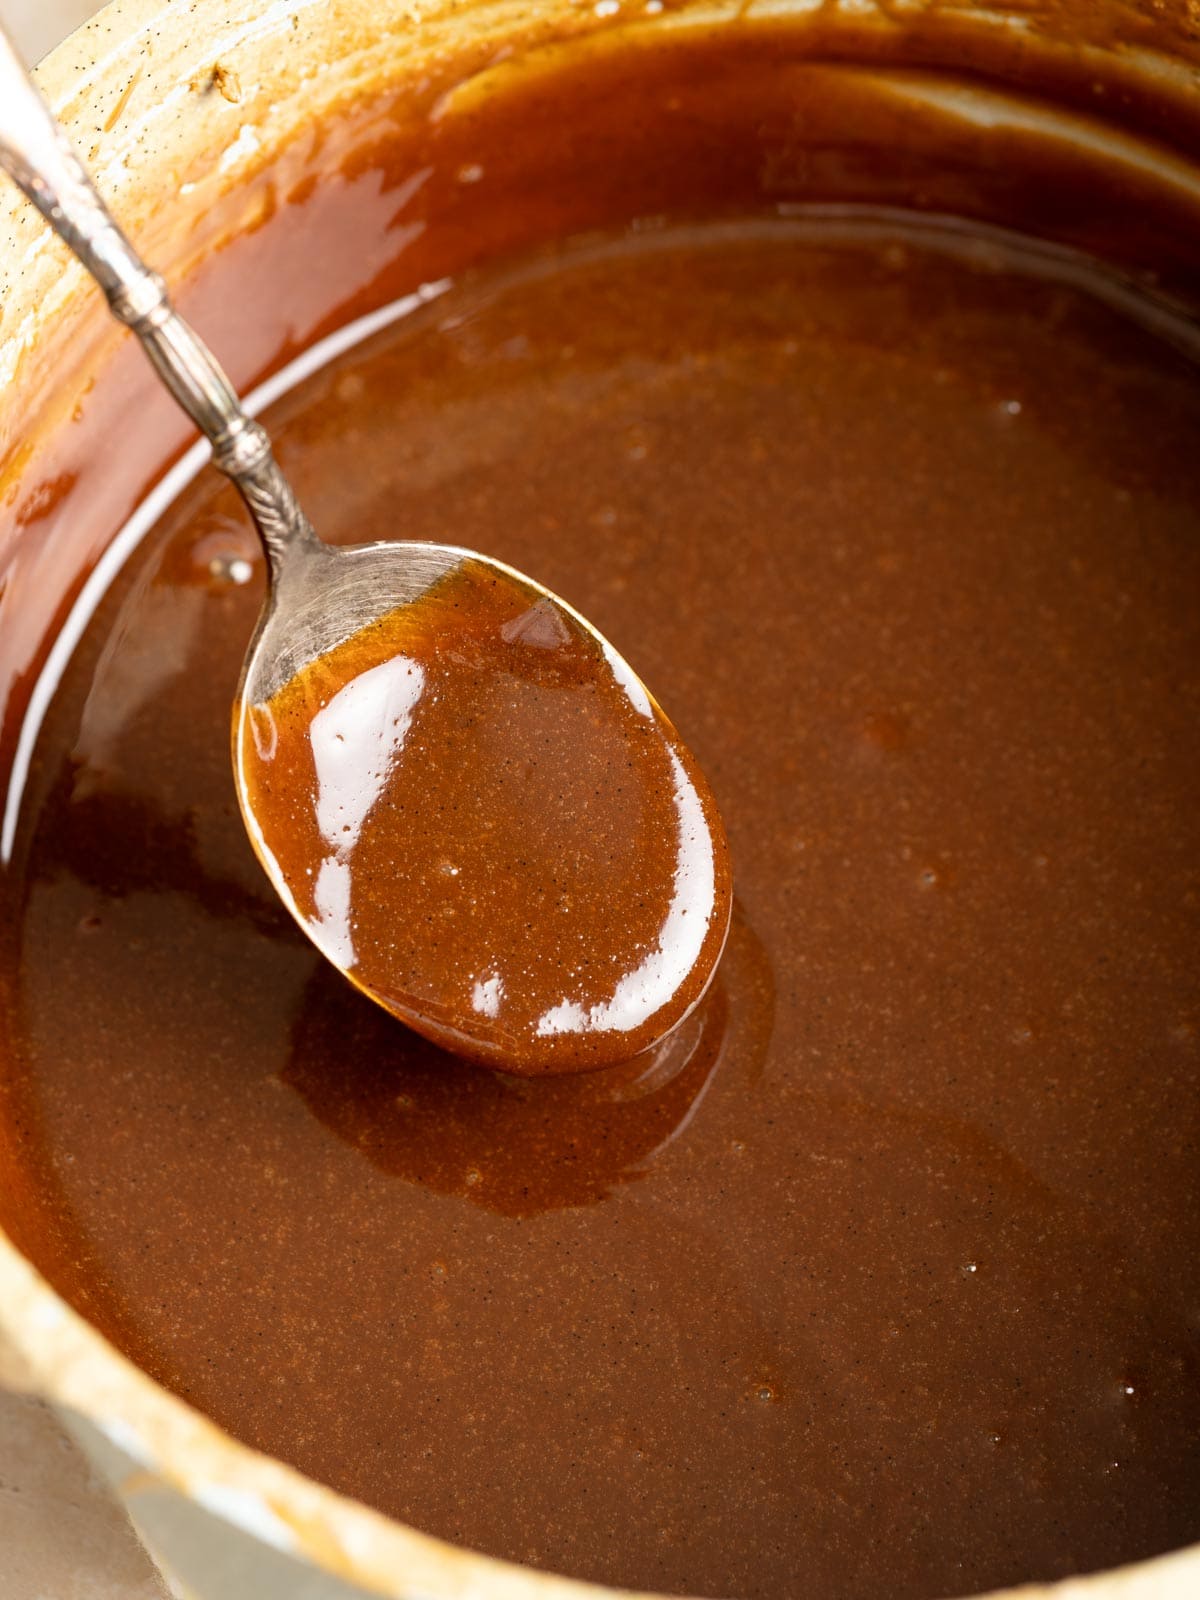
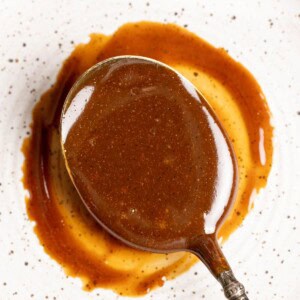
- Your dulce de leche should be thick and glossy. It should fall off the spoon slowly in a thick ribbon.
Baker’s tips
- Depending on your stove and what heat level you’re cooking your dulce de leche at, it can take between 2 to 4 hours. This batch took me 2 hours and 10 minutes on medium heat, which is higher than recommended, but I was impatient. Low heat is recommended but it could take 4 hours. Though it will be safer to cook it on lower heat if you plan to take your eyes off the mixture here and there. I was in the kitchen at all time, stirring the pot almost constantly here.
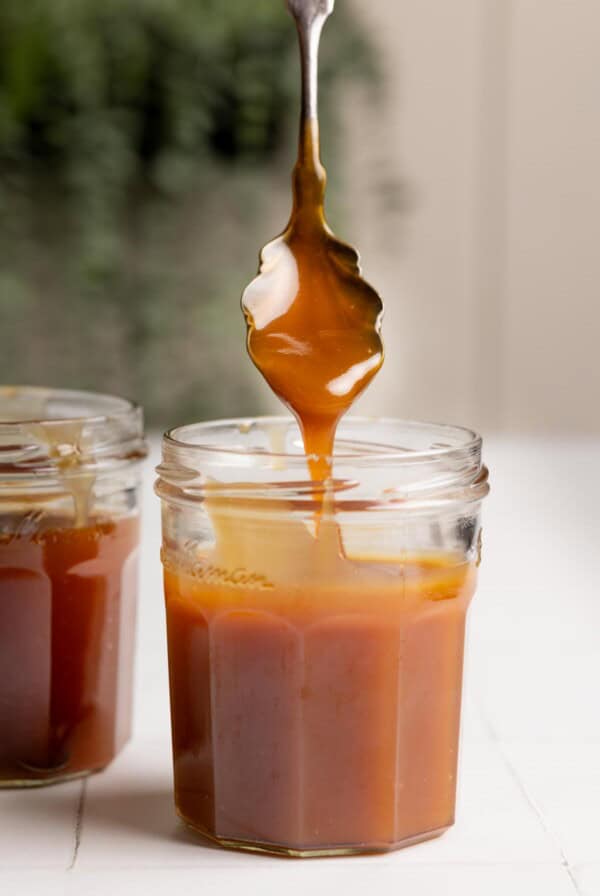
- Store your dulce de leche in a clean jar in the refrigerator. Note that after a few weeks, you may see crystallization. This is the first time I’ve seen it in my homemade dulce de leche. I’m not sure if it’s because I made it with lactose free whole milk or because I cook it too quickly on high heat. I plan to test it again some day with regular whole milk and will report back the results. You won’t have to worry about crystallization if your dulce de leche doesn’t last more than 2 weeks.

My favorite way to enjoy dulce de leche is to spread it on a piece of homemade sourdough toast with butter. I discovered this way of serving it from a little French cafe we went to last summer. They serve baguette split open with butter and dulce de leche, amazing!
Hungry for more?
Dulce de leche – 2 ways
Equipment
- Heavy pot
- Whisk
Ingredients
Method 1: from scratch
- 4 cups (960 g) of whole milk
- 1 ½ cups (300 g) granulated sugar
- 1 whole vanilla bean, split with the seeds scraped
- ½ teaspoon baking soda
- 2 pinches kosher salt
Method 2: with condensed milk
- 14 oz (397 g) sweetened condensed milk, 1 can
- 2 pinches kosher salt
Instructions
For Method 1:
- Add milk, sugar and scraped vanilla bean seeds along with the pod (or vanilla bean paste) in a heavy bottom saucepan over medium heat and bring to a simmer while stirring occasionally.
- When the sugar completely dissolves, add baking soda and salt. Reduce to low heat (see note) and cook for 3 ½ to 4 hours uncovered, stirring occasionally. If using vanilla bean pod and seeds, you’ll need to remove the pod after cooking for an hour.
- Skim off foam as necessary (if there is too much).
- In the last hour of cooking, stir the mixture frequently and reduce heat to the lowest setting if necessary, the mixture will bubble more rapidly.
- Reduce the mixture to about 1 ½ cups. When it thickens and the color is caramel brown, it is ready.
- Transfer to a jar and let cool to room temperature.
For Method 2:
- Preheat oven to 425°F.
- Pour condensed milk into a pie dish, sprinkle salt over the top. Cover with foil.
- Place covered pie dish into a roasting pan. Fill the pan with hot water half way up the side of the pie dish. Bake for 1 hour.
- Remove roasting pan from the oven, and remove pie dish from the water bath. Uncover the dish carefully and whisk the mixture until smooth, 1 – 2 minutes.
- Cover the dish and return to the water bath. Add more water if necessary. Place the roasting pan back into the oven and bake for 1 ½ hour more.
- Remove from the oven, and remove pie dish from the water bath. Uncover and whisk the dulce de leche until smooth, 4 – 5 minutes.
- Transfer to a jar and let cool to room temperature.
Notes
- You can cook the dulce de leche on higher heat setting to shorten the cook time, but you will need to watch it more closely and stir the mixture more frequently. The most recent batch took me about 2 hours and 10 minutes on medium heat on my gas stove.
- Method 2 will take about 2 hours 45 minutes.
- Calories are estimated based on 1 tablespoon serving of homemade dulce de leche.
Nutrition
Nutrition information is automatically calculated, so should only be used as an approximation.
 Like this recipe? Rate & comment below!
Method 1 is based on Alton Brown’s Dulce de leche. Method 2 is based on CHOW.


It seems to me that the stove top method would be very easy to burn. I wonder if I could adapt the oven method to the stove top ingredients. you mentioned the saltiness of the condensed milk method. Why add the salt? I don’t see it as necessary to the evaporation process. Love the idea of making these types of things at home. I am hooked on making my own vanilla and even found a recipe for vanilla paste that I have made now. i enjoy the creative process of cooking and enjoy knowing exactly what I am eating. Thank you for your website. you have awesome information I have not seen anywhere else.
Hi Pat, when you’re cooking on the stove top, you definitely need to pay attention to whatever it is that you’re cooking or you’ll burn it. So stirring and checking in on it every once in a while is necessary, especially when you get down to the caramelization part. The salt is not needed for evaporation, more for flavor, sugar needs salt to balance out, but I may have over did the salt since there is already a little bit of salt present in the condensed milk (check the nutrition label in the back). I have never done the milk+sugar in the oven, I would imagine it should work since you’re applying heat to it either way, but I think you still need to check on it and stir it every so often to make sure the mixture is not being cooked too quickly at the bottom or side of whatever pot you’re using and to make sure the sugar is being distributed evenly.
This on looks fantastic. I can’t wait to try it. Thanks for sharing!
I adore dulce de leche. I’ve made the condensed milk method. Can’t wait to try the milk + sugar method.
Love it! I made dulce de leche by baking it yesterday and it was pretty great!! I used to always just boil the can. Thanks for the inspiration!! I love dulce de leche!! If you ever get a chance, try Brazilian or Argentinean dulce de leche! They make the best dulce de leche ever!!
Thanks Cam! I’m glad you liked it. I didn’t realize there are so many different versions of Dulce de Leche. Will be sure to check them out next time. Thanks for the tip 🙂
Oh man, this looks so spoon worthy! I like the two different ways of making this dulce de leche. Great pictures, too!
Thank you so much Vanessa!