
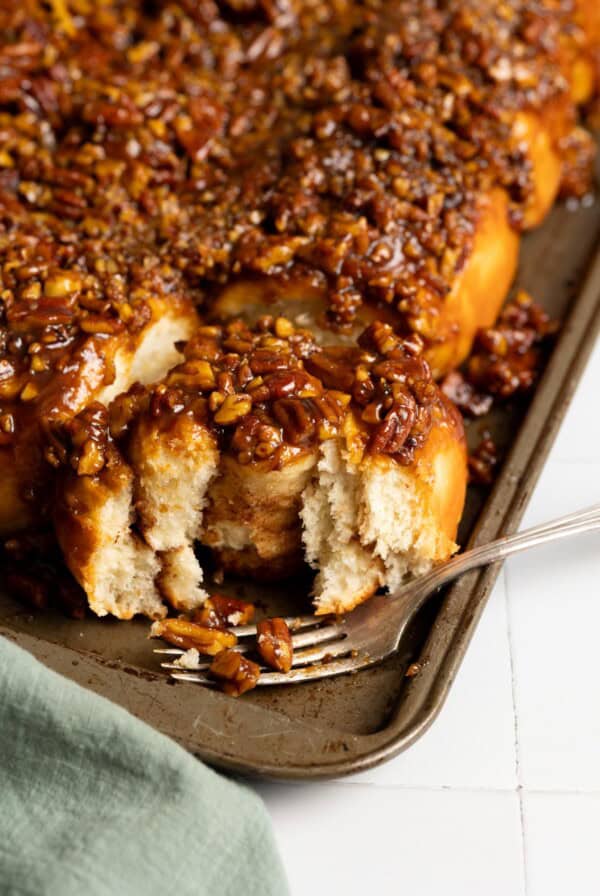
These Honey Buttermilk Buns are the best dinner rolls you will ever make. They are lightly sweetened with honey, super soft and fluffy. They are simple to make and will be the perfect addition to your holiday dinner.

Now, before we make this recipe, let me just tell you straight out that, just like my other dinner rolls recipe, these buttermilk rolls will take longer than an hour from start to finish. However, most of that time is just you letting the dough do its thing, either in the mixer or in a bowl, by itself, in the corner of your kitchen. Total active time will only be about 20-30 minutes.
As with all bread recipes, if you put in a little bit of work and patience, you will be rewarded in the end with soft fluffy rolls that are far superior to store bought. I promise you will love these buttermilk rolls.
Table of Contents
Why you’ll love this recipe
- These buns are very simple to make!
- It’s the perfect recipe to use up leftover buttermilk.
- The rolls are super soft and fluffy and slightly sweetened with honey.
- They’re wonderful for everyday meals and also the perfect addition to your holiday feast.
Ingredients and substitutions
As always, you can find the ingredient list with all the quantities in the recipe card at the end of this post. But here are some notes and substitution tips on the ingredients I used for this buttermilk dinner rolls recipe.

- Buttermilk – I used reduced fat buttermilk. You can use any type of buttermilk you can find at the grocery store. You can even use regular milk in this recipe if you don’t have buttermilk. Or make your own buttermilk by adding lemon juice or yogurt to regular milk.
- Butter – I used unsalted butter in the bread dough and a little bit of salted butter to brush the top of the buns right when they come out of the oven. You could use salted butter in the bread dough as well so you don’t have to get 2 different types of butter for this recipe, just make sure to reduce the amount of salt called for separately by about half.
- Honey – This will give the yeast food and make the bread a little sweeter. You can substitute another type of liquid sweetener, such as maple syrup, if you wish.
- Yeast – You can use either active dry yeast or instant yeast. I’ve used both with success. Even with instant yeast, I still like to bloom it in warm liquid first to ensure the yeast is working.
- Flour – Typically, you want to make bread using bread flour for the higher protein content, which will make your bread chewier. However, for this buttermilk bun recipe, to keep things simpler, I’ve used all-purpose flour here.
- Salt – I use kosher salt, if you’re using table salt, only use about ½ teaspoon. If you’re using salted butter, you will need to reduce this amount of salt by about half.
- Water – I only use 2 tablespoons of water to bloom the yeast in.
- Egg – I didn’t use any egg in the bread but I did use one egg to make egg wash to brush on top of the bread before baking to get a golden brown top crust. If you omit the egg wash to save an egg, your bread won’t have the gorgeous golden brown crust. You could use a buttermilk wash instead, though it may not result in a deep golden color.
How to make buttermilk rolls
Bloom the yeast
Add warm water along with a teaspoon of honey to a small bowl, sprinkle the yeast over the liquid surface and let it bloom for 5 – 10 minutes, the mixture should puff up.
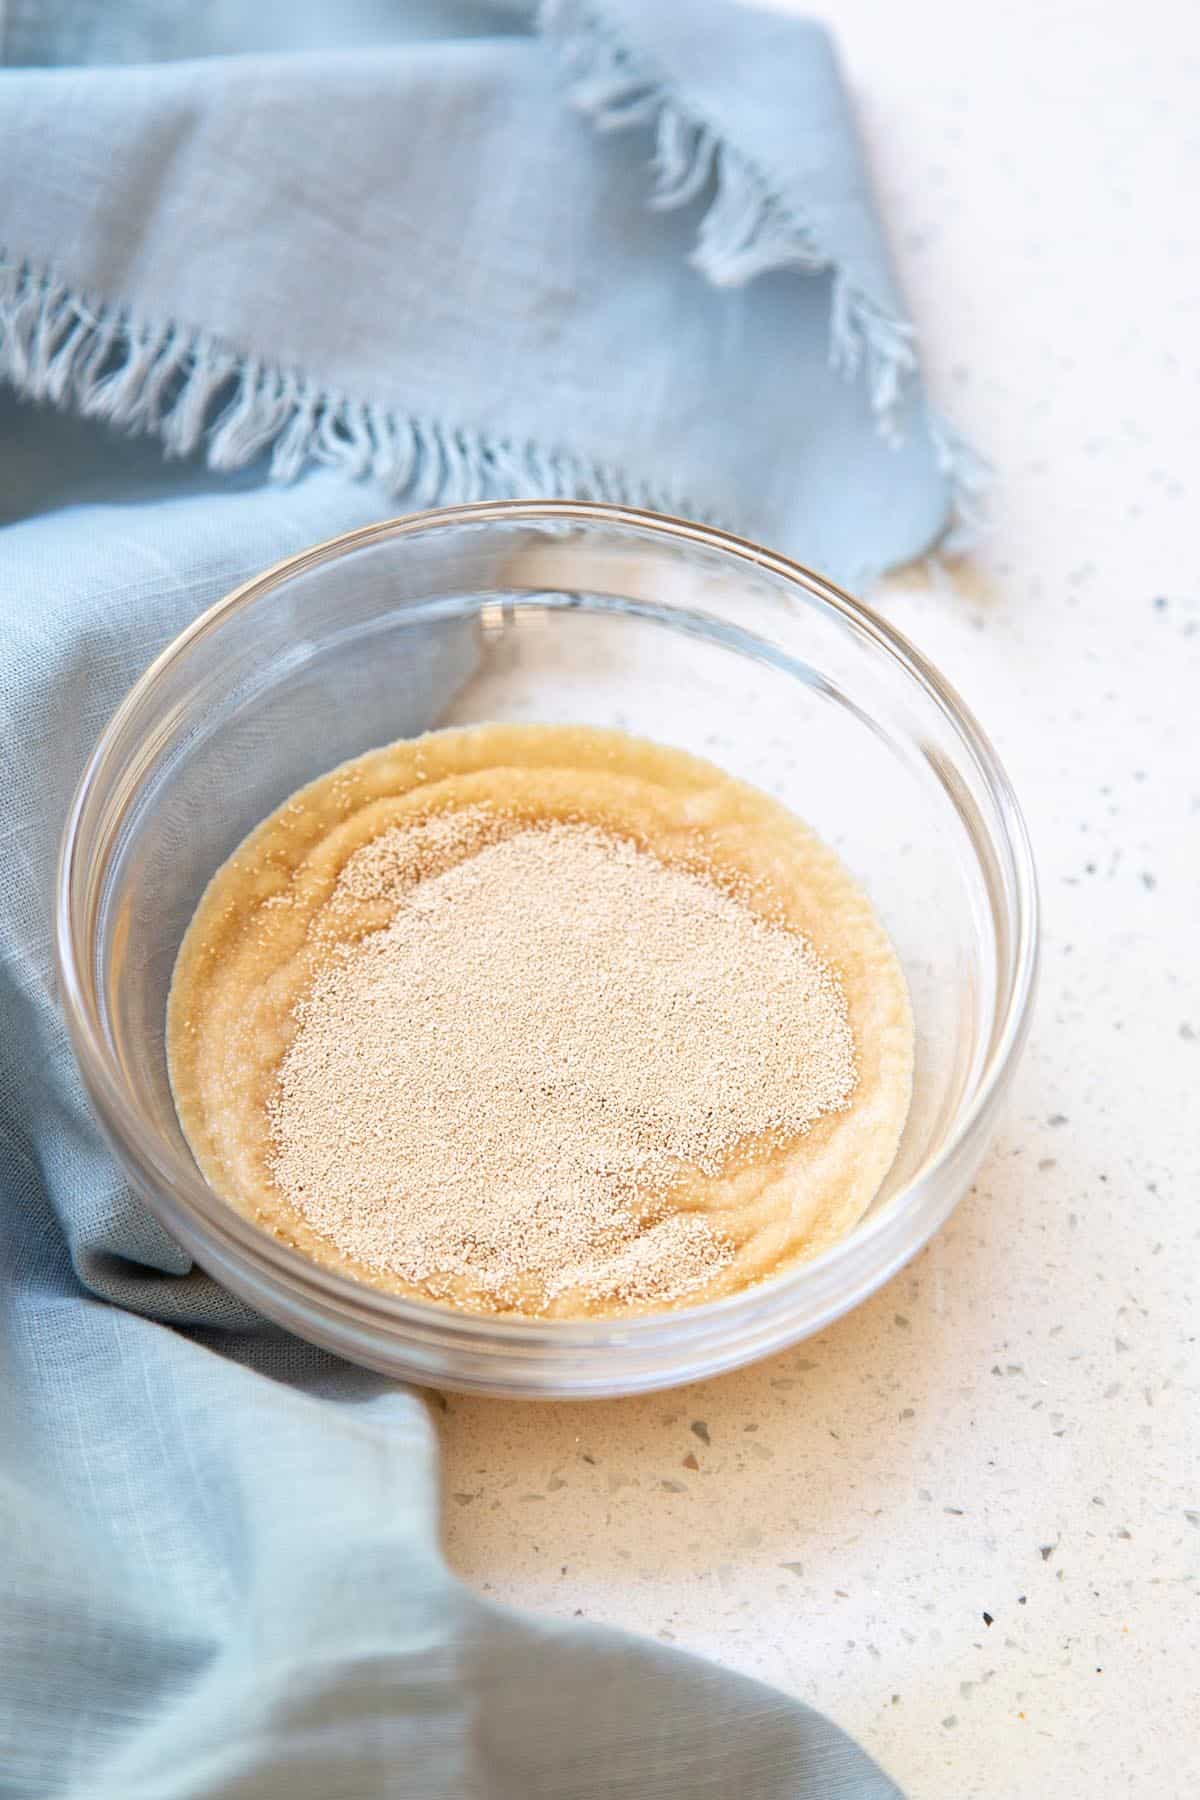
Tip: use either active dry yeast or instant yeast in this step. Both can be bloomed in warm liquid to ensure yeast is working.
Make the dough
Warm the buttermilk and melt 2 oz of butter in the microwave or on the stove top. Stir buttermilk and melted butter together to combine. Ensure the liquid mixture is below 110°F, it should be warm to the touch and not piping hot.
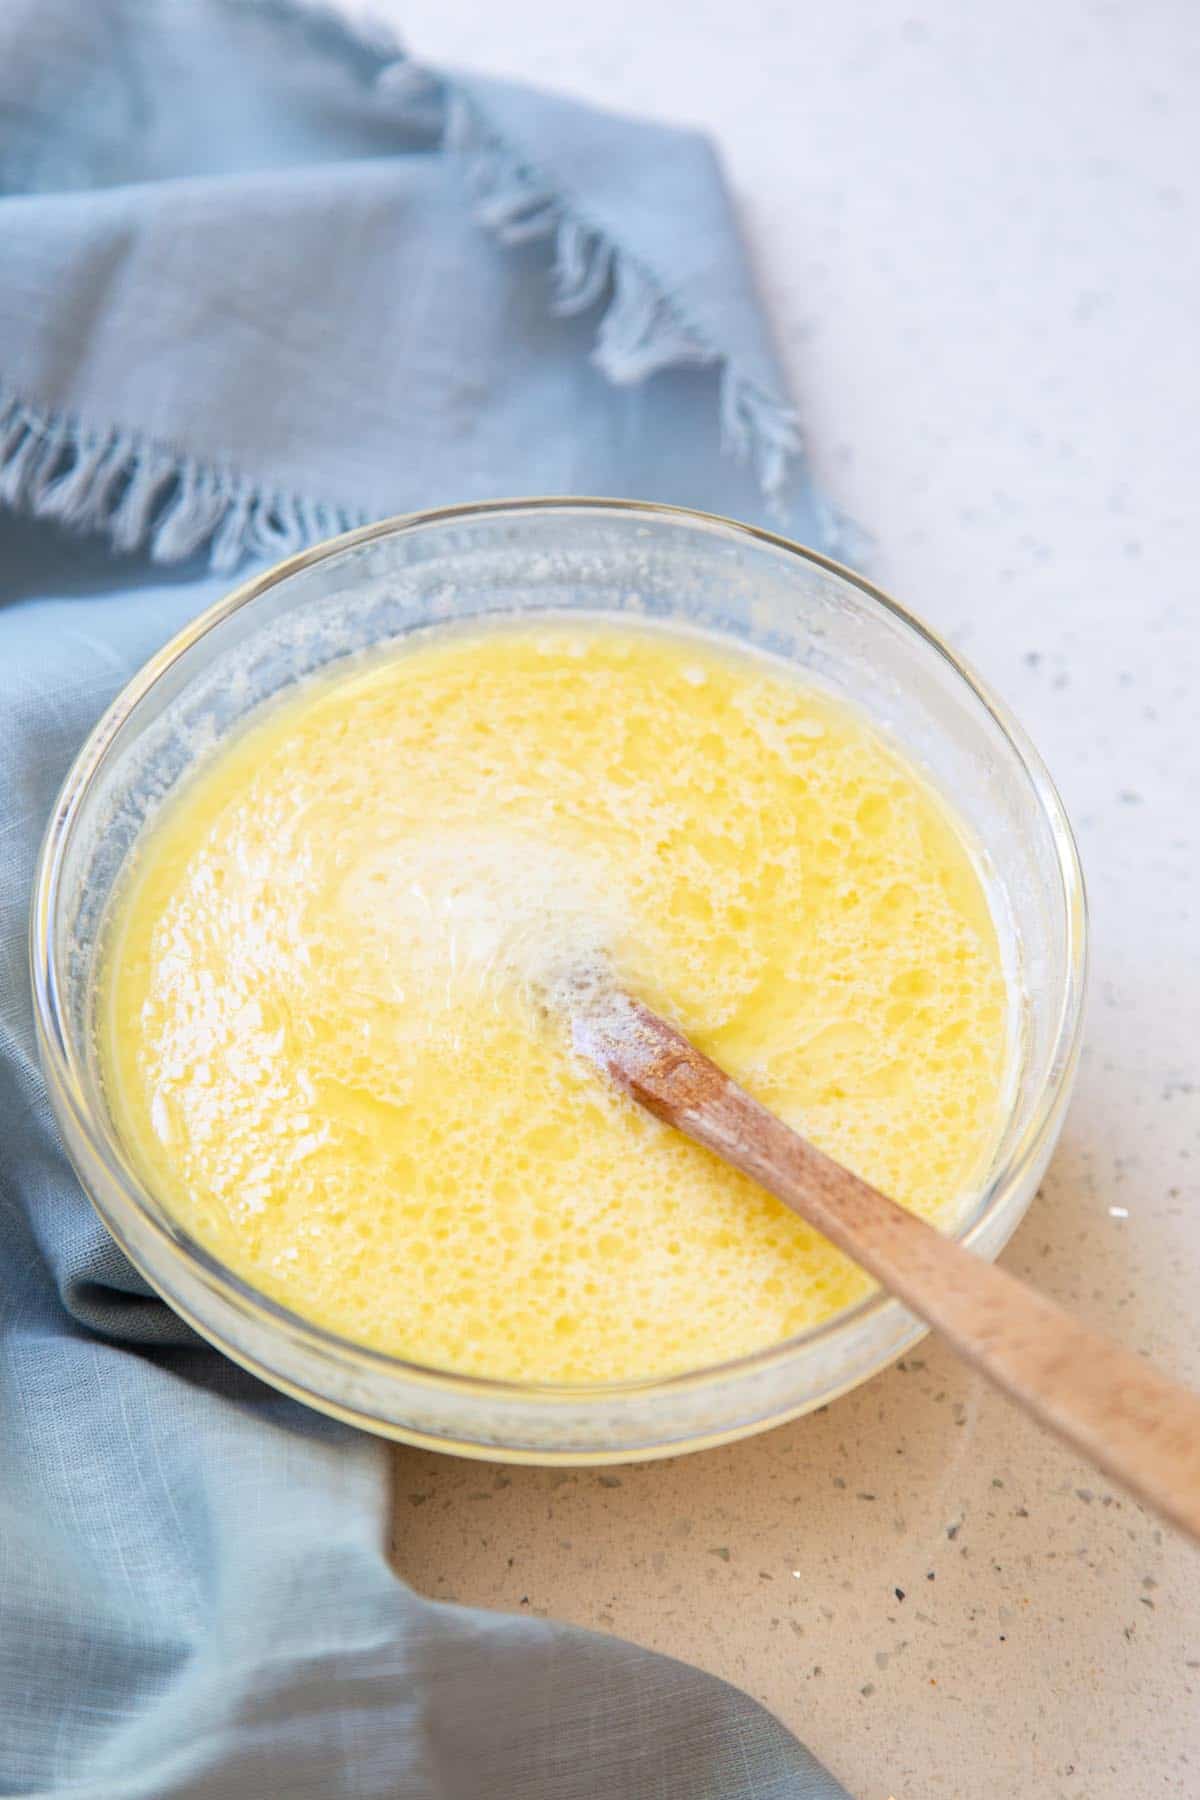
Tip: since we’ll be adding this liquid to the yeast mixture, we want to make sure the temperature is not above the threshold (110°F) that will kill the yeast.
Add flour and salt to a stand mixer bowl, stir to distribute evenly. Add warm milk mixture along with the bloomed yeast, and knead with the dough hook on speed 2 for about 10 minutes. The dough will still start to pull away from the side of the bowl, but will still be very soft and somewhat sticky.
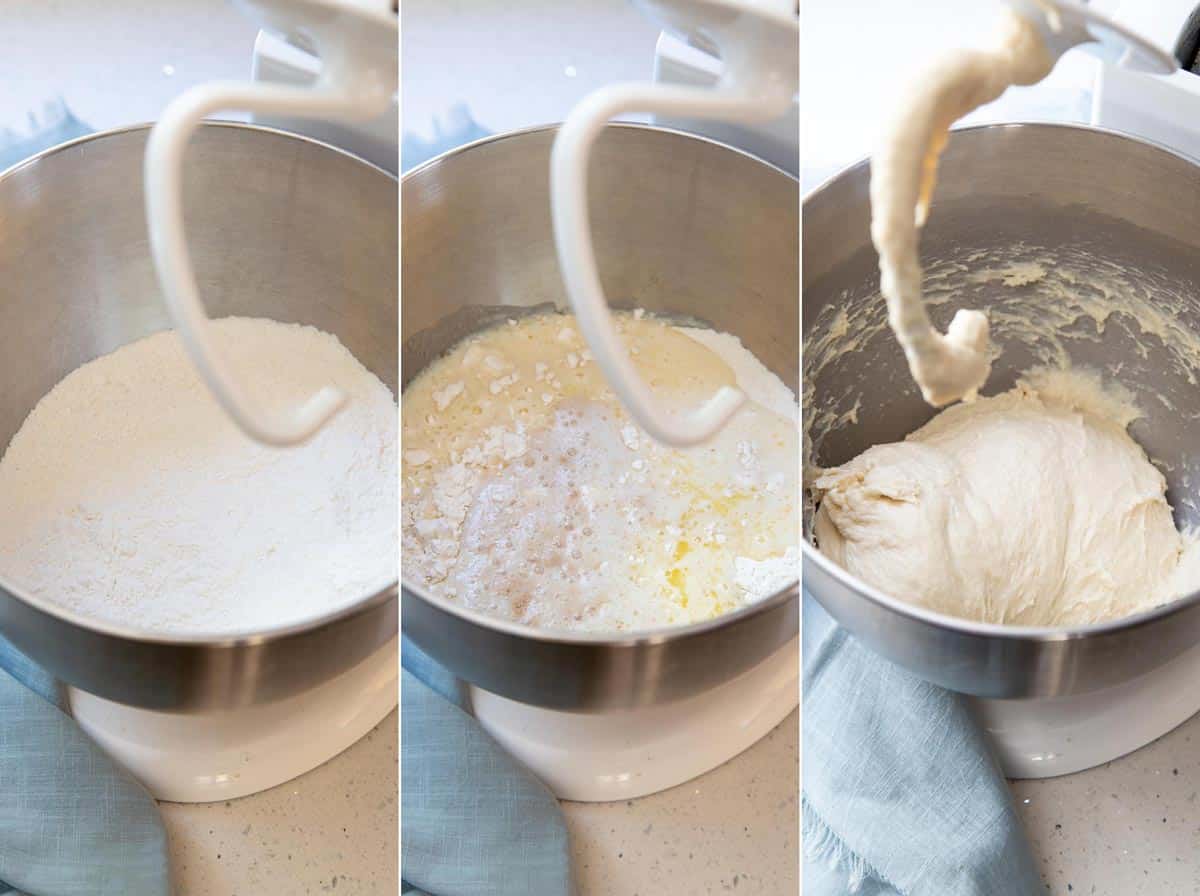
Scrape the dough out of the mixing bowl onto a floured surface, quickly shape it into a ball and place it in an oiled glass bowl. Cover, and let rise in a warm place for 1 – 2 hours until at least double in size.

Shape the buns
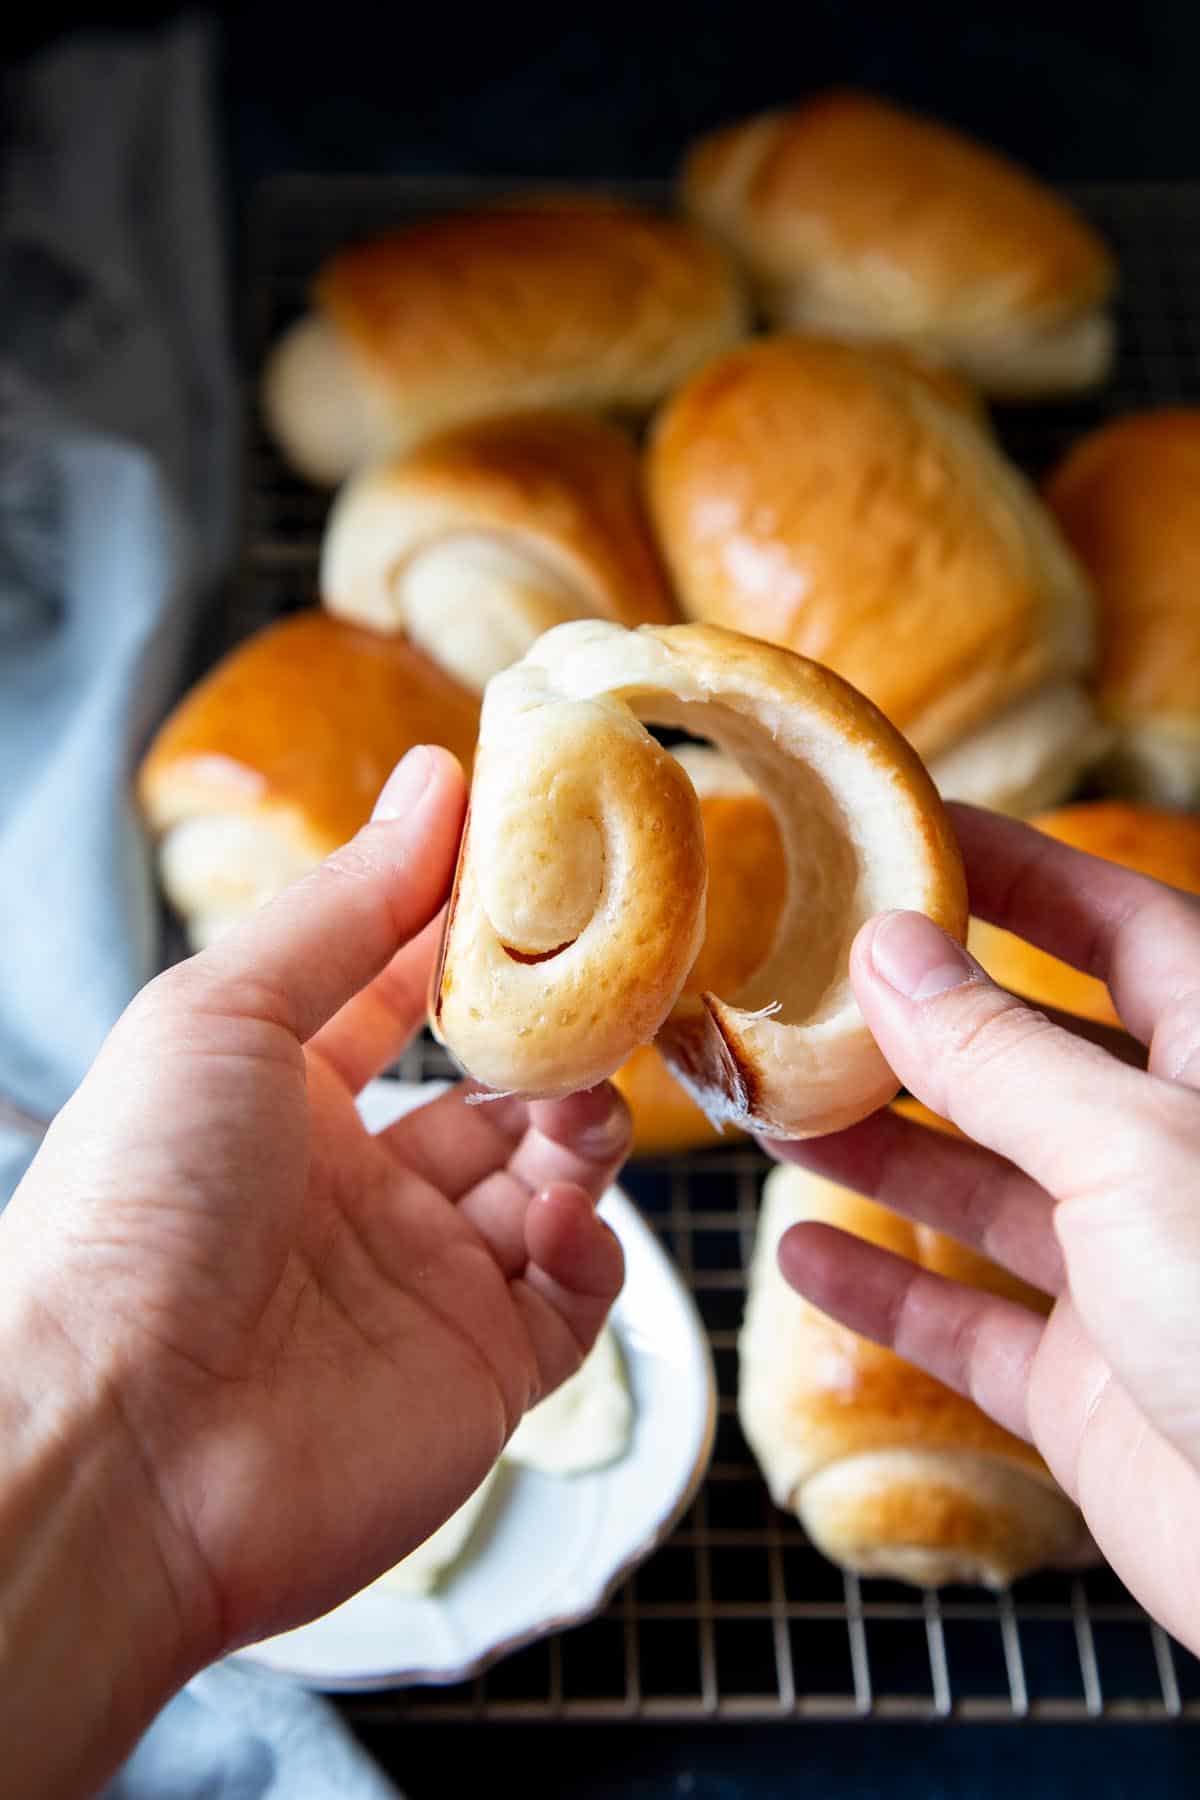
Roll the dough out into a ¼” thick rectangle, on a floured work surface. Brush the surface of the dough with the remaining 1 oz of unsalted butter.

Use a pizza wheel to cut the dough sheet into half lengthwise and into sixths width wise. This will yield 12 small rectangles.

Roll each of the small rectangles up and place them on a lined baking sheet seam side down, spaced 1” – 2” apart.

Allow the rolls to rise for 1 hour until doubled in size and puffy. Brush the rolls with egg wash and bake until golden brown.

Brush the rolls with melted salted butter as soon as they come out of the oven for additional flavor.

More baker’s tips
- Mind your water temperature – when getting hot water from the tap to bloom the yeast, make sure it is not too hot. You should be able to dip your finger into the water without feeling like you’re getting burned. Temperature higher than 110°F will kill the yeast.
- Make sure yeast is working properly before continuing with the recipe to ensure success. If the yeast mixture doesn’t puff up when bloomed, it is best to start over. Otherwise, your dough will not rise.
- Rising time depends on the environment: temperature, humidity, barometric pressure. The dough will rise faster in warmer weather compared to colder weather, in higher altitude compared to lower altitude, etc.
- Use a scale to measure the ingredients and to divide the dough.
- Shaping the buns – I shaped these buttermilk buns like the famous Lion House Rolls because I thought they were fun and pretty. But of course, you can just shape them into round buns instead. In this case, simply divide the dough into 12 equal portions and let them rise on a baking sheet or buttered 9”x13” pan.

FAQs
If you would like to shorten the rise time or even skip the second rise, you could opt to use rapid rise or quick rise instant yeast. This type of yeast is designed to work with just one rise. However, your bread will always come out more airy if you add a second rise. It’s worth the wait.
Yes, you can and here are some tips:
Make sure to use active dry yeast or instant yeast that is not rapid rise or quick rise in this case since your bread will have a longer rise time.
Allow the dough to complete the first rise at room temperature. Shape the dough and prepare it for the second rise and refrigerate overnight.
In the morning, take the dough out to let it come to room temperature and finish the second rise before baking.
To speed up the rise in the morning, you can make a proofing oven by placing the bread in your oven middle rack and adding boiling water to a tray placed underneath. The steam will create a warm environment for your bread to rise.
Be mindful not to let the dough over-rise, especially during the second rise, because over-risen dough will actually deflate during baking and you’ll end up with very dense hard bread.
Storage
- Room temperature: you can store these honey buttermilk buns at room temperature for 1-2 days in an airtight container or ziploc bag.
- Refrigerator: you can also keep them in the fridge for up to a week. You can reheat them in the oven, at 350°F for 3-5 minutes, to get all warm and toasty for serving.
- Freezer: if you make a big batch, you can freeze your buttermilk rolls. They should last up to 3 months in the freezer. Simply store in a freezer bag. You can thaw and reheat or reheat them directly from the freezer at 350°F for 5-7 minutes.
More dinner rolls recipes
- Hawaiian Dinner Rolls
- Sweet Potato Dinner Rolls
- Purple Sweet Potato Dinner Rolls
- Pani Popo (Samoan Coconut Buns)
- Orange Cranberry Hot Cross Buns
Hungry for more?
Honey Buttermilk Buns

Equipment
Ingredients
Bread dough
- 2 tablespoon warm water, from the tap, ~100°F
- 2 teaspoon instant yeast, or active dry yeast, 6 g
- 1 cup buttermilk, warm, 236 g
- 3 oz unsalted butter, divided, 85 g
- ¼ cup honey, divided, 84 g
- 3 cup all-purpose flour, 400 g
- ¾ teaspoon kosher salt
- Oil or nonstick cooking spray
- Salted butter for brushing at the end, optional
- Extra flour for rolling
Egg Wash
- 1 large egg
- 1 tablespoon water or milk
Instructions
- Add warm water and a teaspoon of honey to a small bowl, sprinkle the yeast over the liquid surface and let it bloom for 5 – 10 minutes, the mixture should puff up.
- Microwave the buttermilk in a large measuring cup or glass bowl for 30 seconds to warm it up. Melt 2 oz of butter in the microwave for 30 seconds. Add the melted butter and honey to the warm buttermilk, and stir to combine. Ensure the liquid mixture is below 110°F, it should be warm to the touch and not piping hot.
- In a stand mixer bowl, add flour and salt, stir to distribute evenly. Pour the warm milk mixture and bloomed yeast mixture over it, and knead with the dough hook on speed 2 for about 10 minutes. The dough will still start to pull away from the side of the bowl, but will still be very soft and somewhat sticky.
- Oil a glass bowl, your hands and the dough scraper. Scrape the dough out of the mixing bowl onto a floured surface, quickly shape it into a ball and place it in the oiled bowl. Cover, and let rise in a warm place for 1 – 2 hours until at least double in size.
- Line a large baking sheet with parchment paper or a silicone mat.
- Shape the buns into Lion House Rolls: Turn the dough out onto a lightly floured surface and roll out into a rectangle 12”x15” and about ¼” thick.
- Melt the remaining 1 oz of unsalted butter and brush the surface of the dough with the melted butter.
- Use a pizza wheel to cut the dough sheet in half, horizontally. Then cut each half into six rectangles about 2 ½”x6”. Roll each of the small rectangles up and place on the prepared baking sheet seam side down, spaced 1” – 2” apart.
- Shape the buns into round dinner rolls: Skip step 6-8 and simply divide the dough into 12 equal portions and shape into round balls. Place dough on the prepared baking sheet equal distance apart.
- Cover the rolls with a sheet of oiled plastic wrap and let rise for 1 hour.
- Preheat the oven to 375°F.
- Beat 1 large egg with a tablespoon of water or milk to make the egg wash. Lightly brush egg wash over the top of the rolls and bake for 15 – 20 minutes until golden brown.
- Remove the rolls from the oven and brush the top with melted salted butter if desired.
Notes
- Water temperature should be under 110°F or you will kill the yeast. From the tap, the water should be warm but not too hot. You should be able to dip your finger into the water without feeling like you’re getting burned.
- Make sure yeast is working properly before continuing with the recipe to ensure success. If the yeast mixture doesn’t puff up when bloomed, it is best to start over. Otherwise, your dough will not rise.
- Rising time depends on the environment: temperature, humidity, barometric pressure. The dough will rise faster in warmer weather compared to colder weather, in higher altitude compared to lower altitude, etc.
- Use a scale to measure the ingredients and to divide the dough for the best results.
Nutrition
Nutrition information is automatically calculated, so should only be used as an approximation.
 Like this recipe? Rate & comment below!
This post may contain affiliate links. For more details on how we utilize affiliates, ads, and sponsored content, see our full disclosure policy. Thank you for your continued support, which enables us to keep bringing you delicious recipes, at no extra cost to you.


Sorry, I’m not too pleased with this roll recipe, it is way too sticky. There is no rolling anything out. It’s just a sticky mess. I followed the ingredients and instruction’s explicitly.
All I can do now is add a ton of flour.
Hi Lynn, I’m sorry this recipe didn’t work out for you. I’m not sure what the problem could be if you followed the ingredients and instructions to the tee. It’s true that I usually make a very soft wet dough so it will yield very soft rolls once baked. Oiling your hands and equipment can help during the rolling process, though once the dough has risen the first time, it should have been easier to handle. Thank you for trying it, I understand how frustrating it is to spend all the time and the recipe doesn’t come out.
Made these today and they were excellent. I’d like to make them for Thanksgiving, but need a few more. Have you ever made 1.5X the recipe, for a total of 18 rolls, successfully? I’m going to try it but was curious and wanted to ask first.
Hi Julie, you should be able to 1.5x the recipe without any issues! Thank you for giving these a try and leaving a 5-star review 🙂 Let me know how it turns out for Thanksgiving.
These are so tasty, the recipe worked perfect for me and the only thing I did different was I added some cinnamon sugar to the butter I brushed it with and put it back in the over for only 3 minutes. They’re so good!
Ooo the cinnamon sugar sounds super tasty! Thank you for taking the time to leave a review 🙂
Am I able to prep the night before, put in fridge and bake the next day?
Hi Samantha! Yes, you can and here are some tips:
Make sure to use active dry yeast or instant yeast that is not rapid rise or quick rise in this case since your bread will have a longer rise time.
Allow the dough to complete the first rise at room temperature. Shape the dough and prepare it for the second rise and refrigerate overnight.
In the morning, take the dough out to let it come to room temperature and finish the second rise before baking.
To speed up the rise in the morning, you can make a proofing oven by placing the bread in your oven middle rack and adding boiling water to a tray placed underneath. The steam will create a warm environment for your bread to rise.
Be mindful not to let the dough over-rise, especially during the second rise, because over-risen dough will actually deflate during baking and you’ll end up with very dense hard bread.
Delicious recipe however I had to add another half cup of flour and subbed it with bread flour. Otherwise the dough was too soupy.
I love making bread at home and these had me intrigued. So yum, great recipe.