
Learning how to make a homemade butter croissant is indeed hard work. But I can guarantee there is no better feeling than the one you will have when biting into a warm, flaky, and buttery delight made fresh from your very own oven!
Hello friends, this post has been a long time in the making. But let me tell you right off the bat that if someone tells you it’s easy to make croissants, don’t you believe them for a second. It’s a days-long process that definitely requires patience and skill.

It will get easier with practice but it is definitely not an easy feat. However, don’t give up if you don’t get it the first time or the second time, because I sure didn’t! It took me quite a few tries to get a hang of it, but you will get there if you persevere. And the reward will be delicious homemade butter croissants that you can be so proud of!
Once you’ve mastered this recipe though, you will be able to make the best Chocolate Croissant as well as Almond Croissant. And if you feel up to it, create more unique flavor like this Macadamia Coconut Croissant!

Table of Contents
Now, there will be a lot of photos and text throughout this post — I wanted to share as many photos and as much information as possible that you can use to follow along. Be sure to refer to the detailed recipe card too. It has everything you need to know to get started on your own butter croissants!
Helpful tools
I prefer a French rolling pin as it allows me to add more pressure on the dough for a more even lamination. You’ll also want to invest in a kitchen scale. It’s cheap and it comes in handy not just for this recipe but for so many others. I use it daily.
I would also say that a stand mixer is extremely useful to have for making this butter croissant recipe at home. It is possible to make the dough by hand though!
Ingredients and substitutions
As always, you’ll find the complete list of ingredients and quantities in the recipe card at the end of this post. Below are some notes and substitution tips:

- All-purpose flour – for the poolish, the pre-ferment you need to make this French croissant recipe, and the dough as well. Bread flour or a mix of bread flour and all-purpose would work also, but I only used all-purpose flour to make this recipe more accessible since I expect everyone typically have all-purpose flour available on hand.
- Active dry yeast – you’ll need yeast for both the dough and the poolish. Yeast is responsible for starting the fermentation process.
- Water – warm water hydrates the dough and help with the activation of the yeast. You’ll use this for both the poolish and the dough again. Make sure it is just warm to the touch. Hot water can kill the yeast.
- Granulated sugar – adds sweetness to your croissants and also acts as food for the yeast during the fermentation process.
- Kosher salt – balances the sugar and enhances the overall flavor of the other ingredients.
- Unsalted butter – unsurprisingly, you need a lot of butter to make any good butter croissant recipe! It’s key for adding fat, which is needed for the best flavor. Avoid low or reduced-fat options as they just won’t taste the same. I wouldn’t substitute salted butter here since this will make the recipe too salty.
- Egg – to make an egg wash for a golden brown and glossy finish.
How to make a butter croissant
The following instructions, step-by-step photos, and tips are here to help you visualize how to make the recipe. You can always skip straight to the printable recipe card at the end of this post.
Day 1: Make the poolish
Start by mixing 100 grams of all-purpose flour with a pinch of active dry yeast with 100 grams of warm water in a small bowl. Cover and let it ferment at room temperature overnight for at least 15 hours — preferably even longer if you have time.

Note: When the poolish begins to bubble, as shown above, it’s ready to be used. To get to this stage, it may take longer than 15 hours depending on the temperature that day.
Day 2: Make the dough
This French croissant recipe will go a lot more smoothly when you measure out all your ingredients before starting.
To start the dough, take about a teaspoon of sugar from the total amount and add it to warm water along with the active dry yeast. Allow it to bloom for 10-15 minutes.

Add salt and the rest of the sugar to the flour and mix thoroughly.

After 15 minutes, the yeast should look puffy, as shown below. If it doesn’t, it’s best to redo this step before proceeding to ensure the yeast is activated properly.

Combine all of the ingredients including flour, softened butter, yeast, and poolish, and knead with the dough hook for 20 minutes. The dough shouldn’t be too sticky and very easy to handle. Turn the dough out from the mixing bowl onto a lightly floured counter. Use your hand to flatten it and stretch it into a small rectangle. Fold it like a letter and repeat once more.

Place the butter croissant dough in an oiled bowl and let rise for 1.5 hours. It should double in size as seen below.

While you wait for the dough to rise, prepare the butter for the lamination step. Allow the block of butter to come to room temperature first. Place the softened butter between two pieces of parchment paper. Flatten it with a rolling pin into a rectangle about 6.5″ x 7.5″. Wrap in parchment paper and chill until ready to use.

Tip: Don’t be afraid to really whack the butter with the rolling pin. The flatter it is, the easier it will be to further flatten into the butter croissant dough.
When the dough is ready, turn it out onto a lightly floured counter and use your hands to flatten it into a rectangle about 10 x 7.5 inches large. Place on a parchment-lined baking sheet, wrap in plastic, and freeze for 20 minutes.

Meanwhile, take the piece of flattened butter out of the refrigerator to allow it to soften a bit. The trick here is for the dough and butter to be at about the same softness so they act like one when you laminate. If the butter is too hard, it will break apart when you roll it out, but too soft and it will melt into the dough.
Take the dough out of the freezer and roll it out into a rectangle about 16 x 7.5 inches large. Place the cold, but slightly soft, flattened butter rectangle in the middle and fold the dough over it. Pinch the two ends to encase the butter.

Dough lamination turn 1
Position the dough so that the shorter, open end faces you. Roll out to a rectangle about 22″ x 9″, then fold into thirds like a letter. Place the folded rectangle on the baking sheet and freeze for 15-20 minutes until the dough is cold but still pliable.

Dough lamination turn 2
Take the dough out of the freezer and position it so the short end is facing you with the opening to the right. Roll it out into a rectangle about 22″ x 9″ again, fluffing, flipping, and turning the dough as you go. Fold it into thirds like a letter, then place the folded rectangle on the baking sheet and freeze for 15-20 minutes until the dough is cold but still pliable.

Dough lamination turn 3
Repeat everything in dough lamination turn 2.
End of lamination
Remove the dough from the freezer and position the short end toward you again, with the opening to the right. Roll out to a rectangle about 24″ x 9″, fluffing, flipping, and turning the dough as you go.
Cut the dough in half crosswise into two 12″ x 9″ rectangles. Place parchment paper between the two pieces. If you want to finish your French croissant recipe right away, freeze the dough for 15-20 minutes. To continue the next day, wrap it well in plastic and refrigerate overnight.

Day 3: Form the croissants
Remove the dough from the fridge (or freezer if forming the croissants on day 2), but leave one piece to rest in the fridge. Place the dough with the short end facing you and roll it out to about 18″ x 10″.
Note: The ends won’t be perfectly straight — but that’s okay because you’ll trim them off!
Place a ruler along the left edge of the rectangle and mark four 4-inch sections. You can use the tip of a knife to make five small cuts — make sure to place these cuts so they all fit in the center and away from the crooked edges.
On the right edge of the rectangle, measure the spot that will be exactly across the first cut on the left edge, then put a cut 2 inches below that spot. Make three more cuts 4 inches apart to yield three 4-inch sections on this side.

Now use a ruler to connect the opposite cuts and use a pizza cutter to cut the dough into seven isosceles triangles which you will form into butter croissants.
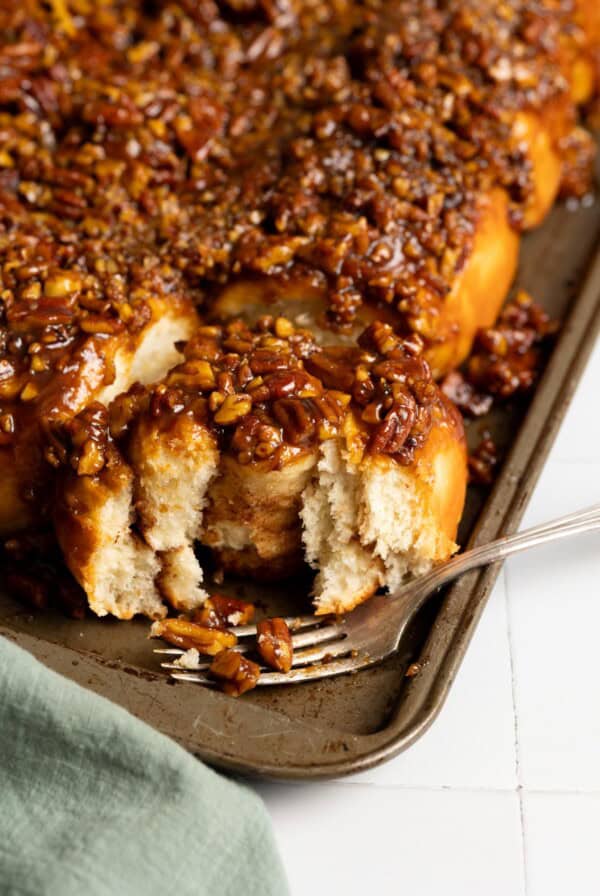
Note: Don’t throw away the scraps, I’ll show you how to make them into the most buttery delicious Cinnamon Twists!
Lightly roll each triangle out to just over 12 inches long, evening out the base of the triangle if it is slightly thicker than other parts. Trim about a quarter inch off the base to expose the laminated layers, then roll it up. Place the formed croissant on a parchment line baking sheet at least 2 inches apart.

Repeat all of the steps above with the second piece of dough that you left in the fridge to rest. Allow the croissant to proof up to 5 hours at room temperature, then brush with egg wash before baking. Make sure to allow croissants to rest before serving — they’ll continue to cook slightly after you take them out of the oven.

Note: A room temperature between 75-80 degrees F is ideal, so avoid over-proofing the dough if you live in a warmer climate.
Storage
My French croissants recipe makes 14 croissants. Store leftovers in an airtight container in the refrigerator if you plan on enjoying them within 1-2 days. Otherwise, you can freeze them for up to 1 month.
If you do plan on freezing, I suggest holding off on baking until you’re ready to serve. Unbaked, already-formed croissants will keep for up to 2 months in the freezer. You’ll have to let them thaw and proof at room temperature for 6-8 hours (or overnight), but the taste and texture will be much better.
As another note on storage, like I mentioned above, be sure to save the dough scraps for another use instead of throwing them away! It’s a great puff pastry substitute. You can keep them in an airtight container in the fridge for up to 1-2 days.

Hungry for more?
Homemade Butter Croissant Recipe

Equipment
Ingredients
Poolish
- 100 g all-purpose flour, ¾ cup
- 100 g warm water, ½ cup
- A pinch of active dry yeast
Dough
- 500 g all-purpose flour, 3 ½ cup + 2 tablespoon
- 75 g granulated sugar, ¼ cup + 2 tablespoon + 1 ½ teaspoon
- 15 g kosher salt, 2 ½ teaspoon
- 100 g unsalted butter, about 3.5 oz
- 10 g active dry yeast, 1 tablespoon
- 200 g water, about 1 cup
For Lamination
- 330 g unsalted butter in one block, about 11.6 oz
Egg wash
- 1 egg
- 1 tablespoon of water
Instructions
Day 1 – Make the poolish
- Mix 100 g of AP flour with a pinch of active dry yeast and 100 g of warm water in a small bowl, cover and let ferment at room temperature over night, for at least 15 hours and preferable longer.
Day 2 – Make the dough
- Cube 100 g of unsalted butter and allow to soften at room temperature before mixing into the dough.
- Also let the big block of butter to be used for lamination soften at room temperature.
- Measure out all ingredients in separate bowls to ensure a smooth process.
- Warm the water to about 100°F and add it to the stand mixer bowl.
- Stir in 2 teaspoons of sugar and the yeast and let bloom for at least 15 minutes. Use sugar from the amount specified in the ingredient list and not in excess.
- When the yeast mixture is puffy, add the rest of the ingredients to the bowl including the poolish, flour, remaining sugar, salt and soften butter.
- Knead with the dough hook for 20 minutes.
- Grease a large glass bowl with oil.
- Turn the dough out from the mixing bowl onto a lightly floured board or counter. Flatten with your hand and stretch into a small rectangle, fold it like a letter. Repeat once more.
- Place the dough into the oiled bowl and let rise for 1.5 hours.
- Place the big block of butter on top of a piece of parchment paper, place another piece of parchment paper on top of the butter and flatten it with a rolling pin into a rectangle about 6.5” x 7.5”. Wrap it up in parchment paper and refrigerate until ready to use.
- When the dough in the bowl has risen, turn it out onto a lightly floured counter and flatten by hand into a rectangle about 10” x7.5”, place on a parchment line baking sheet, wrap with plastic and place in freezer for 20 mins.
- Meanwhile, take the piece of butter you prepared early out of the refrigerator to allow it to soften a bit.
- Take the dough out of the freezer and roll out into a rectangle about 16” x 7.5”.
- Place the cold but slightly soft flattened butter rectangle in to the middle and fold the dough over it. Pinch the two ends to encase the butter.
- Dough lamination turn 1: turn the dough so the short end/open end faces you and roll out to a rectangle about 22”x9”. Fold into third like a letter. Place the folded rectangle on the baking sheet and freeze for 15-20 minutes until the dough is cold but still pliable.
- Dough lamination turn 2: take the dough out of the freezer and place the short end facing you again with the opening to the right, roll out to a rectangle about 22”x9”, fluffing, flipping and turning the dough as you go. Fold into third like a letter. Place the folded rectangle on the baking sheet and freeze for 15-20 minutes until the dough is cold but still pliable.
- Dough lamination turn 3: repeat everything in dough lamination turn 2.
- End of lamination: take the dough out of the freezer and place the short end facing you again with the opening to the right, roll out to a rectangle about 24”x9”, fluffing, flipping and turning the dough as you go. This time, cut the dough in half crosswise into two 12”x9” rectangle. Place parchment paper between the two pieces. At this point, to continue working, freeze the dough for 15-20 minutes. Or if you want to continue the next day, wrap well and refrigerate overnight.
Day 3 (or day 2 continuation) – Form the croissants
- Take the dough out of the freezer (or fridge), work with one piece at a time while the other one rest in the refrigerator. Place the dough with the short end facing you and roll out to about 18”x10”. The ends are not going to be perfectly straight. That’s okay, we will trim them off.
- Place a ruler along the left edge of the rectangle and mark four 4” sections. You can use the tip of a knife to make 5 small cuts, make sure to place these cuts just so they all fit in the center and away from the crooked edges.
- On the right edge of the rectangle, measure the spot that will be exactly across the first cut on the left edge then put a cut 2” below that spot, make 3 more cuts 4” apart to yield three 4” sections on this side.
- Now use a ruler to connect the opposite cuts and use a pizza cutter to cut the dough into seven isosceles triangles which you will form into croissants.
- Lightly roll each triangle out to just over 12” long, even out the base of the triangle if it is slightly thicker than other parts. Trim about ¼” off the base to expose the laminated layers. Roll it up. Place the formed croissant on a parchment line baking sheet at least 2” apart.
- Repeat all the steps above with the second piece of dough.
- Sprinkle plastic wrap with some flour and cover the baking sheet. Let proof at room temperature for 4-5 hours.
- Preheat oven to 325°F.
- Beat one egg with 1 tablespoon of water to make egg wash.
- Brush egg wash lightly all over each croissant.
- Bake one tray at a time for 35-40 minutes.
- Cool on a wire rack before serving.
Notes
- Work as quickly as you can during the dough lamination steps. At any time during these steps, if you feel that the dough is getting too warm or too elastic. Pop it back into the freezer for 5 minutes to keep it cold so the butter doesn’t melt into the dough, and to relax the gluten.
- Use only as much flour as needed while rolling to keep dough from sticking. This dough should be very easy to handle and should not require a lot of extra flour, except for perhaps at the very end.
- Save the dough scraps in a container and refrigerate or freeze for another recipe at the end of this series.
Nutrition
Nutrition information is automatically calculated, so should only be used as an approximation.
 Like this recipe? Rate & comment below!
This recipe is adapted from Thomas Keller’s Bouchon Bakery.
This post may contain affiliate links. For more details on how we utilize affiliates, ads, and sponsored content, see our full disclosure policy. Thank you for your continued support, which enables us to keep bringing you delicious recipes, at no extra cost to you.


I love this recipe – really, this whole series on croissants! I’ve tried making croissants a few times with other recipes, and they never turned out right, but these were perfect! I appreciate that you include instructions for making these over 2 or 3 days, and I LOVE that you also have a recipe for the scraps instead of just wasting them. Very approachable, great results, highly recommend
Thank you Kristen for the wonderful review! I’m so glad you find this series helpful 🙂
How long can I freeze the dough for after day 2? I’d like to make half of the batch and keep the other half frozen for now.
You should keep going and shape the croissants before freezing them. If you freeze the dough, it will be tricky to thaw and shape it from frozen, my gut says thawing it could mess with the lamination if some of the butter end up melting. Once you shape the croissants, you can freeze it for months, just thaw and proof before baking.
Oh, no. I’ll just buy croissants. But. Maybe, just maybe…try to do it. Thanks for sharing this recipe
It’s a fun recipe to try when you have some times on the weekend 🙂