
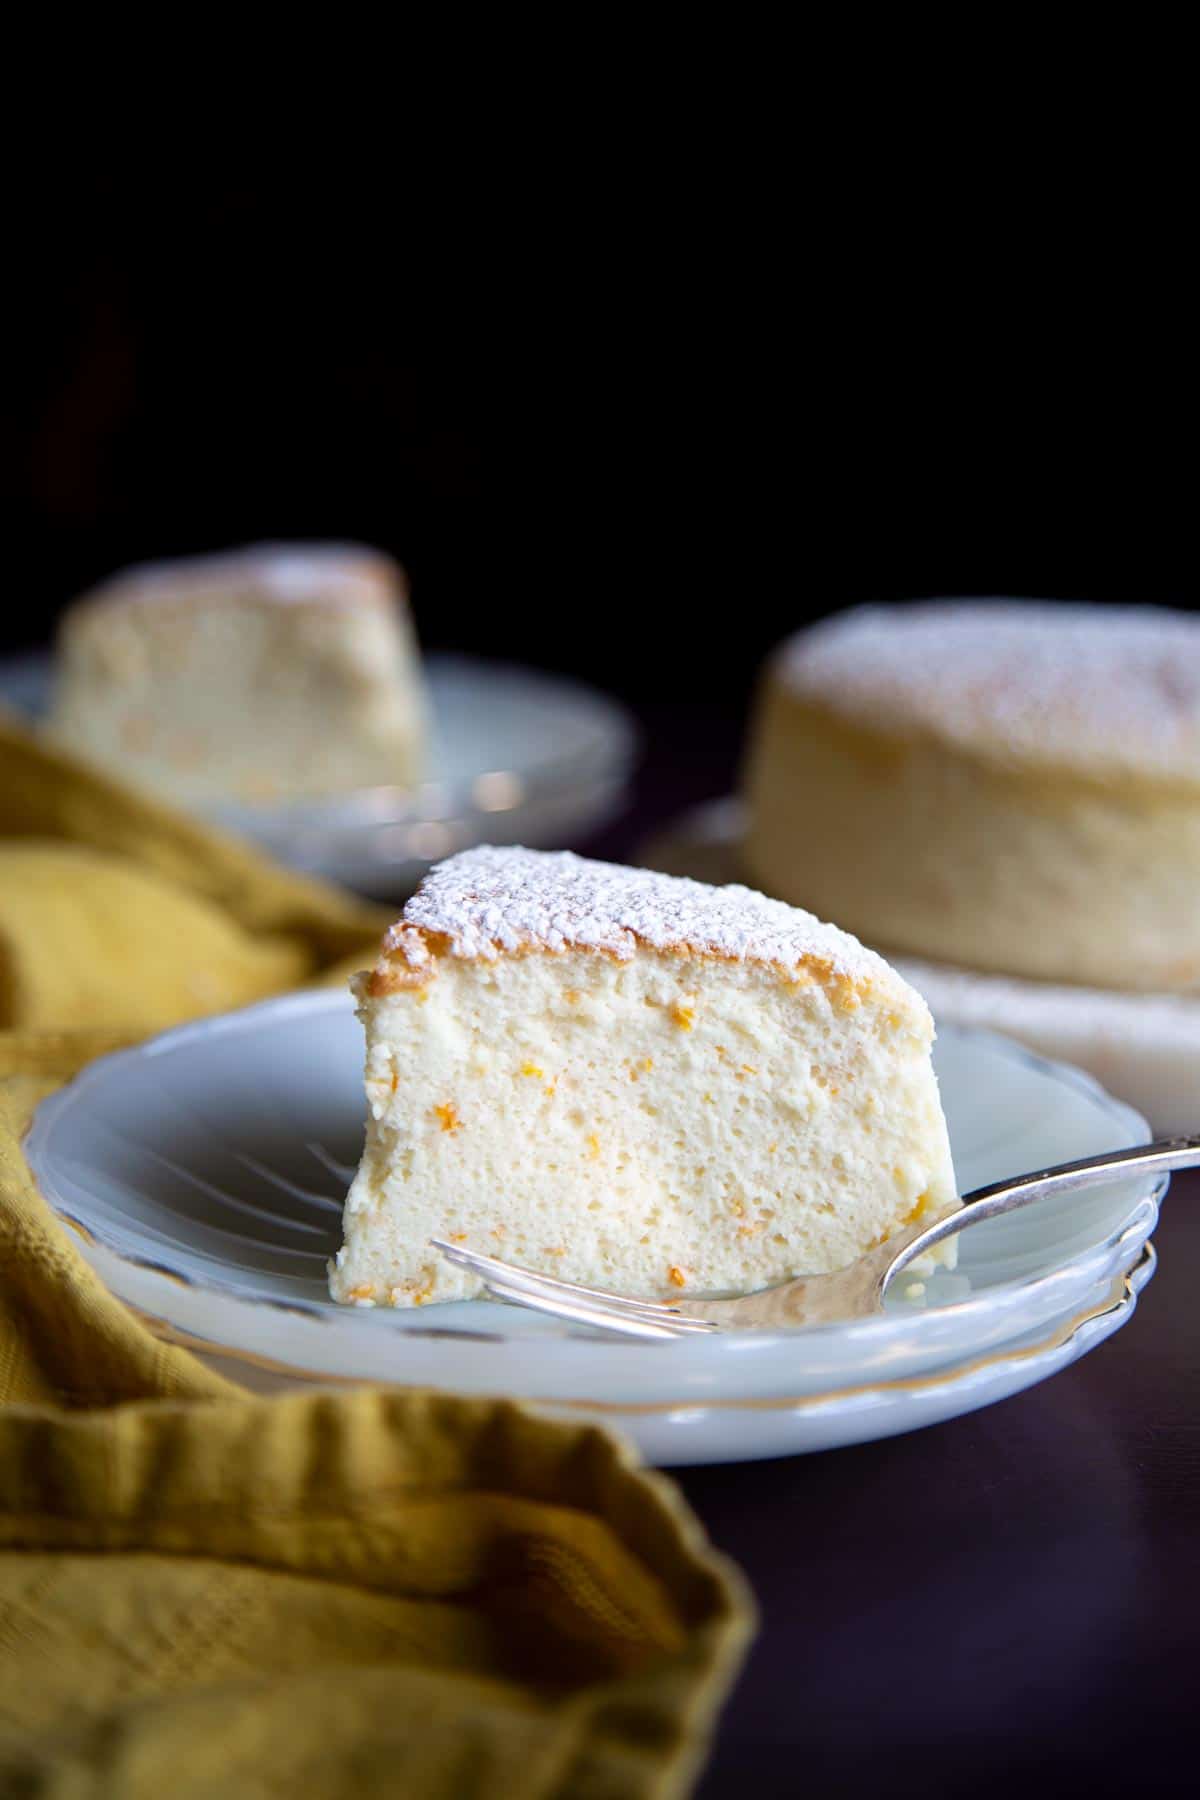
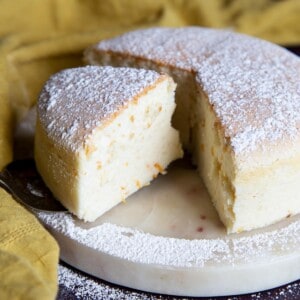
Light, fluffy and jiggly Japanese cheesecake is the perfect marriage between a cheesecake and a sponge cake. This wonderful dessert is mildly sweet with a slight tang and a melt-in-your-mouth texture.
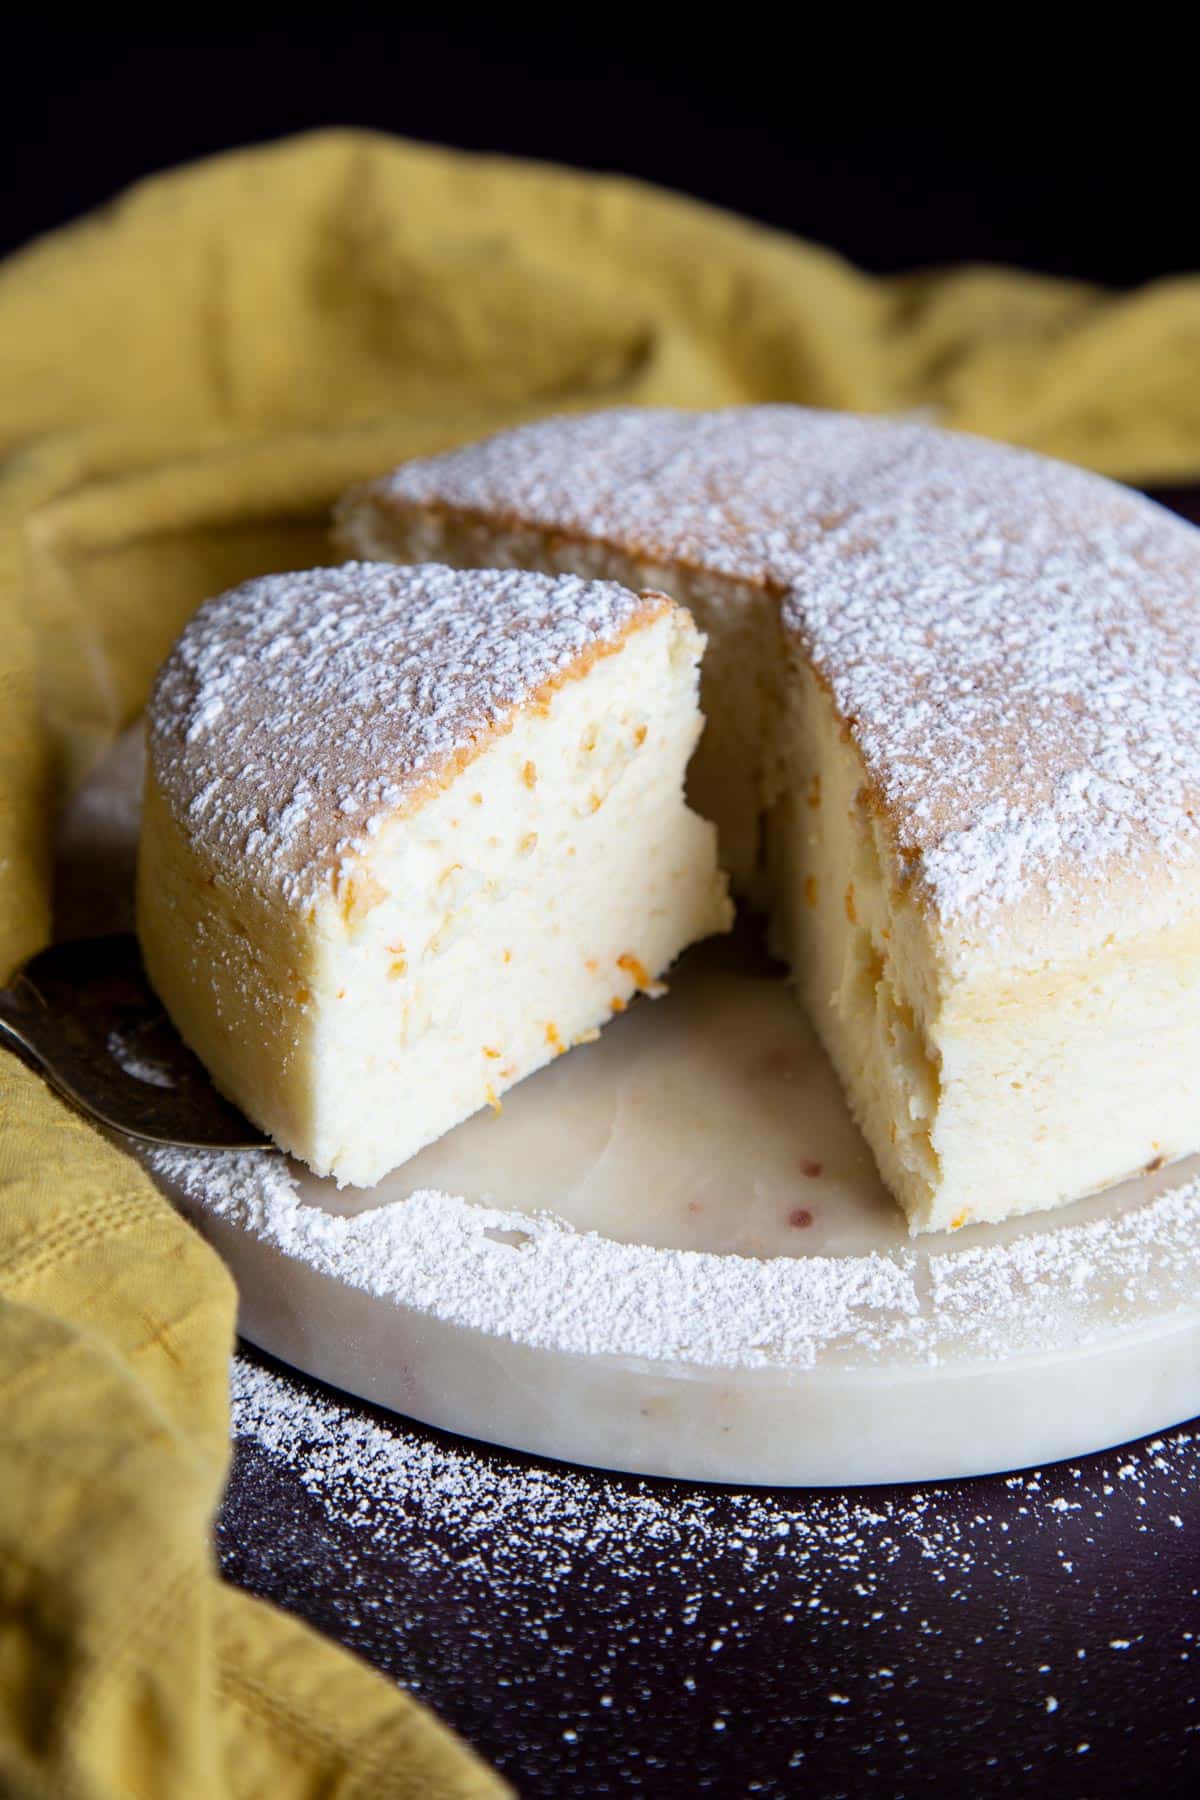
This Japanese cotton cheesecake is so soft and fluffy. It is like eating a cloud! I made this mini Japanese cheesecake in a 7” cake pan, just the perfect amount of cake if you’re not making it for a crowd since this cheesecake tastes best if eaten within a couple days.
Table of Contents
What is Japanese cheesecake?
There are actually three types of cheesecakes in Japan:
- Baked cheesecake – which is like the typical cheesecake we are familiar with.
- Rare cheesecake – this is a no-bake cheesecake that is set with gelatine.
- Soufflé cheesecake – this is the fluffy cotton cheesecake that we will be making today.
The soufflé cheesecake or cotton cheesecake is the most well known Japanese cheesecake and is super popular due to its unique soufflé texture, achieved by incorporating meringue into the cheesecake batter, which makes it light and fluffy instead of the typical dense and rich cheesecake.
The Japanese cotton cheesecake is only mildly sweet, light and airy and not too rich. So it is perfect for those who prefer a less sweet treat. Some might think it is too eggy because it does use a lot of egg whites to create volume.
Why you’ll love this recipe
- This Japanese cotton cheesecake has all the delicious qualities of a cheesecake without being too rich or too sweet.
- It is soft and light like a sponge cake with the tanginess and richness of a cheesecake.
- It is the perfect size for a small celebration without too much leftovers .
- The recipe is a little bit involved but due to the small size, it is actually very simple to prepare.
Ingredients and substitutions
As always, you’ll find the complete list of ingredients and quantities in the recipe card at the end of this post. Below are some notes and substitution tips:
- Cream cheese – this is the main ingredient that gives this cheesecake its tanginess and cheesiness.
- Butter – I use unsalted butter for this recipe but since it is such a small amount I think you can get away with using salted butter in its place.
- Milk – I recommend using whole milk here.
- Eggs – one egg yolk and three egg whites are used in this recipe. We use a lot more egg whites here to create a fluffy soufflé texture.
- Flour – I use cake flour for this cheesecake. If you don’t have cake flour, you could easily substitute all-purpose flour and cornstarch. Simply replace 1 ½ teaspoons of the flour for cornstarch in this recipe.
- Sugar – regular granulated sugar is all you need.
- Salt – just a tiny bit of kosher salt is used to enhance the flavor.
- Vanilla extract – while vanilla is not the main flavor in this cheesecake, it is used to add complexity and enhance the overall flavor profile.
- Orange zest – fresh orange zest gives this cheesecake a light and fresh flavor.
- Lemon juice – lemon juice is used to stabilize the meringue before it is folded into the cheesecake batter. You can substitute vinegar or cream of tartar.

Tools you’ll need
- A stand mixer or electric hand mixer would be helpful in making the meringue.
- A 7” springform cake pan for the cheesecake, this will make removing the cake from the pan a breeze.
- An 8” cake pan to put the springform pan in before it goes into the water bath. This is to prevent water from seeping into the springform pan since it is not water tight.
- A roasting pan to create a water bath for the cheesecake to bake in.
How to make Japanese souffle cheesecake
The following instructions, step-by-step photos, and tips are here to help you visualize how to make the recipe. You can always skip straight to the printable recipe card at the end of this post.
Add cream cheese, butter, and milk to a large measuring cup or heat proof mixing bowl and microwave for 1 minute. Then whisk until smooth.

Beat one egg yolk in a small bowl and slowly drizzle in the warm cream cheese mixture while whisking.
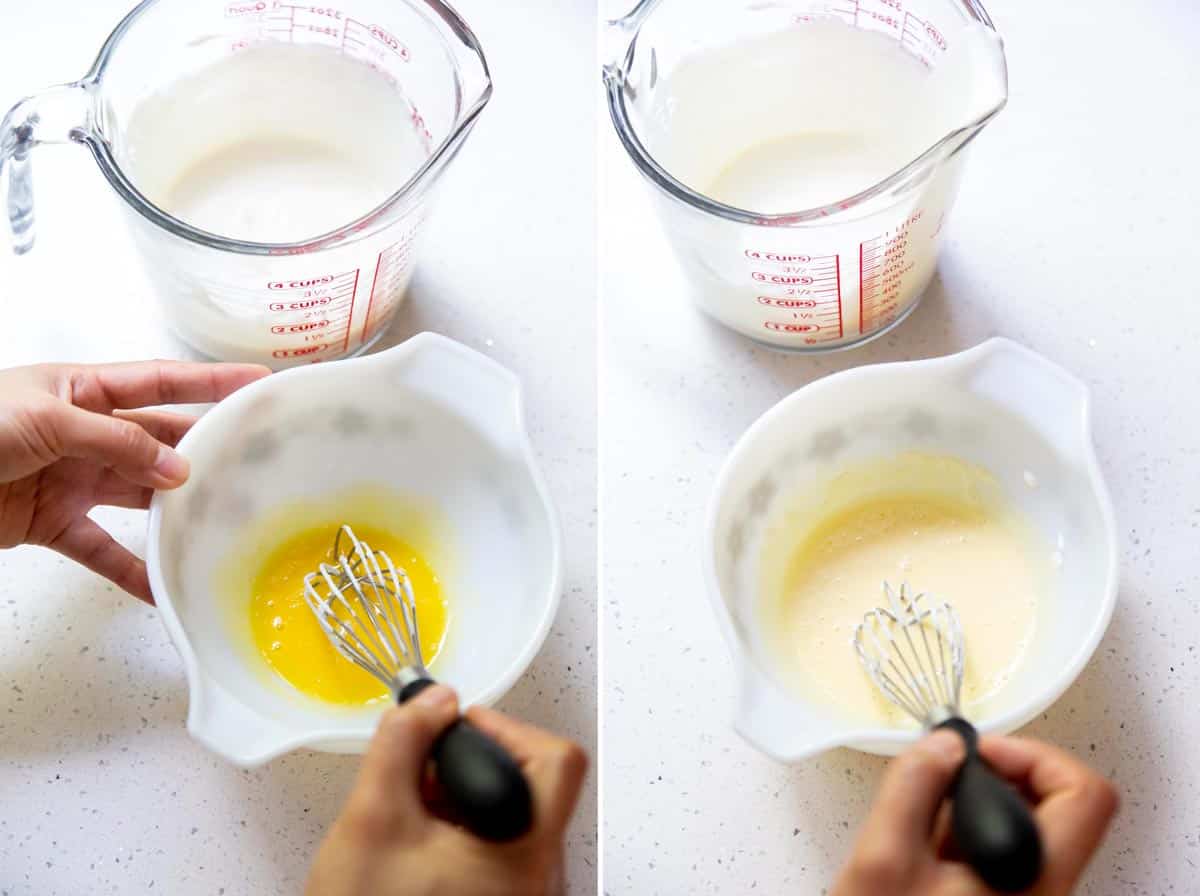
Tip: The reason you’ll want to slowly add the warm cream cheese mixture to the egg yolk instead of just adding the egg yolk directly into the warm cream cheese mixture is so that it doesn’t cook the egg.
Once you’ve added half of the cream cheese mixture into the egg yolk, you can transfer the egg mixture back into the other half of the cream cheese mixture in the measuring cup and beat to combine.

Add vanilla, salt, half the sugar, and sift the cake flour into the liquid mixture. Whisk until smooth.
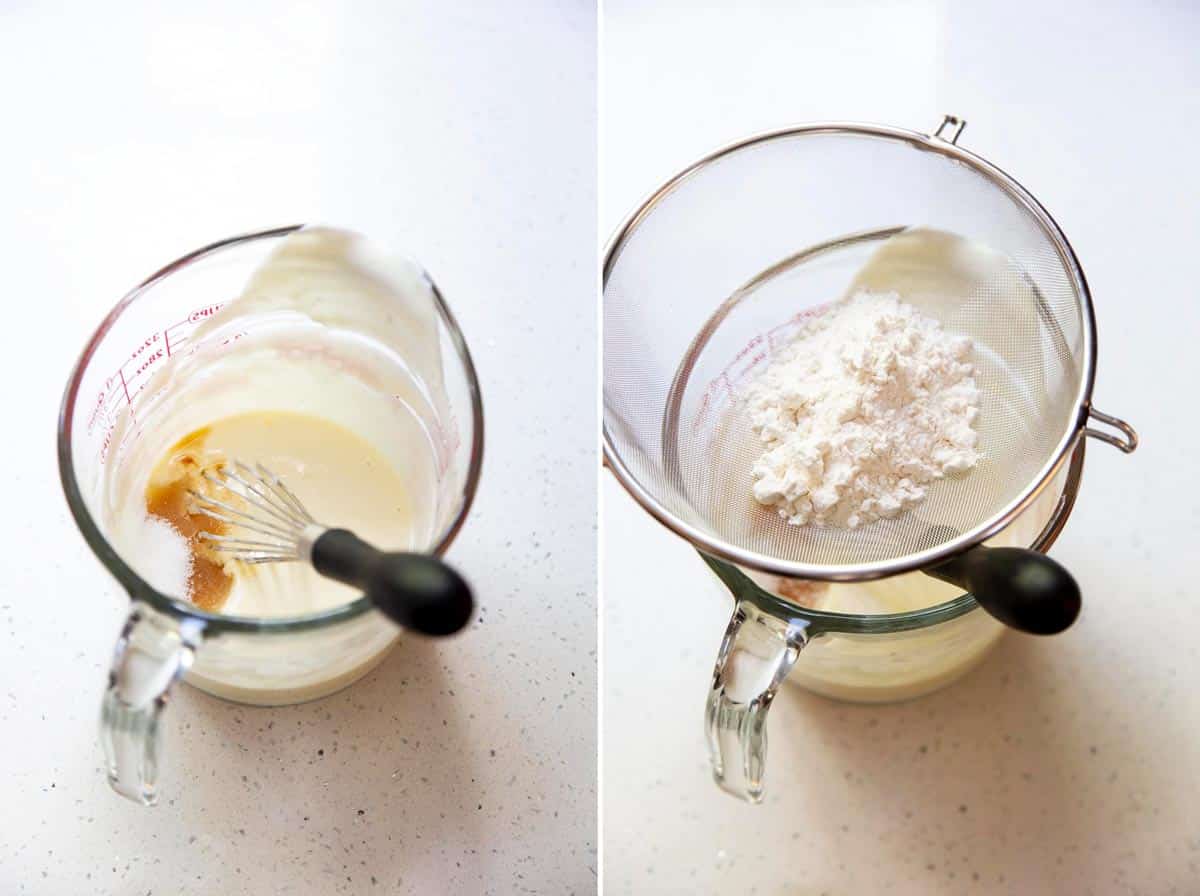
Pour the batter over a fine-mesh sieve to get rid of any lumps. Stir the orange zest into the strained batter.

Tip: Make sure to add the orange zest after you strain the batter not before, otherwise the zest will get strained out and your cheesecake won’t have the refreshing orange flavor.
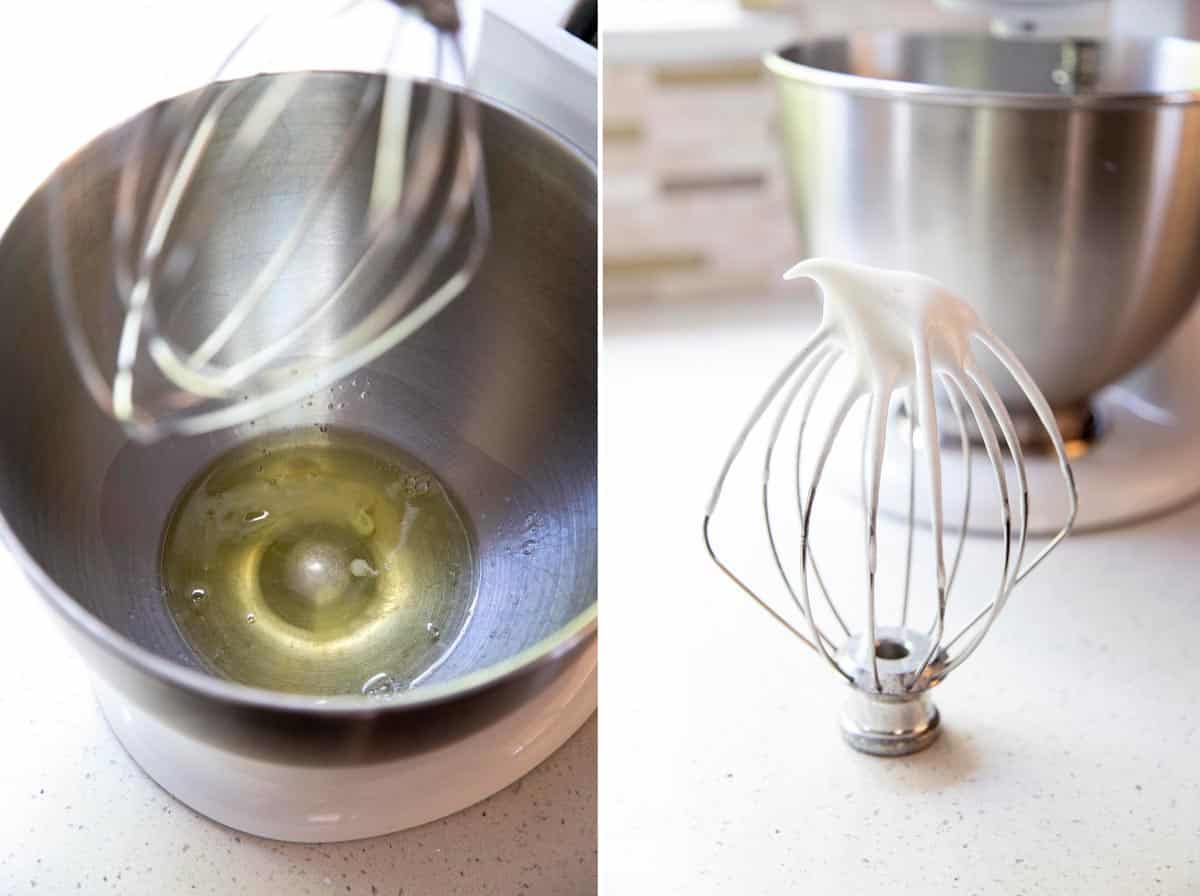
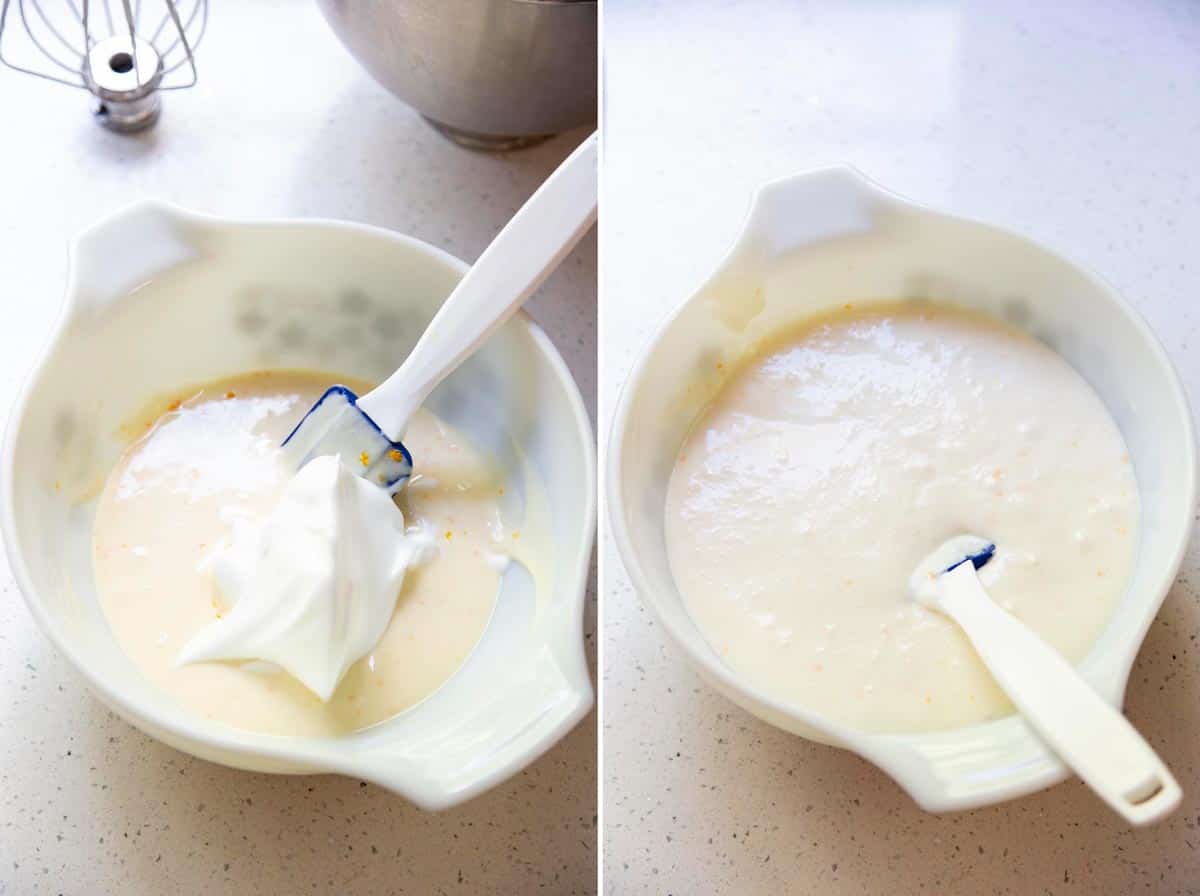
Beat egg whites in the stand mixer bowl with the whisk attachment on medium speed until frothy, slowly stream in the remaining sugar, halfway through, add 1 teaspoon of lemon juice, continue streaming in the rest of the sugar and beat until medium peak.
Fold the meringue into the cheesecake batter, a quarter at a time until finished and thoroughly combined.
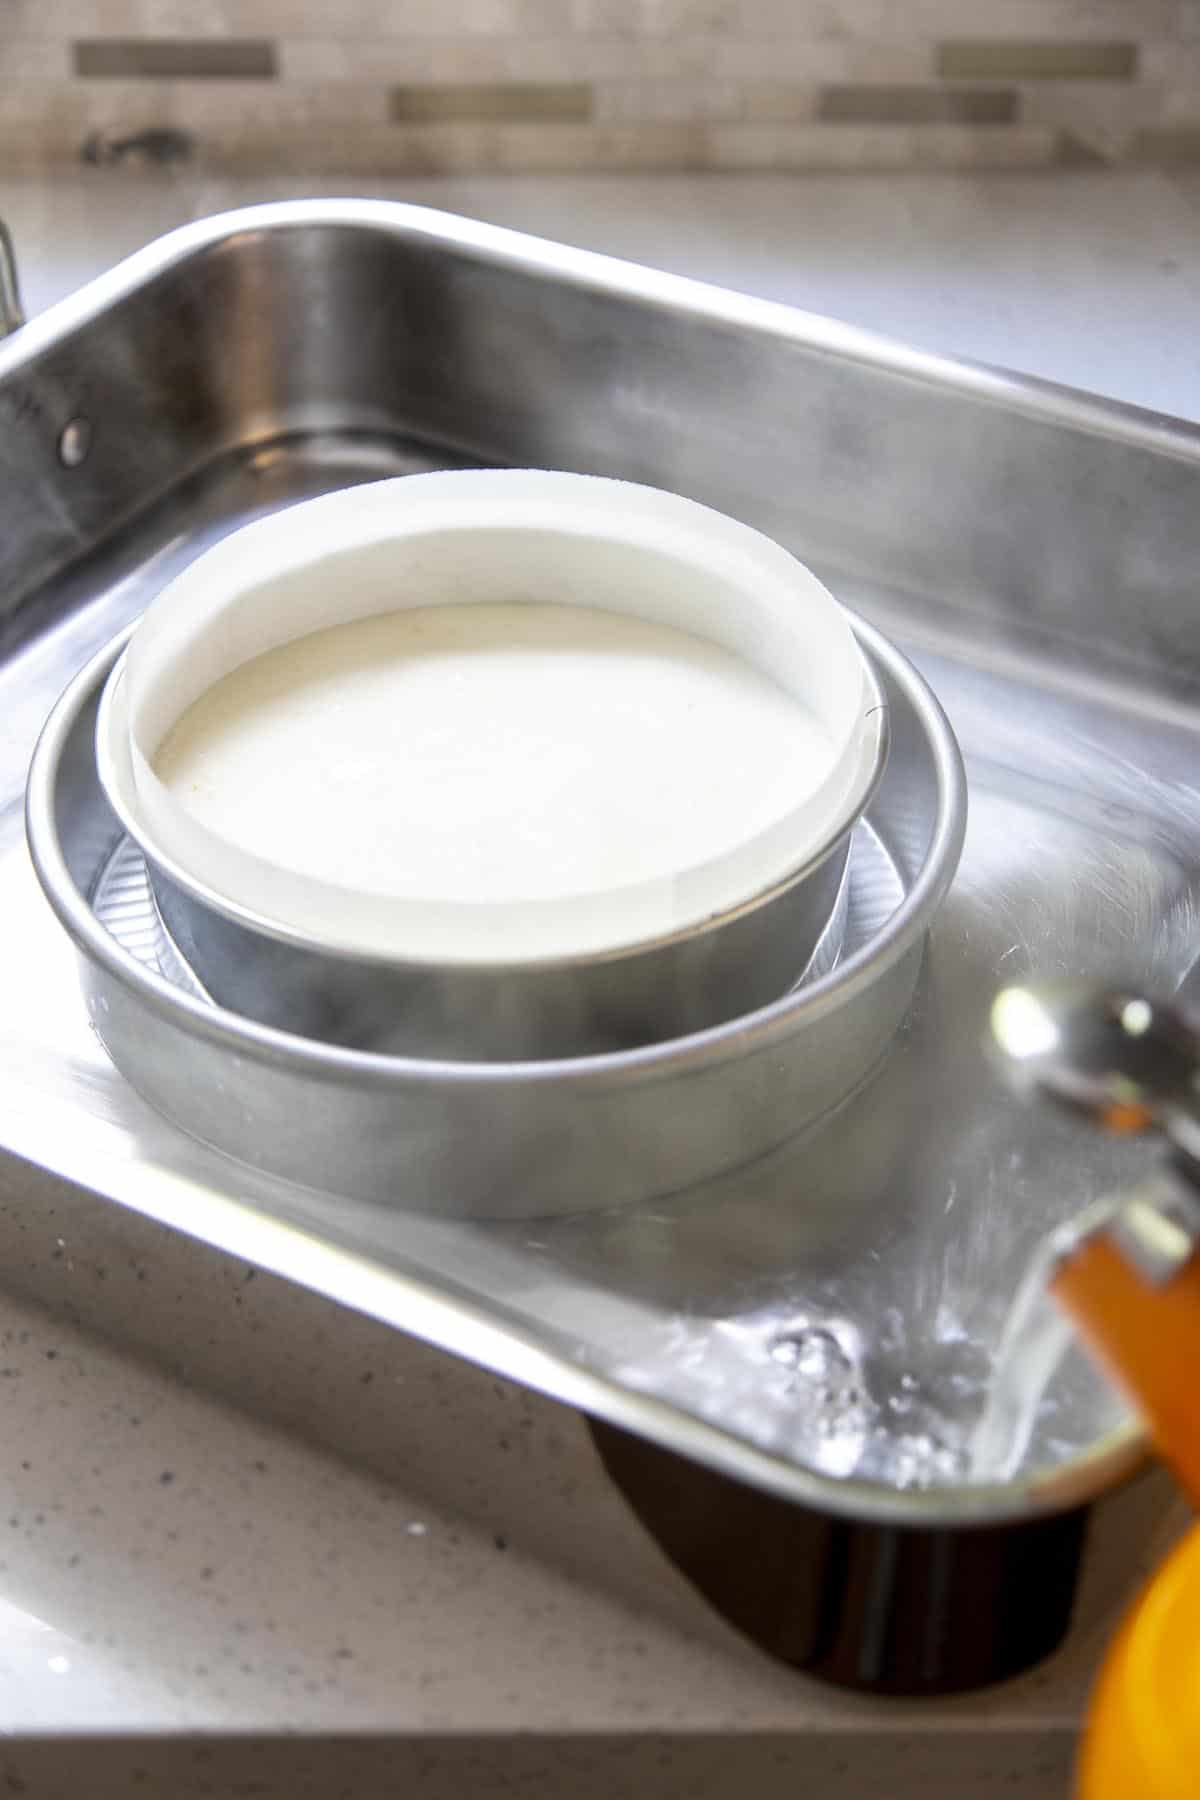
Pour cheesecake batter into a prepared cake pan and place it into a larger non-springform cake pan (I use an 8” cake pan). Then place the whole thing in a roasting pan or any larger pan that can act as a water bath.

Pour boiling water into the roasting pan to create a water bath. Carefully transfer the whole thing into the oven. Bake on the middle rack.
Oven temperature
I start my oven at 400°F but this is not the temperature I’m baking at. The reason to start high is because once you open the oven and place the water bath in, the temperature will reduce. So you don’t want to start at the baking temperature because then the oven will actually be at a lower temperature.
I then immediately lower the oven temperature to 350°F and bake for 15 minutes. This is to get the cheesecake to rise.
Next, I lower the oven temperature to 300°F and bake for 60 minutes. This is to ensure the cheesecake will be cooked all the way through.
Then I increase the oven temperature to 350°F and bake for another 15 minutes. This is to brown the top.
I’ve tested this recipe at lower oven temperature but I found that the cheesecake doesn’t get very brown. So 350°F and 300°F are my preferred temperatures. However, you need to consider what your oven temperature runs at, whether it is hotter or cooler than usual and adjust for it so the cake doesn’t get overly brown or underbaked.
More baker’s tips
- Don’t use foil to wrap your springform pan because water can still leak into the pan and ruin your cheesecake. I’ve experienced this before while baking a regular cheesecake and hence I’m recommending using a second cake pan between the springform pan and the water bath.
- Cool slowly – allow the cheesecake to cool inside the oven will prevent it from shrinking or collapsing which can happen when it is cooled too quickly.
- Cool completely or chill before serving – this cheesecake is best when served chilled in my opinion. Chilling it allows all the flavors to develop and brings out the tanginess of the cream cheese.
- Use a baine-marie (water bath) – make sure you use a water bath in this recipe. The purpose of the water bath is to regulate the temperature around the cheesecake and allow it to bake gently, preventing cracks from forming.
- If you don’t have a springform pan – use a regular cake pan but also line it with 2 pieces of long parchment paper so you can use them as handles to lift the cake out later. If using a regular cake pan, you can place it directly in the water bath.
How to serve this cheesecake
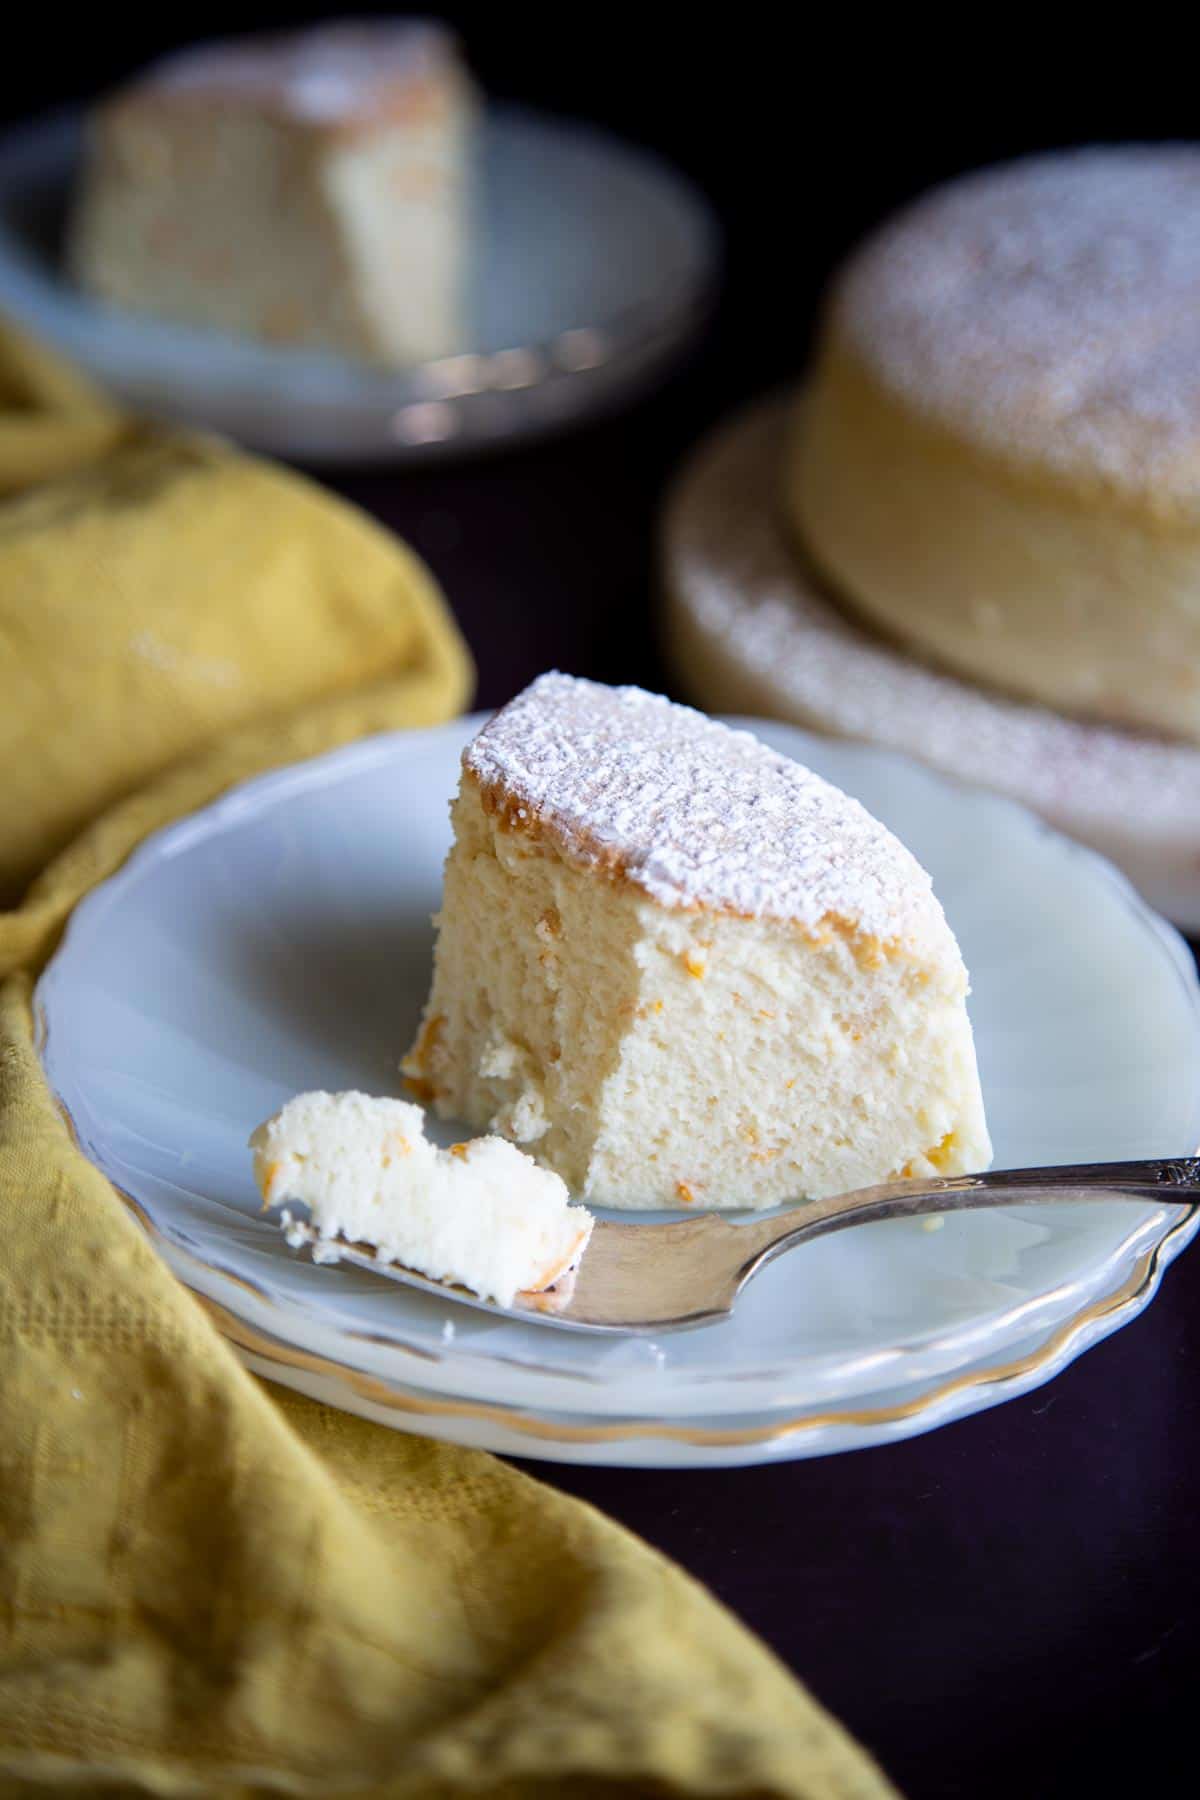
- You can serve this simply with a dusting of powdered sugar.
- I’ve seen cotton cheesecake at Japanese grocery stores served with a layer of apricot jam on top.
- Or you can add whipped cream and fresh berries.
Storage
This fluffy Japanese cheesecake will last 3-4 days in the refrigerator. And while I have never tried freezing this cheesecake, I think it should last up to 3 months in the freezer like other cakes do.
FAQs
This Japanese cheesecake recipe uses meringue to lift the batter much like in a soufflé. This gives it a light, fluffy and airy texture, and sometimes a more eggy taste. Whereas a typical cheesecake is denser, richer and with a stronger taste of cream cheese than egg.
When you first finish baking, this cheesecake will be at its maximum volume and it will shrink as it cools. It shouldn’t collapse but it will shrink a bit once cooled completely.
There are a few factors that could cause cracking. Over-whipping meringue could cause this so make sure you don’t whip it to stiff peak, the peak should be slightly droopy (see process photos above). If your oven temperature is too hot, the outside will set quickly before the inside expands causing the cheesecake to crack, so if your oven tends to run hot, bake it at an even lower temperature. Finally, make sure to use a water bath for a gentle bake.
More Japanese inspired recipes
- Anpan (Japanese Red Bean Bun)
- Milk Bread
- Matcha Butter Shortbread Cookies
- Matcha Cupcakes
- Green Tea Mochi
Hungry for more?
Japanese cheesecake
Equipment
- 7” Springform Cake Pan
Ingredients
- 6 oz cream cheese, 170 g
- 1 oz unsalted butter, 28 g
- 2 oz whole milk, 56 g
- 1 large egg yolk
- 1 teaspoon vanilla
- ¼ cup cake flour, 33 g
- ⅛ tsp kosher salt
- 6 tbsp granulated sugar, 74 g, divided
- 3 large egg white, ~100 g
- 1 teaspoon lemon juice
- Zest of 1 orange
Instructions
- Butter and line both the bottom and the side of a 7” springform pan with parchment paper. For the side, cut the parchment paper so it extends beyond the height of the pan (see process photo within post for visual).
- Microwave cream cheese, butter, and milk for 1 minute. Whisk until smooth.
- Beat the egg yolk in another bowl and slowly drizzle in the cream cheese mixture into the beaten egg yolk while whisking. Once you’ve beaten half of the cream cheese mixture into the egg yolk, you can add the egg mixture back into the other half of the cream cheese mixture and beat to combine.
- Add vanilla, salt, half the sugar, and sift the cake flour into the egg mixture. Whisk until smooth and pour over a fine-mesh sieve to get rid of any lumps. Stir the orange zest into the strained batter.
- Preheat the oven to 400°F and boil water in a pot or tea kettle on the stove top.
- Beat egg whites in the stand mixer bowl with the whisk attachment on medium speed until frothy, slowly stream in the remaining sugar, halfway through, add 1 teaspoon of lemon juice, continue streaming in the rest of the sugar and beat until medium peak.
- Fold the meringue into the cheesecake batter, a quarter at a time until finished and thoroughly combined.
- Pour cheesecake batter into the prepared cake pan and place into a larger non-springform cake pan (I use an 8” cake pan). Then place the whole thing in a roasting pan or any larger pan that can act as a water bath (see process photo within the post for visual).
- Pour boiling water into the roasting pan to create a water bath. Carefully transfer the whole thing into the oven. Bake on the middle rack.
- Immediately lower the oven temperature to 350°F and bake for 15 minutes. Lower the oven temperature again to 300°F and bake for 60 minutes. Then increase the oven temperature to 350°F and bake for another 15 minutes. Turn off the oven and let the cheesecake cool in the oven for 1 hour with the oven door cracked open.
- Remove cheesecake from the oven and let cool completely before unmolding and serving.
Notes
- Don’t use foil to wrap your springform pan because water can still leak into the pan and ruin your cheesecake. I’ve experienced this before while baking a regular cheesecake and hence I’m recommending using a second cake pan between the springform pan and the water bath.
- Cool slowly – allow the cheesecake to cool inside the oven will prevent it from shrinking or collapsing which can happen when it is cooled too quickly.
- Cool completely or chill before serving – this cheesecake is best when served chilled in my opinion. Chilling it allows all the flavors to develop and brings out the tanginess of the cream cheese.
- Use a baine-marie (water bath) – make sure you use a water bath in this recipe. The purpose of the water bath is to regulate the temperature around the cheesecake and allow it to bake gently, preventing cracks from forming.
- If you don’t have a springform pan – use a regular cake pan but also line it with 2 pieces of long parchment paper so you can use them as handles to lift the cake out later. If using a regular cake pan, you can place it directly in the water bath.
Nutrition
Nutrition information is automatically calculated, so should only be used as an approximation.
 Like this recipe? Rate & comment below!
This post may contain affiliate links. For more details on how we utilize affiliates, ads, and sponsored content, see our full disclosure policy. Thank you for your continued support, which enables us to keep bringing you delicious recipes, at no extra cost to you.


Can I make this in an 8″ springform pan? Will any of the cooking times change?
Hi Dina, this recipe makes a pretty small cheesecake so if you use an 8″ pan, it will be a bit thinner. I did not test it with an 8″ pan so I can’t say for sure how it would change the cooking time. I think it will cook faster because of the thinner layer, you can try lower the baking time at 300F to 45 mins. But again, I really don’t know for sure.