
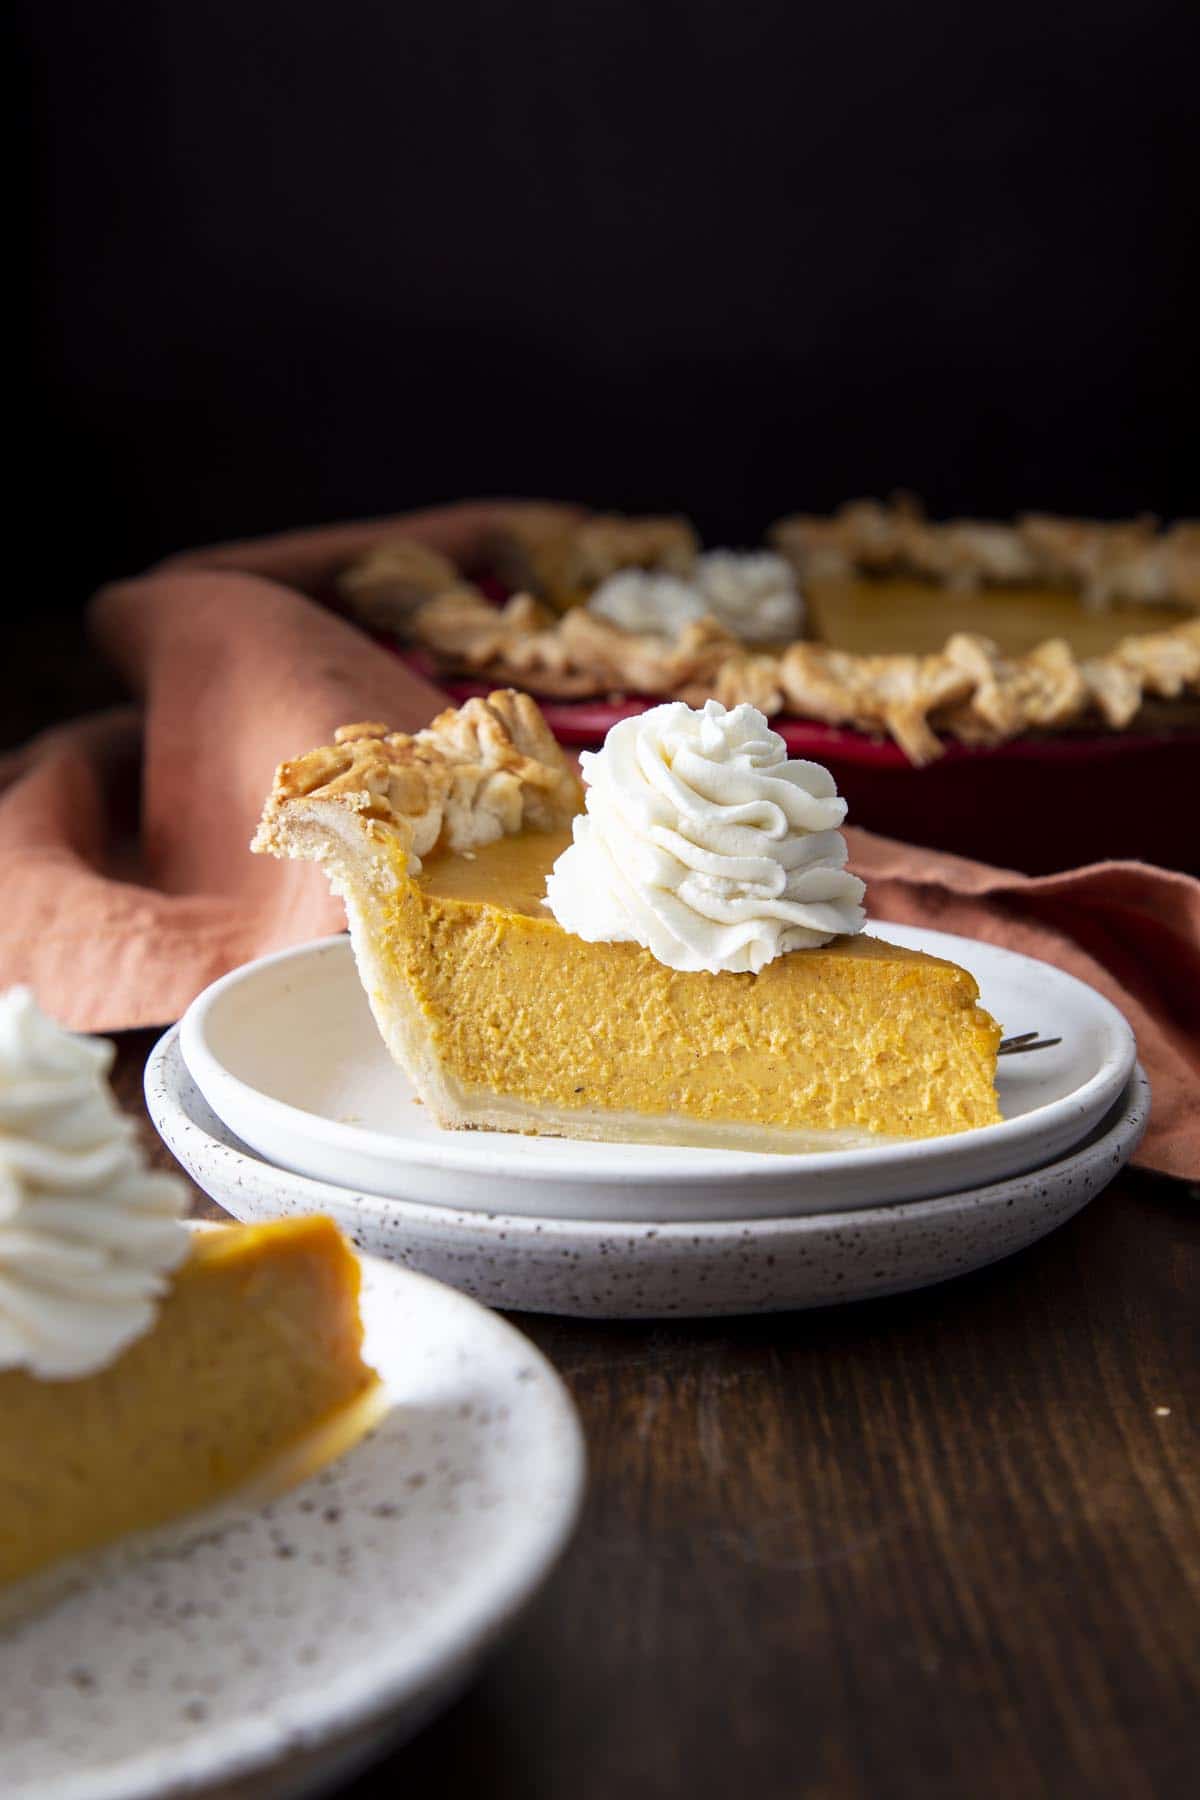
Pumpkin Pie is one of my favorite Thanksgiving pies. This special recipe has been making an appearance at our family Thanksgiving dinner for the past 10 years plus. Read on to find out the special ingredients in making this pie extra creamy!
This pumpkin cream cheese pie recipe was given to me by my husband’s aunt years ago, way before we started hosting Thanksgiving at our house. Since then, I’ve perfected it and given it an upgrade with a homemade all-butter pie crust!
Table of Contents
Why you’ll love this recipe
- Addicting in the best way possible! I truly can’t remember the last time I had a pumpkin pie that didn’t contain cream cheese. Once you’ve tried this pumpkin pie recipe with cream cheese, you won’t want to go back to regular pumpkin pie ever again!
- So creamy! Thanks to the cream cheese as well as condensed milk, every bite of this pumpkin cream cheese pie is super creamy with a cheesecake like quality and decadence. It keeps you coming back for more.
- Save time with store bought pie crust – While I think homemade pie dough is always the best and will elevate any pie recipe to the next level, I am certainly not against simplifying the process with frozen pie crust or refrigerated pie dough. You will still end up with the most delicious pumpkin pie cheesecake that is sure to win that pie baking contest.
Tools you’ll need
Depending on whether you’ll make your own pie dough or make any decorations for the crust, you will need some of these tools for this pumpkin cream cheese pie recipe.
- A food processor or stand mixer will help with making your homemade pie dough. But you can also make it by hand if you don’t have these tools.
- A rolling pin – I like French rolling pins for their tapered edges, which allows for more control when rolling out the dough.
- A 9-inch deep dish pie pan for baking. If you only have smaller 8″ shallow pie pans, you will be able to bake 2 pies with the filling made from this recipe.
- Pie weights to weigh down the crust when par-baking it. You can also use uncooked beans or rice. I personally have a couple pounds of dry beans just for this purpose.
- Parchment paper to line the crust while par-baking. You don’t want to pour pie weights directly on to the pie crust. Parchment paper will also allow you to lift out the pie weights easily.
- Pie shield is used to shield the edges from getting burned in the oven. I have a silicone shield but actually prefer using foil. I just tear off long strips and wrap it loosely around the pie crust to protect it from burning.
- Fall or Thanksgiving inspired pastry stamps to make decorations for the crust.
- Pastry brush to use with egg wash.

Ingredients and substitutions
As always, you’ll find the complete list of ingredients and quantities in the recipe card at the end of this post. Below are some notes and substitution tips:
- Flour – all purpose flour will work just fine for the pie crust. But you can use pastry flour if you wish; pastry flour has a lower protein content which will yield a more tender crust.
- Sugar – I like my pie crust on the sweeter side so I use granulated sugar to add sweetness. Feel free to adjust to your taste.
- Salt – For the pie crust, salt is added to round out the flavor. Don’t skip the salt as it adds complexity and enhances the flavor of desserts.
- Butter – I use unsalted butter for the pie crust. You can substitute salted butter if you’d like, just make sure to skip the salt called for separately in this case.
- Water – I use cold water to bring the pie dough together. You only need to use just enough to hydrate the dough, too much water will make the pie dough too soft. You could also use some sort of alcohol instead of water. Alcohol inhibits gluten formation, so it would make the pie crust even flakier.
- Cream cheese – I use full fat brick cream cheese in my pumpkin pie to give it that creamy cheesecake quality that you will absolutely love. I don’t recommend light cream cheese or whipped cream cheese. I have never tried other type of creamy cheeses like mascarpone or ricotta in this recipe so I can’t recommend personally, but I think these won’t give that tanginess that cream cheese usually does.
- Sweetened condensed milk – Sweetness is added to this pumpkin pie with condensed milk as well as to make it even creamier. Make sure it is sweetened condensed milk and not evaporated milk.
- Pumpkin puree – Canned pumpkin puree is totally fine for this recipe, but you can also use homemade pumpkin puree. Make sure it is pure pumpkin puree and not pumpkin pie filling since that already contains spices and sugar.
- Eggs – You’ll need 3 whole eggs for the filling and 1 egg for the egg wash.
- Vanilla – A little bit of pure vanilla extract is used to add warmth and complexity to this pumpkin cream cheese pie. Don’t skip the vanilla even though it is just a small amount, it really rounds out the flavor.
- Pumpkin pie spice – Store bought or homemade pumpkin pie spice will both work for this recipe. It adds that quintessential pumpkin pie flavor. The pie will be bland if you forget to add your spices.
- Milk – This is used for the egg wash, beaten together with 1 whole egg. You will only need to use egg wash if you’re adding decoration to the pie crust. Skip the egg wash if not making decorations.
How to make cream cheese pumpkin pie with condensed milk
The following instructions, step-by-step photos, and tips are here to help you visualize how to make the recipe. You can always skip straight to the printable recipe card at the end of this post.
Make the pie crust
If you want to save a little time, frozen pie crust is totally acceptable, and is actually what the original recipe calls for. However, a homemade pie crust is highly recommended to take my pumpkin pie to the next level.
See my post on How to make Pie Crust for step by step instructions of exactly how to make pie crust, not just 1 but 3 different ways. Once you bring the dough together and shape into a disk, refrigerate for an hour before rolling out.
Tip: If making decorations, make two batches of pie dough. I find that the consistency of the dough is better when made in smaller batches rather than a double batch, it is also easier to handle, and you don’t have to guess at dividing the dough in half.
Once the dough is ready, roll it out and shape it in your pie pan, lay the edge flat. Refrigerate or freeze before par-baking. Poke the dough with a fork to create steam vents and fill it with pie weights. Bake for 25 minutes at 425°F with the weights and then an additional 5 minutes without the weights. Then let cool completely.

Tip: The dough needs to be par-baked for this recipe due to the custard style cream cheese pumpkin pie filling. Par-baking will ensure your pie crust is not undercooked and soggy in the end.
Make the decoration
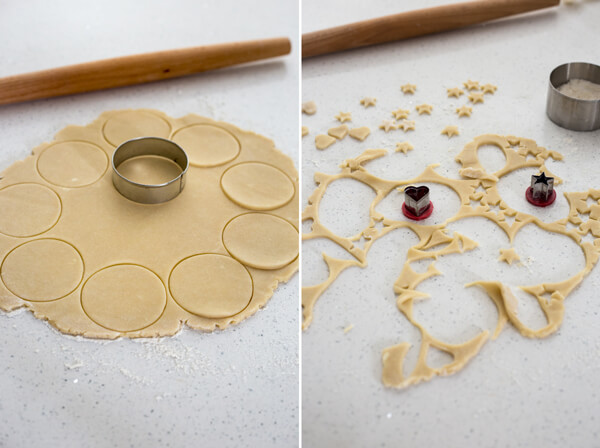
Pie crust decorating is completely optional, but it adds a special touch to your holiday pies. Cut the second disk of dough in half and roll out, then use cute pie stamps to cut out the decorations in the shapes of pumpkins, maple leaves and acorns for Fall theme.

Tip: You only need half a batch of pie dough for the decorations so freeze the leftover pie dough to make pie crust decorations for another recipe like these Apple Hand Pies or this Pear Cranberry Pie.
Make the pumpkin pie cheesecake filling
Beat together softened cream cheese with condensed milk in a large mixing bowl. Beat in one egg at a time until completely smooth.

Tip: You could beat the filling in a stand mixer bowl. Or if mixing by hand, warming the cream cheese in the microwave will make it much easier to beat with the rest of the ingredients even if it is at room temperature already.
Add pumpkin puree, vanilla extra and pumpkin pie spice to the bowl. Whisk into a smooth filling.

Assemble the pumpkin cream cheese pie for baking
If you’re not adding decoration to the pie, simply pour the filling into the par-baked pie crust and pop it back into the oven. If you’re adding decorations, follow the next couple steps.
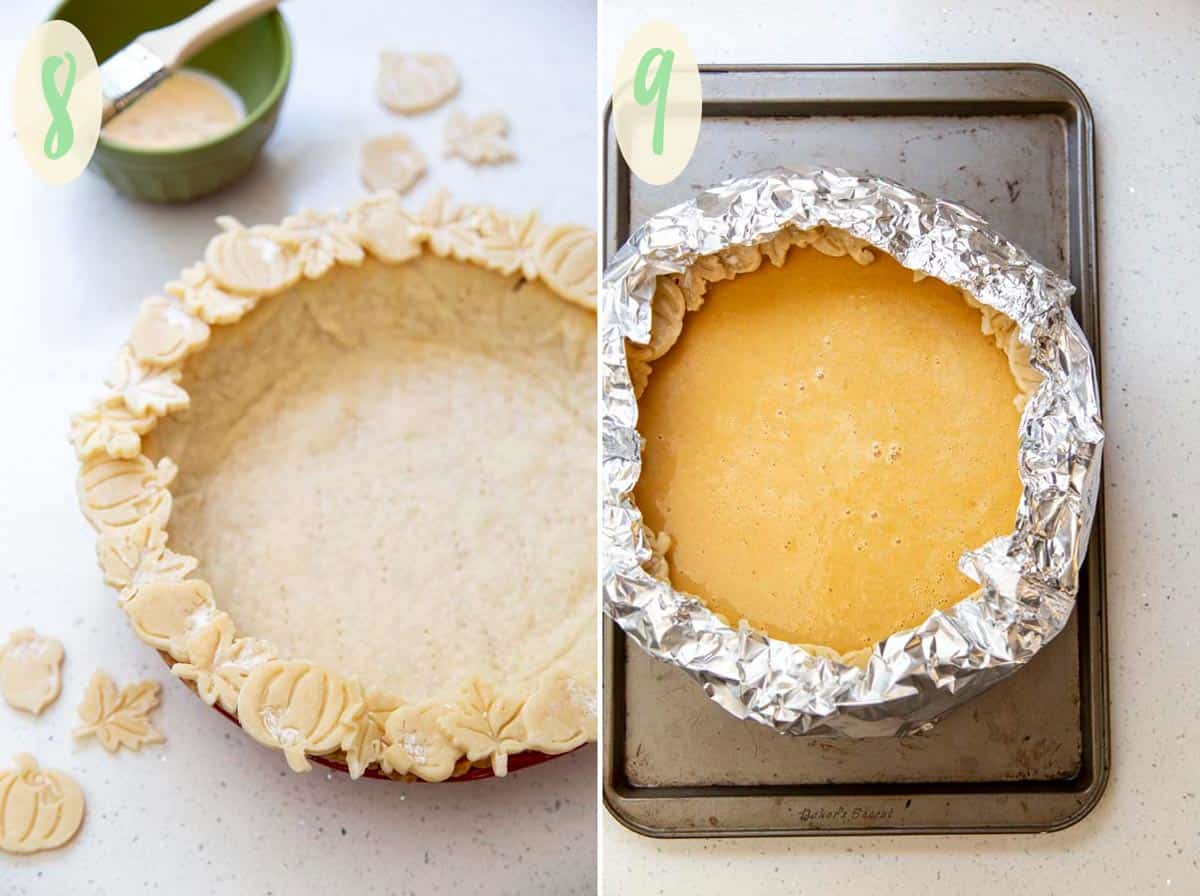
Use egg wash as glue to stick the cutout decorations on the flat edge of the completely cooled par-baked pie crust. Overlap each piece a little bit. When done, freeze the crust with the decorations so they firm up and don’t immediately melt when you put them into the oven.
Tip: Make sure to add decorations to completely cooled pie crust, you don’t want to do this on a hot or warm pie crust because your decorations will get soggy and melt. Freezing the crust with decorations attached will help them keep their shapes during baking.
When you are ready to bake, place the pie pan on a baking sheet, brush egg wash on top of the decorations, make a crust shield with foil to cover the edges along with decorations. Pour in pumpkin pie with condensed milk filling and bake until still slightly jiggly in the middle.

Adding even more decorations
When I first posted this recipe over 5 years ago, I did a 2-layer crust decoration, as in 2 concentric circles of cutouts to form a larger edge, sitting on top of the pie filling. This time around, I simplified the recipe by using just 1 layer sitting on the pie crust edge.

In order to make the 2-layer decorations, you’ll need to modify the recipe with these steps:
- Bake the pie half-way through, about 30 – 40 minutes, for the filling around the edge to set.
- Then add the decorations so they can sit on the thickened pie filling without sinking into it. Use egg wash as glue to stick the decorations on the pie crust and to each other.
- Brush the decorations with a light layer of egg wash.
- Put the pie back into the oven and increase the temperature to 400°F and bake for another 20 – 25 minutes.
- Check doneness per the recipe below.
I wanted to simplify the recipe because working with a hot pie coming straight out of the oven is not fun. I have my fair share of burnt fingers and arms. But the option is available to you if you want to recreate this really awesome crust.
More baker’s tips
- If using store bought crust – You can get frozen pie crust that’s already in the pan. I remember they come in pack of 2. They used to be a bit smaller than the homemade 9″ deep dish pie crust so you’ll be able to make 2 pies using the cream cheese pumpkin pie filling from this recipe. However, if you want to make the decorated version, you should use refrigerated pie crust that you can roll out.
- For a simple crust option – Skip the decoration, and simply flute or crimp the edges for a more simple pie crust.
- When adding decorations to the crust, make sure to let it lay flat on the pie dish edge instead of fluting or crimping. This gives a flat surface for the decorations to adhere to.
- Always use a pie shield – Make sure to use a pie shield to cover the edge whether or not you have decorations. This is to ensure the edges don’t burn.
- Don’t overbake – To avoid cracks in the filling, don’t overbake. You want the middle of the pie to still be jiggly when you remove it from the oven.
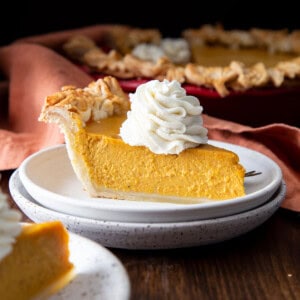
- Let it cool completely – Allow the pie to completely cool and set overnight in the fridge for the best texture.
- How to serve – Always serve it with homemade whipped cream!
- Another crust option – Try this cream cheese pumpkin pie with a pecan crust.

Storage
Leftover pumpkin pie cheesecake should be stored in the refrigerator since the filling is custard based. It will last 3 – 4 days. You can freeze cream cheese pumpkin pie with condensed milk for up to a month. Thaw overnight in the refrigerator.
I personally don’t like freezing pumpkin pie if at all possible, because the crust can get soggy during thawing. Other pies that you can reheat in the oven are better for freezing because you can easily crisp the crust back up in the oven.
FAQs
No, you cannot simply add a lattice top crust on top of pumpkin pie. You could make a lattice crust, cut to the size of your pumpkin pie and bake it separately. Then just place it on top of your pumpkin pie for serving.
This pumpkin cream cheese pie recipe calls for condensed milk. You cannot use evaporated milk here because the condensed milk is also used as a sweetener for this recipe. And evaporated milk is not sweetened.
Like I mentioned under the ingredient section, canned pumpkin pie filling already has sugar and spices. Pure pumpkin puree is just that, pure pumpkin. You must use pure pumpkin puree in this recipe since sweetened condensed milk will sweeten the filling and pumpkin pie spice and vanilla will flavor it separately.
Overbaking is the main cause of cracks in pumpkin pie cheesecake. So don’t overbake. When you pull the pie out of the oven, you want the filling to still jiggle slightly in the middle.

More pumpkin treats
Hungry for more?
Pumpkin Pie
Equipment
- Food Processor or Stand Mixer
- Pie Crust Cookie Cutter
- Pie Weights
- Pie Shield
Ingredients
Crust (x2 if making decoration)
- 1 ½ cup all-purpose flour, 200 g
- 2 rounded tablespoon granulated sugar, 31 g
- ¼ rounded teaspoon kosher salt, 2 g
- 5 ounce unsalted butter, cold & cubed, 142 g
- 2 – 3 tablespoon cold water
Pumpkin Pie Filling
- 8 oz cream cheese, room temperature or microwave 30s to soften
- 1 can condensed milk, 14 oz, 397 g
- 3 large eggs, room temperature
- 1 can pure pumpkin puree, 15 oz, 425 g
- 1 teaspoon pure vanilla extract
- 2 teaspoon pumpkin pie spice
- Egg wash
- 1 large egg
- 1 tablespoon milk
Instructions
Make the pie crust
- Add flour, sugar and salt in a small mixing bowl and mix thoroughly with a whisk. Transfer flour mixture to a food processor fitted with the dough blade. Add cubed cold butter to the flour mixture, pulse several times until butter is about pea and bean size. Variations in size are okay.
- Turn the food processor to “on” position and drizzle cold water over the dough mixture through the water hole, as soon as the dough starts to pull together turn the food processor off. You may need to stop the food processor in between and get a spatula to mix up the flour at the bottom.
- Turn the dough out on the counter or cutting board, and shape into a disk. Wrap in plastic and rest in the refrigerator for at least an hour.
- Optional: If you want to add cutout decoration to the pie, make a second pie crust. You may only need about half of the second pie crust for the decoration, freeze the rest for another recipe.
- Take the disk of pie dough out of the fridge and roll into a circle about 2” larger than your pie dish. Use extra flour to keep the dough from sticking to the counter and roller.
- Carefully place the dough over the pie dish, lightly press the dough into the bottom and side of the pie dish, let the excess dough hang over the side.
- If not making decoration, trim the excess dough leaving just enough to fold under and create a fluted edge. If making decoration, trim the excess dough right up to the edge of the pie dish and let it lay flat.
- Cover the pie dish with plastic wrap and keep refrigerated or freeze for 15 – 30 minutes.
- If making decoration, take out the second disk of pie dough, roll it out to between ⅛”-¼” and cut out shapes with pie stamps. Set them on a tray lined with parchment paper and freeze.
- Once the pie dough has frozen solid, preheat the oven to 425°F.
- Use a fork to poke steam vents on the bottom of the pie dough and on the sides as well.
- Place a large piece of parchment paper over the frozen pie dough, place pie weights on top or pour dry beans on top to fill the whole pie crust. Make sure the parchment is large enough to cover the edges of the crust entirely.
- Bake pie crust for 25 minutes with pie weights or beans, then remove weights and bake another 5 minutes. Then remove pie crust from the oven and let cool completely.
- Beat together 1 egg and 1 tablespoon of milk to make egg wash.
- Add decorations to the pie crust by brushing the flat edge with egg wash and sticking the cutout shapes to it, overlapping each shape as you go, adding egg wash wherever necessary as glue for the crust decorations. Once finished, refrigerate or freeze the pie crust while making the pie filling.
Make pumpkin pie filling
- Place softened cream cheese and condensed milk in a large mixing bowl and beat together until smooth.
- Add eggs, one at a time, and beat until completely incorporated and smooth.
- Add pure canned pumpkin puree, vanilla extract and pumpkin pie spice, whisk until smooth.
Assembling pumpkin pie
- Preheat the oven to 350°F.
- Take the prepared pie crust out of the fridge or freezer and place it on a baking sheet. Brush egg wash on crust decorations. Use long strips of foil to make a pie shield covering the edge and decorations.
- Pour pie filling into the crust and bake for 70 – 80 minutes until the middle is still slightly jiggly.
- Remove the pie from the oven and allow to cool completely on a wire rack. Refrigerate overnight before serving.
Notes
- Making the decoration is optional, you can simply flute or crimp the edge for a more simple pie crust.
- You will most likely need half a batch of pie dough for the decoration, cut out a piece and freeze the rest for another recipe, or make hand pies.
- You can make a 1 layer crust decoration or 2 layers, which is a bit more complicated but still doable, see post for more detail.
- If you forget to let the cream cheese come to room temperature, you can microwave it for 30 – 45 seconds to soften it. Even when the cream cheese is at room temperature, a quick zap in the microwave will make it a lot easier to beat.
- Par-baking the pie crust is necessary for this recipe to ensure the crust isn’t undercooked or soggy.
- Make sure to add decorations to completely cooled pie crust so the decorations don’t melt and get soggy.
- Always use pie shield to cover the edges of the crust whether you have decorations or not to prevent it from burning.
- Don’t overbake to avoid cracks in the filling.
- Allow the pie to cool completely and set in the fridge overnight.
Nutrition
Nutrition information is automatically calculated, so should only be used as an approximation.
 Like this recipe? Rate & comment below!
This post may contain affiliate links. For more details on how we utilize affiliates, ads, and sponsored content, see our full disclosure policy. Thank you for your continued support, which enables us to keep bringing you delicious recipes, at no extra cost to you.


Love Pumpkin Pie and Cream Cheese and all things made with sweetened condensed milk!! Cannot wait to make this pie and family see my crust!! Thanks again for another great dessert!
Thank you Sherry! Hope you and the family love it 🙂
This pumpkin pie is perfectly creamy and luscious and I love the decoration around the edge
I have been seeing a lot of pie decorating using lattice, braids and the leaves. I have noticed that only berry/apple pies have the lattice and leaves. Yours the leaves are only on the edges. My question is can you add the lattice layered look on the whole pumpkin pie? Or does the main center need to be open for cooking purposes? Hoping my question makes sense!
Hi Kala, interesting questions. I’ve never made a custard pie with lattice top or top crust in general. The top doesn’t necessarily have to be open for cooking, if you have a top crust you just need to have some opening for steam to escape. But there are a few problems I can see with having a top crust or lattice crust on a custard type pie.
1. Many times you would want to par-bake the bottom crust before you add the filling to prevent the bottom crust from getting soggy, so adding lattice crust on top of a par-bake crust won’t allow you to crimp the edge the way you would typically do when you add it on top of fruit pie with an unbaked bottom crust.
2. For this particular pumpkin pie recipe, I’ve baked the pie half way before adding the decorative crust so that the dough has a somewhat sturdy surface to rest on. If you add a lattice crust at this point you would have to weave the strips of dough back and forth on top of a hot pie. I don’t think this would work very well as the pie dough would get hot and sticky and probably quite difficult to work with before you could finish the lattice.
3. You could attempt to add the lattice right when you add the filling to the cooled par-bake bottom crust, but the issue I can see with this is that the filling is still liquidy and won’t hold up the lattice. And that is assuming you can manage to weave the lattice in the first place, once you put a strip of dough on top of the filling the liquid will stick to it and make it difficult to lift and weave.
With all that said, baking is all about experimenting and see what works. If you really truly want a lattice top on your pumpkin pie, all you have to do it try it out, maybe you’ll the first to make it work! And if it doesn’t work, you can make pie crust cookies with the extra dough 😉 The best suggestion I can think of is weaving the lattice on a cutting board first and transfer it on top of the pie once it’s been baked half way, perhaps with a really big cake spatula. Then trim of the excess just so the whole lattice fit within the edge of the bottom crust and rest on top of the custard (and hope it doesn’t sink), brush with some egg wash and finish baking. Be sure to let me know if you try to make this, I’d love to see a photo.
“My question is can you add the lattice layered look on the whole pumpkin pie? O”
NO.
That crust is gorgeous! I love pumpkin pie and cannot wait to make this recipe. Beautiful photos BTW.
Thank you so much for your kind words Jared! I hope you will make the pie 🙂 you might hesitate to eat your masterpiece but it tastes just as good as it looks.
This looks great I want a bite.
what a gorgeous pumpkin pie!
This pie is PICTURE PERFECT! Oh my gosh it looks amazing and I don’t really even like pumpkin pie that much!
WOW! that crust is gorgeous!!
Thanks!! 🙂 🙂
Its truly a work of art.