
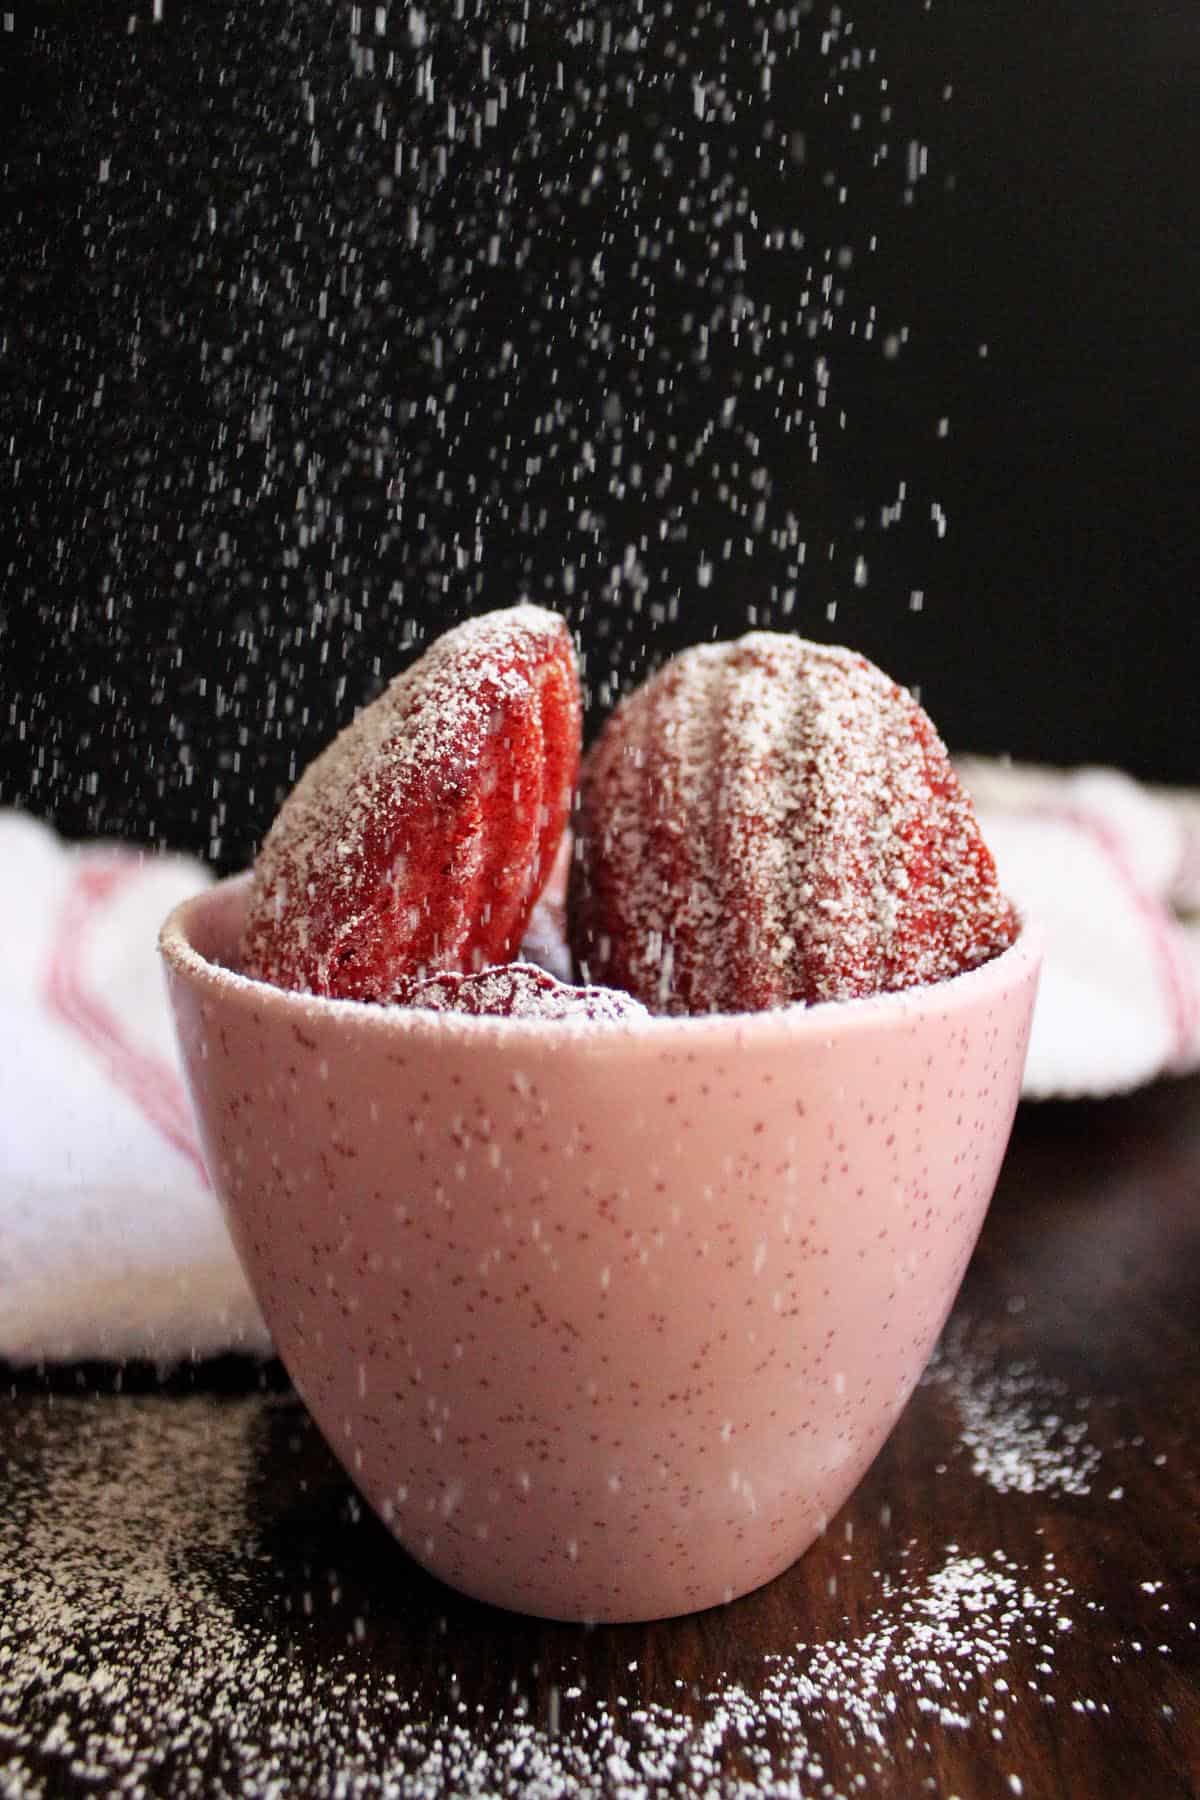
For me, madeleines are perfect little tea cakes with their soft texture, rich buttery flavor, delicate crisp edges, and pretty signature scalloped shell shape. I add just a hint of chocolate flavor to these Red Velvet Madeleines using cocoa powder, then dial up the festivity with a vibrant red color that makes them perfect for holidays, Valentine’s Day, or any special occasion.
This recipe is a mish-mash of my favorite classic madeleines recipe and my red velvet cupcakes. When I can’t choose one thing over another, my solution is always to create a third alternative that will satisfy both my cravings.
Unlike rich chocolate desserts – not that there’s anything wrong with rich chocolate desserts – these madeleines only contain 2 tablespoons of cocoa powder for a very light hint of chocolate. Mostly, they are light and buttery – the perfect bite-sized little cakes that pair wonderfully with coffee or tea. Powdered sugar dusting is always a must for me but a drizzle of white chocolate would be nice too!
Ingredients and substitutions
As always, you’ll find the complete list of ingredients and quantities in the recipe card at the end of this post. Below are some notes and substitution tips for key ingredients:

- Butter – I always use unsalted butter in all my recipes. But you can use salted butter if that’s what you have on hand, just omit the salt called for separately.
- Egg – I use 2 whole eggs and 2 egg yolks in this recipe. The additional yolks add richness and keep the madeleines moist.
- Baking powder – traditional madeleine recipe doesn’t use chemical leavening, all the lift is provided by the air whipped into the eggs. However, I find that a little bit of baking powder helps in this recipe since the liquid food coloring thins out the batter more than usual.
- Red food color – I developed this recipe using liquid food color that is easily found at any grocery store. However, if you use gel food color, you can use less of it to achieve the same vibrant red.
Let’s walk through the steps together
The following instructions, step-by-step photos, and tips are here to help you visualize how to make the recipe. You can always skip straight to the printable recipe card at the end of this post.
1. Beat eggs until ribbon stage
First, beat the eggs, sugar, salt and vanilla extract together until light in color and creamy. The mixture should look thick and falls off the beater in a ribbon.

2. Incorporate dry ingredients
Second, sift together all the dry ingredients and fold it into the wet ingredients in two additions until just combined. At this stage, the batter is very thick. Don’t worry about mixing it until it is smooth or you’ll end up over mixing it.

3. Fold in butter and color the batter
Finally, fold the melted butter and red food color into the batter and refrigerate for at least 1 hour before baking. And if you can refrigerate the batter overnight, that’s even better!

This recipe makes 24 madeleines. You can bake in 2 batches, 1 pan at a time. You can keep the batter refrigerated while the first batch is baking.
Other ways to enjoy these
- You can dip these madeleines in melted white chocolate and they’ll be like a soft red velvet white chocolate chip cookie.
- You can also add a cream cheese glaze to give them that red velvet cake taste.

Hungry for more?
Red Velvet Madeleines

Ingredients
- 6 oz (170 g) unsalted butter, melted and cooled
- 2 large egg
- 2 large egg yolk
- 1 cup (200 g) granulated sugar
- ⅛ teaspoon of salt
- 2 teaspoon pure vanilla extract
- 1 ⅓ cup (180 g) all-purpose flour
- ¼ teaspoon of baking powder
- 2 tablespoon (g) cocoa powder, 13 g
- 1 tablespoon (13 g) liquid red food coloring
- Melted butter and flour for pan
- Powdered sugar for dusting
Instructions
- Melt butter in a small saucepan (or in the microwave) and set aside to cool.6 oz unsalted butter
- Add the eggs, egg yolks, sugar, salt, and vanilla extract to a stand mixer bowl and beat together with the wire whip until light in color and creamy.2 large egg, 2 large egg yolk, 1 cup granulated sugar, ⅛ teaspoon of salt, 2 teaspoon pure vanilla extract
- Sift flour, baking powder and cocoa powder into a small mixing bowl. Fold the flour mixture into the egg mixture with a spatula in two additions until just combined.1 ⅓ cup all-purpose flour, ¼ teaspoon of baking powder, 2 tablespoon cocoa powder
- Mix red food coloring with the cooled melted butter and fold the butter into the batter, working quickly as not to over mix.1 tablespoon liquid red food coloring
- Refrigerate the batter for at least one hour, and overnight is recommended.
- Preheat the oven to 375°F.
- Melt 1 tablespoon of butter and brush it onto the madeleine pan, wipe off any excess pool of butter and sprinkle the pan with extra flour, shake off the excess.Melted butter and flour for pan
- Spoon about 1 ½ tablespoon of batter in each madeleine cup, don’t flatten the batter, it will spread as it bakes.
- Bake for 12-13 minutes, just before the edges are starting to brown.
- Remove from the oven and transfer to a wire rack. Allow the madeleines to cool completely in the pan.
- Once cooled, remove madeleines from the pan and serve with a dusting of powdered sugar.Powdered sugar for dusting
Notes
- Bake these in 2 batches or 1 pan at a time.
- Additional garnishing: you can add more flair by dipping them in melted white chocolate or drizzle them with cream cheese glaze.
- Storage: these madeleines will stay fresh for 3-5 days stored in an airtight container at room temperature.
- Freezing: you can also freeze these red velvet madeleines for up to 3 months. Simply thaw at room temperature for a few hours and dust with powdered sugar before serving.
Nutrition
Nutrition information is automatically calculated, so should only be used as an approximation.
 Like this recipe? Rate & comment below!
FAQs
Madeleine batter is supposed to be thick. When you first finish mixing it, it should be a thick but soft batter, perhaps a tiny bit runnier than usual in this case due to additional liquid from the liquid food coloring. However, after refrigeration, it will thicken more.
You can spray the pan with baking spray but I like to brush it with melted butter to keep the madeleines buttery taste. After greasing, dust the pan with flour to give your madeleines an additional layer of protection.
If your madeleines are underbaked, they may stick to the pan. Make sure to allow them to finish baking and cool in the pan after you take them out of the oven before removing them. To remove them, just flip the pan over and tap the back of the pan until the madeleines fall out onto a wire rack or a kitchen towel.


How long will these keep? Can I make them in advance?
Hi Hannah, once baked, they will keep up to a week but they will start to dry out after a few days. The batter can also be kept in the fridge for 2 days. If you need to make them well in advance, freezing them can keep them longer, then just thaw and dust with powdered sugar to serve.
When do you add cocoa powder? I am assuming with the flour?
Yes, with the flour, sorry about that. I will update the recipe card to reflect the correct step.
Followed the recipe to the letter. The batter felt really thick and heavy. I refrigerated it, and when I removed it it was more like a heavy dough.
Im hoping the final product works
Hi Jill, I hope the recipe worked out for you. Madeleines batter is not supposed to be runny, once you refrigerate, it should be like a soft cookie dough, but hold its shape when you scoop it out onto the pan.
Thanks for the recipe! Making a red velvet trifle for Christmas dessert and needed these cookies to layer with. BTW…my hubby and I quit our jobs in 2000, sold our home and most everything else, packed a small container and moved to Maui!! Unfortunately the Lord suddenly called him home in 2007, but I’m still in Maui, still enjoying every Maui day, and still missing him🙁. We found jobs shortly after we arrived in Maui, found a rental house until the house we built was finished in 2002! You can do it too🤪
Hi Eileen, such a great idea to use these for a red velvet trifle! I’m so sorry about your husband. I admire you guys for doing what you did, it is still our dream to move to Maui one day 🙂 We still talk about it all the time, and I know we’ll do it! Thank you!
These are so gorgeous. It seems you’re the Madeleine queen
Wow. I can only hope that the next time we get to visit we will be able to try them. they look mouthwatering.
The looks of those suckers will certainly lift anyone’s mood! Thanks for sharing!