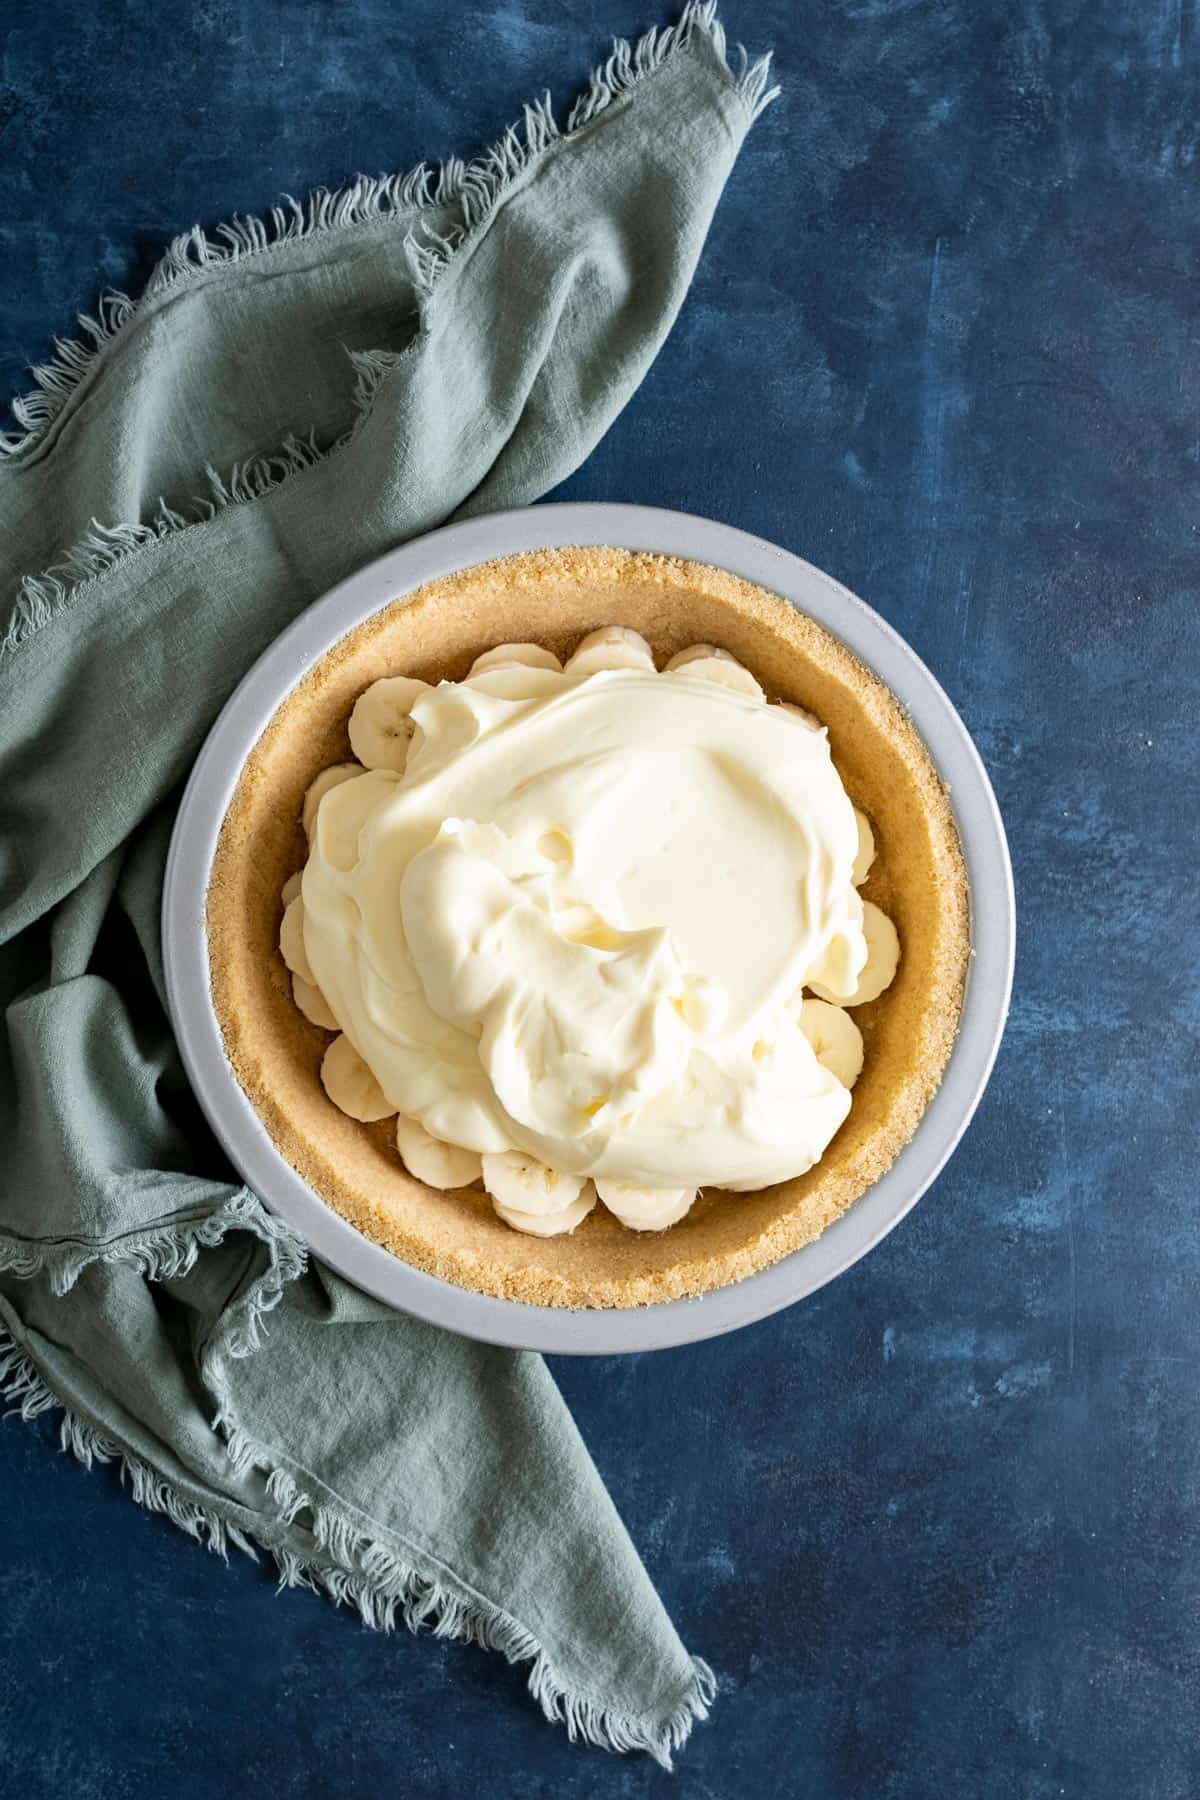
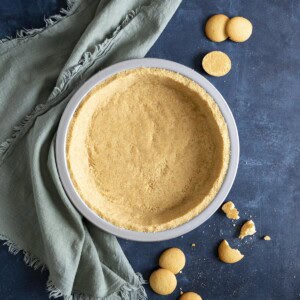
This easy Vanilla Wafer Crust is one of my favorite pie crusts for banana cream pie. It comes together with just 3 ingredients and 5 minutes of prep, creating a buttery, sweet vanilla-flavored crust that complements creamy pie filling perfectly. What I love most is how versatile it is. If it’s too hot to turn on the oven, simply freeze the crust and fill it for an easy no-bake dessert. If you’re using a heavier filling or prefer a little extra crunch, bake it first for a crispier, sturdier crust.

I absolutely love a simple cookie pie crust (see my oreo crust, biscoff pie crust and graham cracker crust, I have them all!) since it requires almost no effort to make. And no matter what level your baking skills are at, you will be able to whip up this one with perfection, no rolling required!
Key ingredients
As always, you’ll find the complete list of ingredients and quantities in the recipe card at the end of this post.
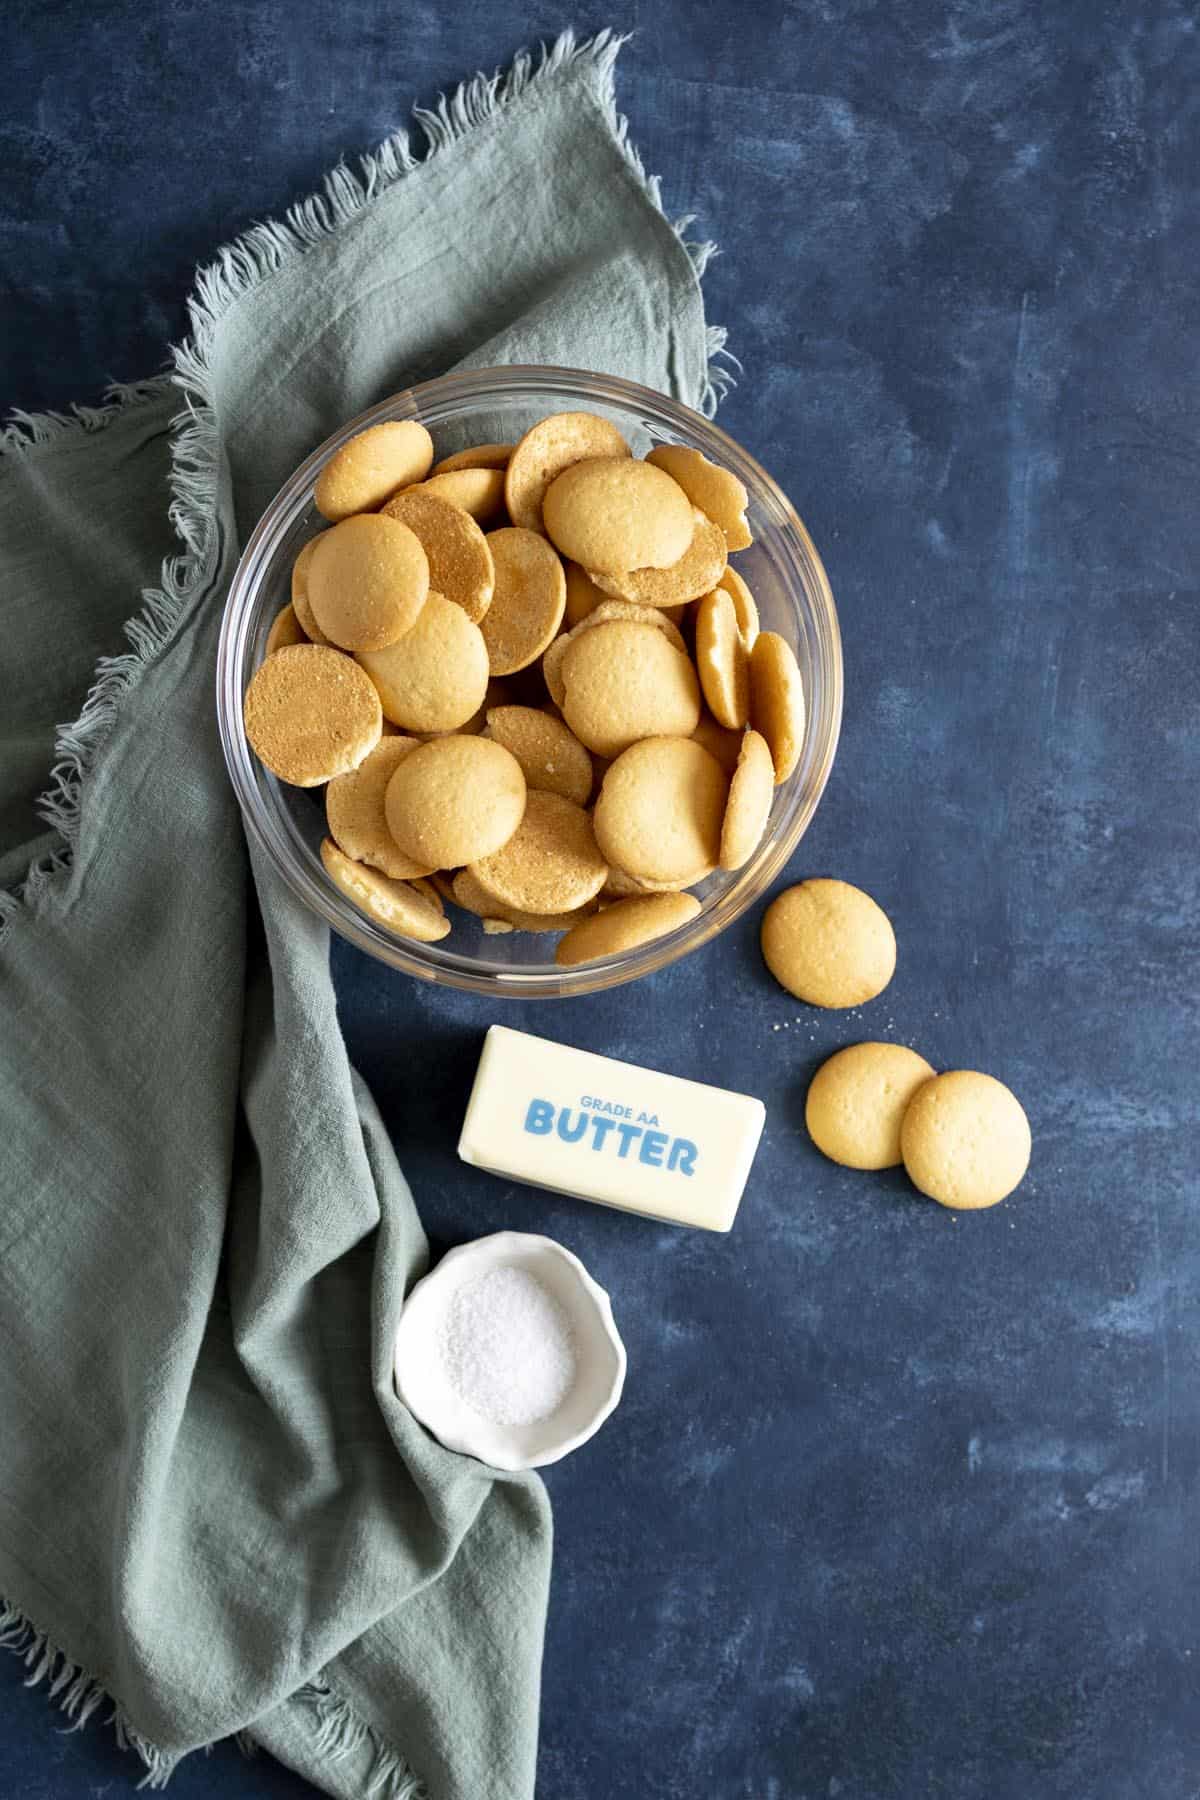
🥧 You simply can’t have a great vanilla wafer crust without vanilla wafer cookies. I think either Nilla wafer or generic vanilla wafer will work just fine. You can certainly go all out and make vanilla wafers from scratch but that’s probably a bit overkilled.
The other key ingredient, you will be surprise to hear that it is salt. I think vanilla wafers are pretty sweet on their own, so a little bit of salt will balance out the flavor and add dimensions, which makes my pie crust a little bit different than others out there.
However, if you perfer your crust a little bit sweeter, add a couple tablespoons of granulated sugar or brown sugar to your taste – this is totally optional.
Some other optional ingredients to spice up your crust…
- Amp up the vanilla flavor with a splash of vanilla extract or add a couple tablespoons of vanilla sugar to the crust.
- Replace a few tablespoons of the vanilla wafer crumbs with finely chopped nuts like walnuts, pecans, or pistachios.
- Add spices like cinnamon, nutmeg, apple pie spice or pumpkin pie spice to add warmth and Fall flavors.
How to make it + tips
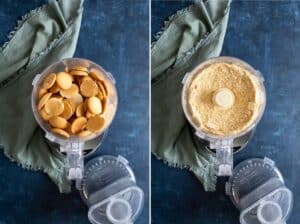
1. Make cookie crumbs
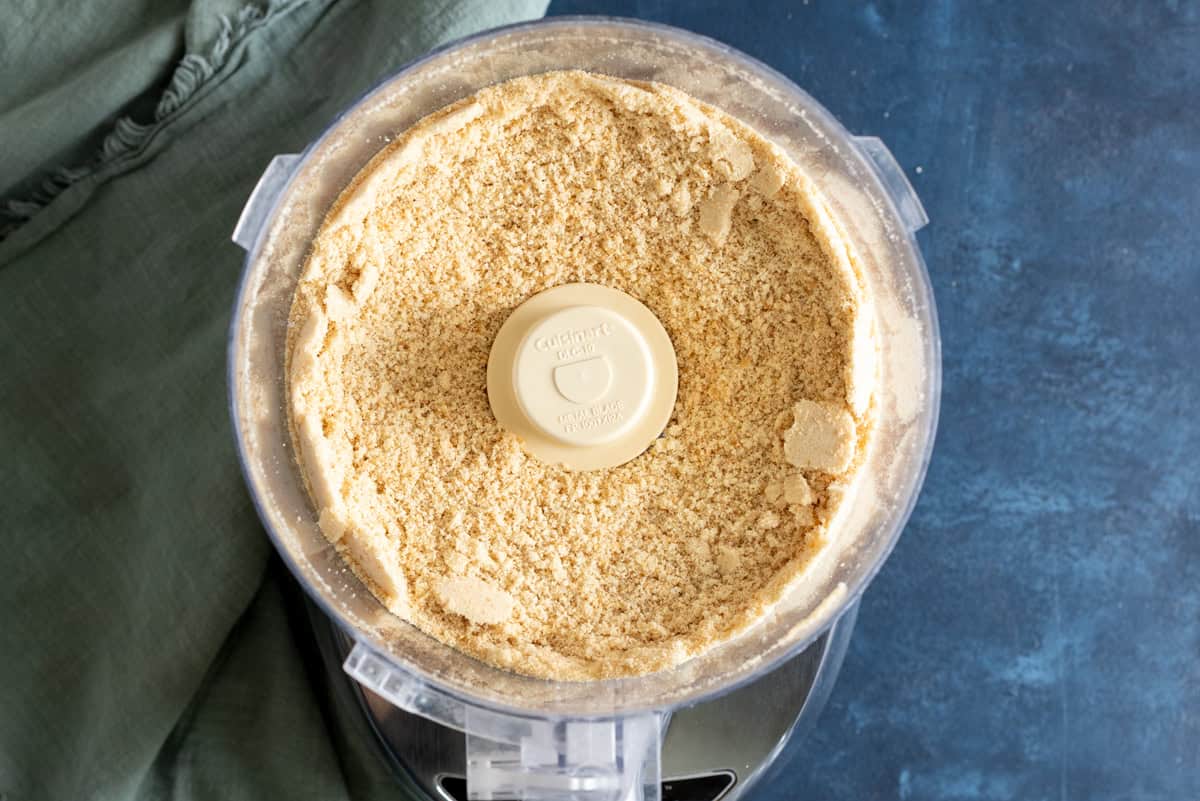
You can use a food processor, a blender or a ziploc bag and a rolling pin to crush the vanilla wafers into fine crumbs. Make sure there are no large pieces since those won’t hold together well in the pie crust.
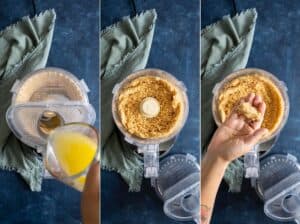
2. Add butter to form the “pie dough”
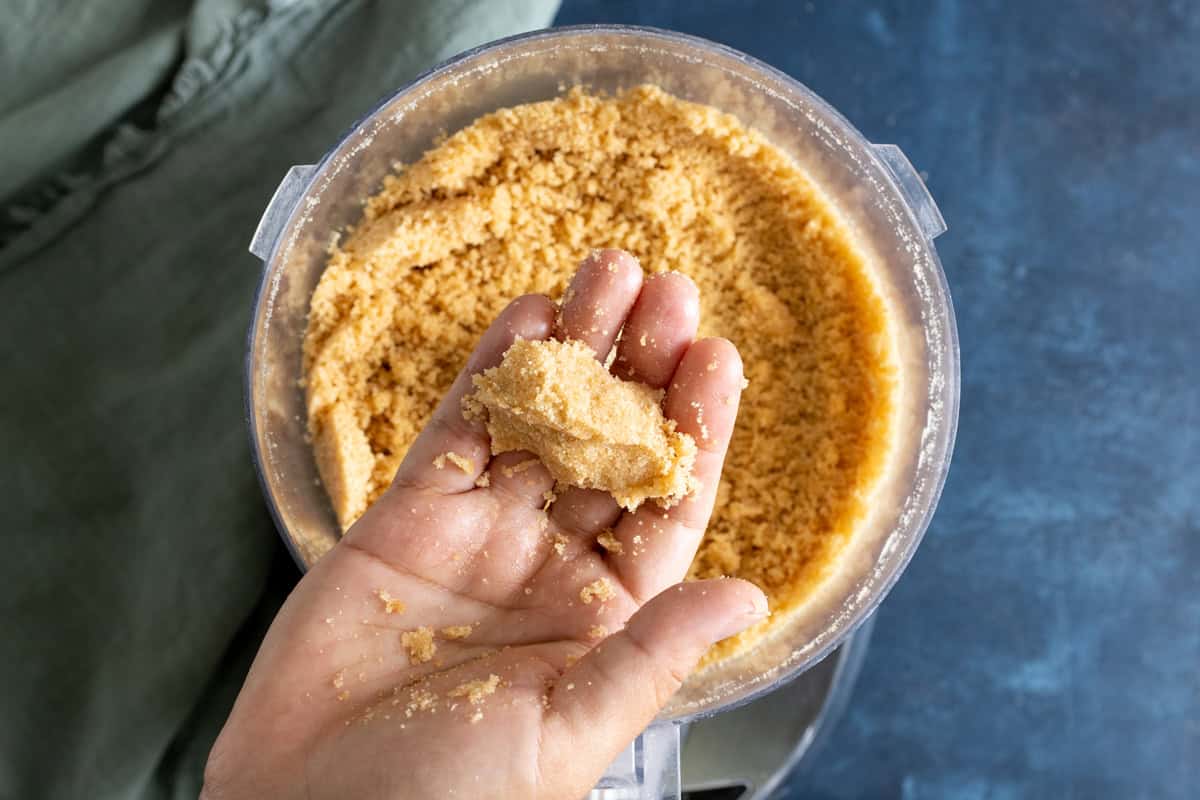
You want to look for a “wet sand” texture when mixing the cookie crumbs with melted butter. I only used melted butter in this recipe but just thought of this after the fact that brown butter would add a really amazing flavor to this pie crust.
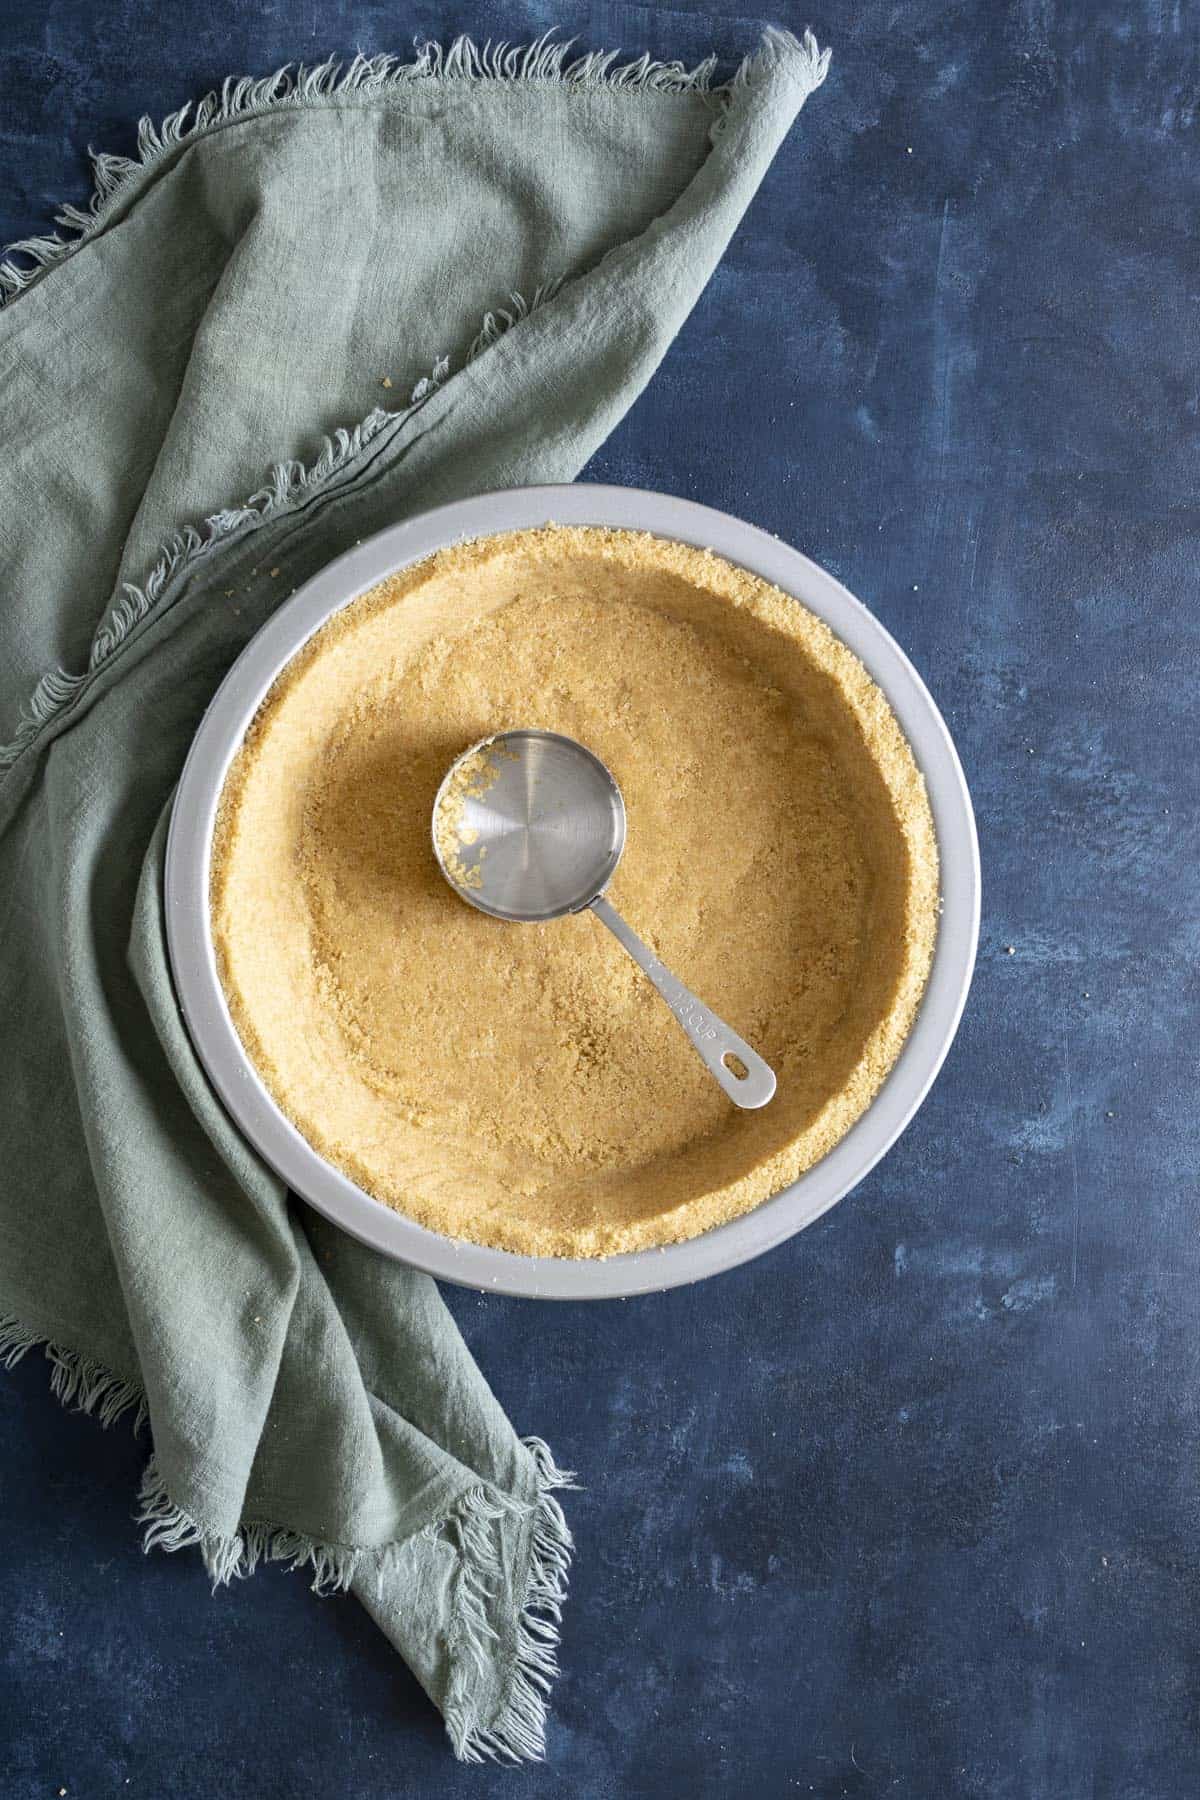
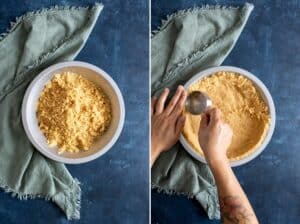
3. Press it into a pan
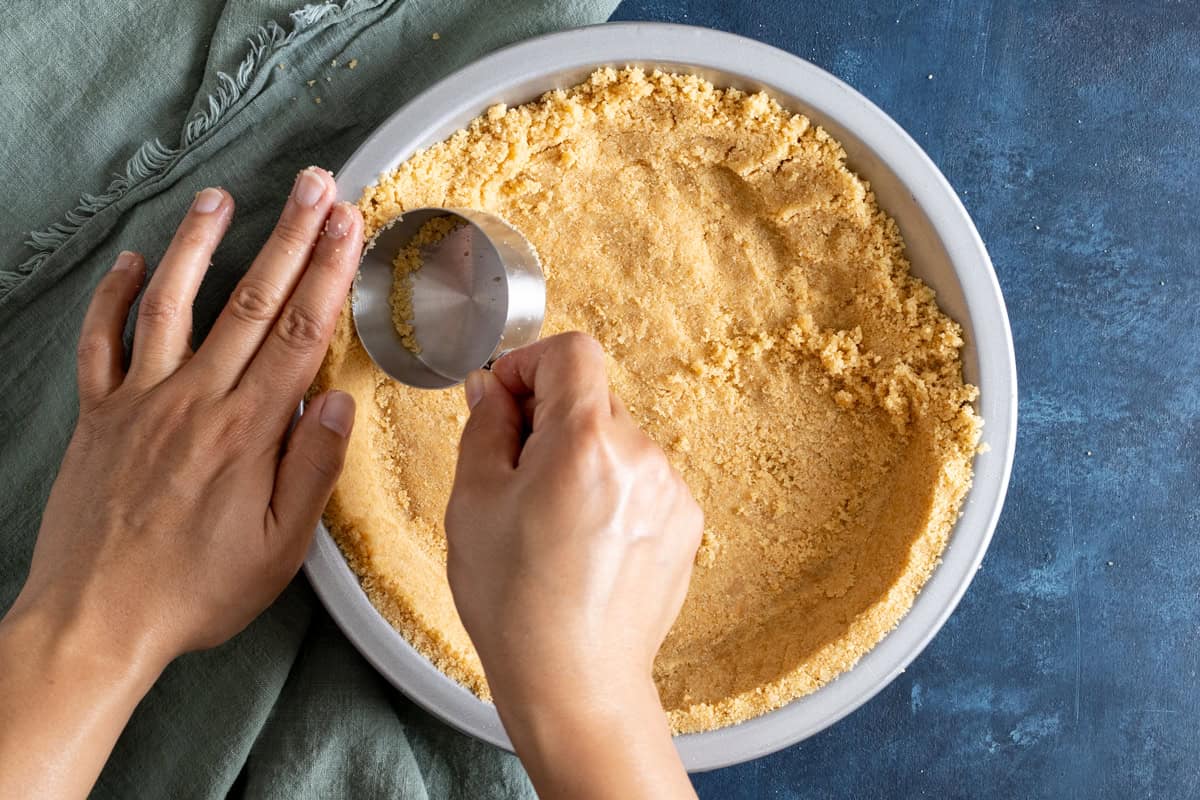
I like using my quarter-cup measuring cup for this task but anything with a flat side and bottom will work perfectly.
When to chill or to bake this crust
There are two ways to use this Nilla wafer crust:
- Chill it for no-bake recipes.
- Bake it for a crunchier and sturdier crust. This can be used with either baked or no-bake fillings.
Chilling
If you’re planning to use this crust for no-bake pies and tarts, and you don’t want to bake it, simply chill it in the refrigerator for an hour or freeze it for 15 minutes before adding your filling.
No-bake vanilla wafer pie crust is held together by the solidified butter, so you’ll want to serve it chilled or frozen to avoid having the crust fall apart. This is best for recipes that should be served cold.
Baking
If you want a crispier crust with a toasty flavor, you can blind bake the crust and allow it to cool before adding your no bake filling.
To blind bake: line the crust with parchment paper and fill it with dry bean (or pie weight) and bake the crust for 10 minutes at 375°F.
For cheesecakes, custard pies and bars, it is best to par bake this crust first to give it a little bit of structure before adding the filling and continue baking according to the recipes.
Hungry for more?
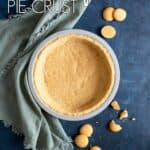
Vanilla Wafer Crust
Equipment
Ingredients
- 4 cups vanilla wafers, 230 g
- ⅛ teaspoon kosher salt
- 3 oz unsalted butter, melted, 85 g
Instructions
Using a food processor
- Ground vanilla wafers along with the salt in a food processor until fine crumbs form.4 cups vanilla wafers, ⅛ teaspoon kosher salt

- Melt the butter in the microwave for about 30 – 45 seconds, stir with a fork to dissolve any remaining solid butter. Drizzle melted butter over the cookie crumbs while the food processor is running, then process for an additional 10 – 20 seconds until the mixture is the texture of wet sand.3 oz unsalted butter
Make it by hand
- Put the wafers into a ziploc bag, break them up with a rolling pin and pound them into fine crumbs.4 cups vanilla wafers
- Transfer crumbs to a medium mixing bowl and stir in the salt. Drizzle melted butter over it and mix it with a fork until the mixture resembles wet sand.⅛ teaspoon kosher salt, 3 oz unsalted butter
Form the pie crust
- Turn the mixture out into a tart pan or pie dish and press into the bottom and sides of the pan to form a crust.
- For a no-bake recipe, wrap well and freeze (or refrigerate) until ready to use.
- For a baked recipe or simply for a crunchier crust, blind bake or par-bake the crust at 375°F for 10 minutes.
Notes
- Fine crumbs are a must: Whether you’re processing the vanilla wafers with a food processor or blender, or by hand, make sure to process them into fine crumbs, larger pieces will not hold together as well.
- Press firmly to form the crust: It helps to use something with a flat bottom like a measuring cup to press the crust into an even layer.
- Yield: This recipe will be enough to fill a 9” pie plate, an 8” or 9” springform pan for cheesecake, an 8” square baking pan or an 8” tart pan to make a thicker crust.
- No need to grease the pie pan.
- Storage: Unbaked crust will last in the refrigerator for up to 3 days and in the freezer for 3 to 6 months. Baked crust can be stored at room temperature for up to 3 days, in the refrigerator for up to a week, and in the freezer for 3 to 6 months.
Nutrition
Nutrition information is automatically calculated, so should only be used as an approximation.
 Like this recipe? Rate & comment below!
FAQs
If you are filling the no-bake crust with a moist cream filling, it could absorb moisture from the filling and become soggy and crumbly. Baking the crust before filling it will keep the crust crunchier and crispier. You can take it even one step further by brushing the crust with some beaten egg white creating a barrier to keep the crust from getting soggy.
Absolutely! You can prepare this vanilla wafer crust a couple of days or months ahead. Store baked or unbaked crust in the refrigerator or freezer until you are ready to fill it or bake it.